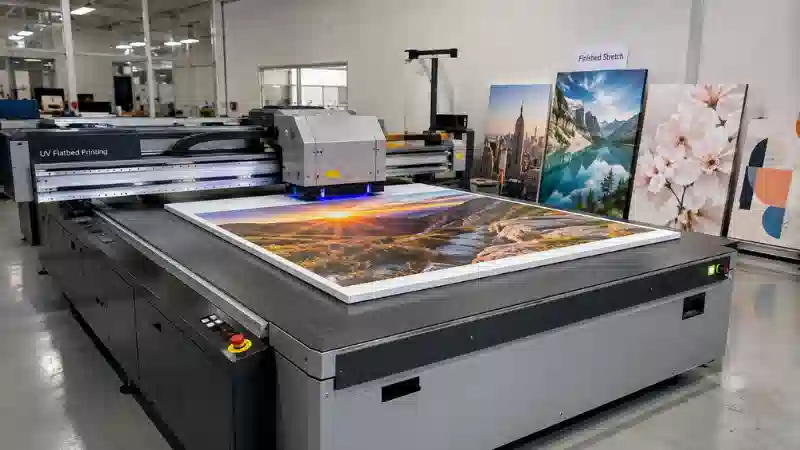
Direct-to-object printing places a digital image directly onto a finished product or component instead of first producing a separate label, transfer, plate, or carrier.
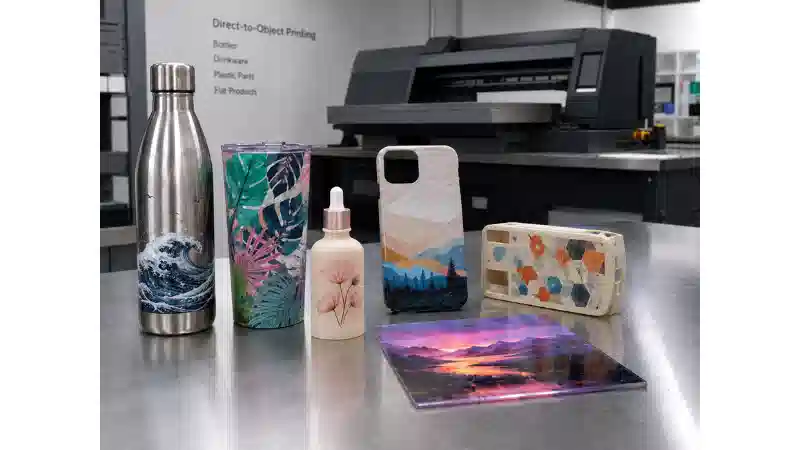
With UV inkjet technology, businesses can decorate flat panels, electronic housings, promotional products, bottles, tumblers, packaging components, tools, and many other manufactured items. Flat or box-shaped products are commonly handled on a UV flatbed printer, while bottles, cups, and other round products are better matched to a cylindrical UV printer when repeatable rotation and full-wrap printing are required.
The key production rule: a machine being able to place ink on an object does not mean that the object is ready for production. A qualified direct-to-object process must also control the real printable surface, fixture, ink stack, pretreatment, curing, artwork, color, handling, and end-use durability.

What Is Direct-to-Object Printing?
Direct-to-object printing, often shortened to DTO, is a digital decoration process in which ink is jetted directly onto the product surface. In a UV workflow, artwork is processed by a RIP, piezoelectric printheads deposit UV-curable ink, and a UV curing system hardens the printed film during production.
A DTO project can involve CMYK, white ink, clear varnish, variable data, product-specific fixtures, and-on cylindrical objects-a controlled seam or no-print area. The technology is especially useful for mixed runs, personalization, multiple SKUs, frequent artwork changes, prototypes, and full-color decoration without creating a new printing plate for each design.
DTO is not automatically the best choice for every job. Very long runs of one simple design may favor another decoration method when setup, automation, ink cost, cycle time, and durability requirements are considered together.
Start with Product Geometry and the Actual Printable Surface
The first decision is not "Which printer has the highest resolution?" It is "What object is being printed, and what surface will actually receive the ink?"
Dacen's overview of materials that UV flatbed printers can print is a useful starting point, but a material name alone is not enough for production qualification.
| Product Example | Base Material | Actual Printable Surface May Be | Main Qualification Question |
|---|---|---|---|
| Metal bottle | Aluminum or stainless steel | Powder coat, paint, clear coat, or bare metal | Will the ink remain attached to the actual coating? |
| Plastic housing | Polymer | Molded surface with additives, texture, or release residue | Is cleaning enough, or is an approved treatment required? |
| Glass bottle | Glass | Bare glass, factory coating, decoration, or contamination layer | Which interface is the weak point after curing? |
| Wood product | Wood | Raw wood, lacquer, stain, sealer, or paint | Is the print bonding to a stable surface layer? |
| Flexible promotional product | Plastic, coated textile, or elastomer | Coating or flexible surface treatment | Can the cured film tolerate bending or squeezing? |
This principle is especially important on glass. Dacen's guide to UV printing and adhesion on glass explains why surface preparation, coating condition, curing, and end-use testing have to be evaluated as one system. Plastic products have their own variables; the UV printing on plastic guide covers related material and application considerations.
Choose Flatbed or Cylindrical Equipment by Geometry
| Product Geometry | Typical Starting Equipment | What to Confirm |
|---|---|---|
| Flat sheet or panel | UV flatbed printer | Size, thickness, flatness, printable area |
| Finished flat or box-shaped object | Flatbed with fixture or registration system | Product height, repeatability, no-print zones |
| Multiple small promotional items | Flatbed with multi-position jig | Fixture pitch, cavity consistency, variable data, loading time |
| Straight bottle, tumbler, or can | Cylindrical UV printer | Diameter, length, rotation, seam, coating |
| Tapered cup or container | Cylinder system with taper support | Upper/lower diameter, software compensation, fixture support |
| Spherical or irregular product | Application-specific equipment and fixture | Printable zone, height variation, safe printhead clearance |
A product may physically fit on more than one machine type, but physical fit is not the same as an efficient production process. A small round promotional product might accept a limited print on a flatbed, while repeated 360-degree bottle decoration is normally a better match for a dedicated rotary workflow. Dacen's bottle printer machine guide provides a more detailed purchasing framework for round containers.

How the Direct-to-Object UV Workflow Works
- Prepare the artwork. Define CMYK, white, varnish, variable data, no-print zones, fixture origin, and any cylindrical seam.
- Position the product. Load the item against a repeatable datum or into a dedicated fixture while maintaining safe printhead clearance.
- Prepare the surface. Remove contamination and introduce pretreatment only when the qualified process requires it.
- Print the complete ink stack. Use the production white, color, and varnish configuration rather than qualifying only a simplified sample.
- Cure under the production condition. Verify the installed ink, print mode, film build, speed, and UV configuration together.
- Test the finished product. Reproduce the handling, washing, bending, packaging, chemical exposure, or other conditions that matter to the application.
The curing system is part of the process, not a separate afterthought. Dacen's article on UV flatbed printer LED lamp curing provides additional background on the role of UV light in the print process.
Fixtures Are Part of Print Quality
A direct-to-object fixture has to do more than stop the product from moving. It establishes the mechanical reference that makes repeated loading possible.
For production fixtures, review:
- Datum or reference location: operators need a consistent point that defines where the object sits.
- Multi-cavity consistency: every cavity in a batch fixture should place the printable area in the expected location.
- Loading variation: a fixture that allows the product to rock, twist, or sit at different depths can create registration errors.
- Fixture wear: repeated loading can change contact points or introduce play over time.
- Product dimensional variation: molded, coated, or blown products may not be identical even when they share one part number.
- Printhead clearance: clamps, guides, raised edges, and the product itself must remain outside the unsafe print path.
For cylindrical products, the fixture also controls rotation. Slippage can create gaps, overlaps, seam shifts, or white-to-color registration errors. For unusual geometries, Dacen's guide to UV printing on golf balls illustrates why object shape and positioning can become a central part of the application.

Use Pretreatment as a Controlled Decision
Pretreatment should solve a defined surface problem rather than being added automatically.
- Identify the real printable surface.
- Use the approved cleaning method to remove known contamination.
- Print an untreated control sample.
- Condition and test the sample according to its intended use.
- Identify where any failure occurred.
- Introduce only a compatible, approved pretreatment when the untreated system does not meet the requirement, then retest the complete stack.
If a factory coating separates from the underlying product, stronger ink adhesion to that weak coating does not solve the root cause. Likewise, if CMYK separates from white while the white layer remains attached, the failure is different from complete film separation from the object.

Choose the Complete UV Ink Stack
Rigid vs Flexible Ink
The best ink depends on what the finished product will experience. A rigid panel may prioritize surface resistance, while a squeezable bottle, flexible case, or formed component may place more strain on the cured film. Dacen's comparison of soft and hard UV ink explains why the required film behavior matters more than simply labeling the base material "hard" or "soft."
White Ink
White ink can create white graphics, support color on dark products, or form an opaque base beneath CMYK on transparent materials. It also increases total film build, so the production stack should be tested with the real white layer rather than only with CMYK. Normal circulation and nozzle condition remain important; see Dacen's guidance on testing UV printer white ink.
Varnish
Clear varnish can add gloss contrast, tactile texture, or raised decoration. It can also become an additional failure interface and may change flexibility or edge wear. The spot UV varnish guide covers the related design and production logic.
Prepare Artwork and Color for the Real Object
DTO artwork should be prepared from the physical product backward. Record the printable dimensions, fixture origin, orientation, no-print zones, raised or recessed features, bleed, white layer, varnish layer, variable-data area, and cylindrical seam where relevant.
Fine artwork should be reviewed on the actual object. Curvature, texture, transparency, product color, gloss, and the white underbase can all change what the viewer sees.
Repeatable brand color requires more than entering the same CMYK values on every job. The International Color Consortium explains that device profiles connect device-specific color behavior to a defined profile connection space. A color workflow should therefore reflect the relevant printer, ink, substrate or surface, print mode, white configuration, and measurement condition. Dacen's article on color management in printing provides additional site-specific context, while the ICC profile connection space guidance explains the underlying profile framework.
Advertised Print Speed Is Not Production Throughput
The printer's imaging time is only one component of daily output. The more useful production measure is the number of acceptable finished products produced during the total working time.
Usable throughput = accepted finished products ÷ total production time.
Total time can include:
- Product loading and unloading
- Fixture change or adjustment
- Cleaning and pretreatment
- RIP processing
- White and varnish layers
- Quality checks
- Maintenance
- Reprints and rejected pieces
When comparing machines, a production sample using the actual object and fixture provides more decision value than a headline imaging speed alone.
Use a Six-Step Production Qualification Workflow
- Define the product and surface. Record supplier, part number, geometry, dimensions, base material, actual printable coating, and final use.
- Define the requirement. Separate appearance, adhesion, abrasion, washing, bending, chemical, packaging, or environmental needs.
- Select the machine and fixture. Match product geometry, height, rotation, taper, batch size, and loading method.
- Establish controlled process candidates. Compare untreated versus approved pretreatment, ink flexibility where relevant, CMYK versus white + CMYK, and varnish only when needed.
- Print and test controlled samples. Keep the product batch, machine, fixture, artwork, print mode, and cure documented while changing one major variable at a time.
- Release the process. Approve only the exact system that meets the agreed end-use criteria and requalify when a meaningful product, coating, ink, fixture, or process change occurs.
Qualification Test Matrix
The following matrix is a planning framework, not reported Dacen test data.
| Test Area | Why It Matters | When It Is Relevant | What to Record |
|---|---|---|---|
| Visual quality | Confirms color, opacity, gloss, registration, and surface appearance | Every application | Color shift, banding, white halo, gloss, edge quality |
| Adhesion | Checks whether the coating stack remains attached to the intended interface | Every new surface or coating | Where lifting occurs and which layer remains |
| Rub or abrasion | Reproduces handling, packaging, or repeated contact | Frequently handled products | Marring, film loss, gloss change, exposed substrate |
| Wash or water | Checks exposure to the intended cleaning or moisture condition | Drinkware, bottles, selected consumer products | Softening, discoloration, lifting, cracking |
| Bend or squeeze | Tests cured-film movement | Flexible, squeezable, folded, or formed products | Whitening, cracking, delamination |
| Chemical exposure | Checks contact with cleaners, oils, fuels, cosmetics, or process chemicals | Only where the real use includes such exposure | Swelling, color change, softening, film damage |
| Packaging | Finds damage caused after printing rather than during printing | Shipped or stacked products | Rubbing, transfer, pressure marks, edge wear |
| Weathering | Evaluates environmental exposure | Outdoor applications only | Use an application-appropriate test plan and document the exposure method |
For some coating systems, ASTM D3359-23 provides tape-test methods for evaluating whether coating adhesion to a substrate is adequate for the intended application. It should only be cited when the procedure is actually followed, and it does not replace application-specific wash, abrasion, chemical, or weathering evaluation.
Identify the Failure Interface Before Changing the Process
| Observed Failure | Likely Interface | First Investigation |
|---|---|---|
| The complete film lifts and exposes the product surface | Ink/primer to printable surface | Contamination, surface chemistry, pretreatment, cure, coating condition |
| A factory coating leaves the product with the print | Factory coating to base material | Product coating quality rather than only ink adhesion |
| White remains but CMYK lifts | White-to-CMYK interface | Layer sequence, interlayer cure, compatibility, film build |
| Color remains but clear layer chips or peels | CMYK-to-varnish interface | Varnish compatibility, cure, thickness, handling |
| The film cracks while much of it remains attached | Cohesive ink-film failure | Ink flexibility, film thickness, bending or mechanical stress |
| Only some fixture positions fail | Process-position variation | Fixture height, loading repeatability, surface preparation consistency |
Illustrative Example: Qualifying a Powder-Coated Bottle
The following example illustrates the decision process and is not reported Dacen production data.
A company wants to decorate a powder-coated bottle with a full-color logo. The first step is to record the bottle diameter, printable length, coating condition, intended wash/handling environment, and whether a 360-degree wrap is required. A dedicated cylinder system is the natural starting point when the job requires repeatable rotation and full-wrap positioning.
The team cleans the actual production coating, prints an untreated control, and compares the required CMYK-only and white + CMYK constructions. The sample is then checked for seam alignment, white registration, adhesion, rubbing, and the intended wash condition. If the coating itself separates from the bottle, the next action is not simply "use stronger ink"; the bottle coating must be investigated. If white remains but CMYK separates, the interlayer process becomes the priority.
The result is then classified as Pass, Conditional Pass, or Fail. This same logic can be adapted to other round products described in Dacen's bottle printing equipment guide.
Direct-to-Object Printing vs Other Decoration Methods
| Method | Strong Use Case | Main Trade-Off |
|---|---|---|
| Direct UV printing | Short and mixed runs, variable data, full color, finished products | Requires surface, fixture, and durability qualification |
| Screen printing | Repeat jobs with established colors and high-volume processes | More setup when artwork changes frequently |
| Pad printing | Small graphics on complex shapes | Smaller image area and more limited full-color flexibility |
| Applied labels | Fast branding on compatible packages | The decoration remains a separate component |
| Transfer processes | Products where direct surface printing is difficult or unsuitable | Adds a carrier/transfer step and its own qualification variables |
The best process depends on geometry, run length, artwork changes, color requirements, durability, automation, and economics rather than on one technology being universally superior.
Operator Training, Maintenance, and Chemical Safety
DTO production depends on routine process control. Operators should understand artwork layers, RIP workflow, fixture loading, product height, nozzle checks, white-ink circulation, approved cleaning, curing, and basic troubleshooting.
Dacen's UV printer printhead maintenance guide explains why the printhead, cap, wiper, ink supply, pressure system, white circulation, and head clearance should be treated as a connected maintenance system.
UV inks, primers, cleaning fluids, and related chemicals should be handled according to their labels and safety data sheets. The OSHA Hazard Communication overview explains the role of hazard classification, labels, safety data sheets, and worker information where hazardous chemicals are used.
FAQ
Q: Is direct-to-object printing the same as UV printing?
A: No. Direct-to-object describes where the image is printed-directly onto a product. UV inkjet is one of the main digital technologies used for DTO applications.
Q: Can direct-to-object printing work on plastic?
A: Yes, many plastic products can be printed, but polymer type, additives, coatings, contamination, ink, pretreatment, and required durability must be evaluated. Dacen's UV printing on plastic guide covers this topic in more detail.
Q: Does every object need primer?
A: No. Pretreatment should be introduced only when the untreated, properly cleaned surface does not meet the required performance and a compatible approved process is available.
Q: Can DTO printers print white and varnish?
A: Many UV systems support CMYK plus white and optional varnish, but channel configuration varies by model. The complete ink stack should be tested because additional layers change total film build and can create additional failure interfaces.
Q: How do I know whether a direct-to-object print is durable enough?
A: Define the real end use first, then test the finished product for the relevant conditions such as adhesion, rubbing, washing, bending, chemicals, packaging, or environmental exposure. "Looks good after printing" is not a durability result.
Q: How should I choose a direct-to-object printer?
A: Begin with the product rather than the headline printer specification. Record geometry, dimensions, printable surface, required print area, quantity, fixture needs, artwork, ink layers, durability, and post-processing before comparing machine configurations.
Conclusion
Direct-to-object printing works best when digital flexibility is combined with disciplined production qualification. The printer is only one part of the system; the actual surface, fixture, ink stack, pretreatment, artwork, color workflow, curing, operator routine, and end-use test all affect whether the job is ready for production.
The strongest equipment evaluation is therefore a sample made with the real product and the intended production process-not a comparison based only on maximum DPI or headline speed.
Businesses can submit the product, dimensions, artwork, expected quantity, surface information, and durability requirements for application evaluation before selecting a direct-to-object printer configuration.