UV printing on plastic has become the default decoration method for short-run, high-mix production - from acrylic signage and PVC cards to PET containers, ABS housings, and branded drinkware.
This guide walks through the full procurement path in one place: how UV curing chemistry actually bonds to a non-porous surface, which plastics print cleanly and which need pretreatment, how to choose between flatbed and cylinder systems, what a realistic cost-per-part looks like, how to qualify a substrate before committing to a production run, and how to evaluate a plastic UV printing machine supplier beyond the quoted price. It is written for sourcing managers, production engineers, and business owners who need to make a defensible equipment decision - not a general introduction to inkjet.
Why Plastic Is Harder to Print Than Paper
Paper absorbs ink. Plastic does not. Every adhesion problem in UV printing on plastic traces back to that single fact: the ink layer has to form a mechanical and chemical bond with a smooth, chemically inert, often low-energy surface, and it has to do so in the fraction of a second before UV light locks it in place.
Conventional solvent or water-based printing solves this partly through solvent bite and long dwell time. UV printing removes dwell time entirely - which is exactly why it is fast, and exactly why surface preparation carries so much weight. A UV system that is perfectly configured will still fail on untreated polypropylene. Understanding that trade-off up front prevents the most common purchasing mistake: buying a machine to fix what is actually a substrate problem.
How UV Curing Works
Microscopic droplets of UV ink are jetted onto the plastic surface, then immediately exposed to UV energy. Photoinitiators inside the ink absorb that energy and release reactive species, which trigger cross-linking between monomers and oligomers. Within seconds, a liquid film becomes a three-dimensional polymer network.
Two consequences matter commercially. First, there is no drying stage - parts can be handled, stacked, or moved to assembly immediately, which is why UV printing compresses lead times so dramatically. Second, polymerization involves shrinkage. That shrinkage creates internal stress at the ink-substrate interface, and on a poorly prepared surface, stress is what eventually lifts the print. Low-shrinkage ink formulations exist specifically to manage this.
LED UV vs. Mercury Curing
| Criterion | LED UV Curing | Mercury Vapor UV |
|---|---|---|
| Typical wavelength | 365 / 385 / 395 / 405 nm (narrow band) | Broad spectrum, roughly 200–450 nm |
| Heat load on substrate | Low - minimal infrared | High - deformation risk on thin parts |
| Startup | Instant on/off | Warm-up required |
| Service life | Long, low replacement frequency | Periodic lamp replacement |
| Deep cure through thick ink | Adequate with correct dose | Stronger penetration |
| Best fit | Thin PET, films, PC, electronics housings | Heavy pigment loads, thick coatings |
For plastic work specifically, LED UV is the practical default. Thin PET containers, PVC sheet, and transparent polycarbonate all distort or yellow under sustained infrared load, and LED curing removes that variable. Mercury retains a niche where very thick or heavily pigmented layers need deep cure.
Curing performance is a function of two independent numbers - peak irradiance (mW/cm²) and total dose (mJ/cm²). Peak irradiance drives surface cure; total dose drives cure through the full ink thickness. A tacky surface usually means insufficient irradiance; a print that looks fine but delaminates after a week usually means insufficient dose.
| Application | Typical UV Dose |
|---|---|
| Thin PET film | 80–150 mJ/cm² |
| Injection-molded PP parts | 150–300 mJ/cm² |
| Thick PC components |
200–500 mJ/cm²
|
Plastic Substrates: What Prints Easily, What Needs Work
Surface energy - measured in dynes/cm - is the single best predictor of whether UV ink will wet and bond. As a working threshold, 38 dynes/cm is the minimum for reliable adhesion on most plastics, and above 44 dynes/cm you are in comfortable territory. Below 34, expect failure without treatment.
| Plastic | Typical Surface Energy | Difficulty | Common Applications | Recommended Preparation |
|---|---|---|---|---|
| Acrylic (PMMA) | 38–42 dynes | Easy | Awards, display panels, retail signage | IPA clean; direct printing |
| PVC (rigid) | 39–45 dynes | Easy–Medium | Membership cards, signs, packaging | Clean; primer optional |
| PVC (flexible) | Varies | Medium | Banners, soft goods | Test for plasticizer migration |
| PET / PETG | 42–50 dynes | Medium | Beverage and cosmetic packaging | Corona or plasma |
| Polycarbonate (PC) | 40–46 dynes | Medium | Covers, industrial parts, housings | Plasma or specialized primer |
| ABS | ~40 dynes | Medium | Electronics enclosures, toys | Clean; flexible ink system |
| Polypropylene (PP) | 29–32 dynes | Difficult | Containers, closures, molded parts | Flame/plasma/corona plus polyolefin primer |
| Polyethylene (PE) | 30–34 dynes | Difficult | Films, bottles, industrial packaging | Flame or plasma; primer usually required |
Contamination Beats Surface Energy
An underappreciated point: a substrate can test at 44 dynes and still fail. Mold release agents, silicone residue, fingerprints, and antistatic additives sit between the ink and the polymer and defeat any amount of surface activation. Cleaning is not a preliminary to treatment - it is a prerequisite for it.
- Isopropyl alcohol wipe for fingerprints and light oils
- Dedicated plastic cleaners for mold release residue
- Ultrasonic cleaning for small precision components
- Avoid aggressive solvents on acrylic and polycarbonate - they stress-crack
Surface must be fully dry before printing. On molded parts, ask the molder whether release agent is internal or sprayed; sprayed release is the most frequent hidden cause of batch-to-batch adhesion variation.
Surface Activation Methods Compared
| Method | Mechanism | Strengths | Limitations | Typical Use |
|---|---|---|---|---|
| Corona | High-voltage discharge oxidizes the surface | Fast, easy to automate, low running cost | Effect decays over hours/days; needs consistent electrode gap | Films, sheets, packaging webs |
| Flame | Controlled combustion oxidation | Effective on PP/PE containers; low capital cost | Heat can deform thin parts; needs tight flame control | Bottles, molded containers |
| Plasma | Ionized gas activation | Precise, consistent, handles complex geometry, low thermal load | Higher investment and process control burden | Medical parts, electronics, high-value goods |
| Adhesion promoter / primer | Chemical bridge layer | Often the only workable route on PP/PE | Adds a process step and cost; must match substrate | Polyolefins, PC, recycled resins |
Treatment decays. Corona-treated polyolefin loses surface energy measurably within days, so treat inline where possible and re-verify with dyne pens if treated stock has been in storage. For PP and PE, the reliable combination is activation plus a polyolefin-specific primer - either alone tends to under-deliver.
Choosing a UV Printer for Plastic: Flatbed, Cylinder, and Configuration
Equipment selection follows from product geometry first, volume second, and price a distant third. A UV printer for plastic that is wrong for your part geometry cannot be corrected by any amount of ink or software tuning.
Flatbed Systems
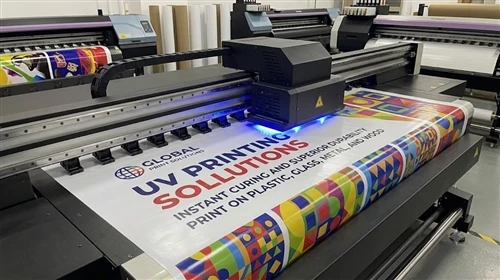
A UV flatbed printer handles flat and moderately irregular parts on a vacuum bed: acrylic panels, PVC signage, phone cases, plastic plaques, membership cards, control-panel overlays. Strengths are large usable area, high positioning accuracy, and the ability to jig multiple small parts for batch throughput. Height clearance matters more than buyers expect - check the maximum object height against your thickest part, not your average one.
Cylinder and Rotary Systems
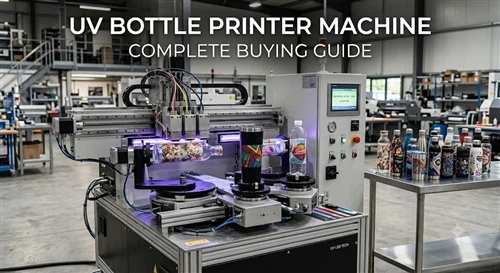
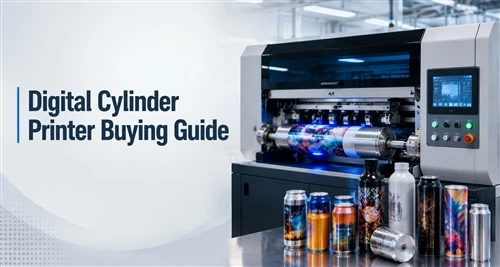
Cylindrical parts require a rotary axis synchronized to carriage motion for full 360° wrap. A cylinder UV printer for bottles covers tumblers, sports bottles, cosmetic containers, and tapered cups. Two specification points decide whether a machine will actually run your SKUs:
- Taper handling. Conical drinkware needs the rotary axis to compensate for varying circumference, or the image stretches along one edge.
- Tooling. Non-standard shapes need custom mandrels. Ask whether the supplier builds tooling from your samples - for mixed drinkware programs this is often the deciding factor.
Desktop vs. Industrial Class
| Desktop / Entry | Industrial | |
|---|---|---|
| Indicative price | $3,000–$15,000 | $20,000–$100,000+ |
| Duty cycle | Intermittent, single-shift | Continuous, multi-shift |
| Printheads | Single, often converted desktop head | Multiple industrial heads with circulation |
| Suited to | Prototyping, personalization, low-volume e-commerce | Contract decoration, OEM supply, high-mix production |
| Main risk | Throughput ceiling, parts availability | Underutilization if volume is overestimated |
Configuration Details That Change Output Quality
Printhead. Ricoh, Toshiba, and Konica Minolta industrial heads dominate the plastic decoration segment. Head choice sets resolution, drop size, and - critically - grey-scale capability and expected maintenance interval. Ask for the head model number, not just the brand.
Ink channels. CMYK alone is insufficient for plastic. White ink is mandatory for transparent and dark substrates, since it creates the opaque base that makes colour reproducible. Varnish enables gloss, matte, and tactile texture effects. A dedicated primer channel automates what would otherwise be a manual spray step on difficult substrates.
RIP software. Consistently the most underweighted item in an equipment comparison. RIP governs colour management, ink limits, white layer generation, and gradient reproduction. For branded work where Pantone matching across batches is contractual, RIP capability matters more than a small difference in printhead count.
Ink circulation and capping. UV ink cures inside a nozzle if it sits. Internal circulation and reliable capping are what separate a machine that runs Monday morning from one that needs an hour of recovery.

Ink Selection: Matching Chemistry to the Part
A UV ink formulated for rigid acrylic will crack on a squeezable PE bottle. Specify ink against the mechanical reality of the finished part, not just the polymer name.
Flexible vs. Rigid Systems
- Flexible substrates (PE/PP film, PVC sheet, squeeze bottles) need high elongation and modified resins so the cured layer moves with the part. Failure mode is cracking during folding, squeezing, or handling.
- Rigid substrates (acrylic, PC, ABS) prioritize hardness, scratch resistance, and chemical resistance. Failure mode is abrasion in transit or at point of sale.
Chemical and Environmental Resistance
Define the exposure the part will actually see: alcohol wipe-down, detergents, oils, sunscreen, dishwasher cycles, outdoor UV. Drinkware sold into the US market is routinely dishwasher-tested; personal-care packaging faces solvent and oil contact. Outdoor signage needs UV-stable pigments and weather-resistant resins, or the print fades regardless of how well it adhered on day one.
Regulatory and Compliance Considerations
- Food contact. Standard UV ink is not automatically suitable. Direct or indirect food-contact packaging requires low-migration UV ink with documentation against applicable FDA requirements and, for EU-bound goods, EU 10/2011. Migration testing is separate from adhesion testing and must be commissioned specifically.
- VOC. UV inks contain little to no evaporating solvent, which is a meaningful advantage in permitted facilities and a common reason converters migrate away from solvent systems.
- California Prop 65. Products sold into California may require evaluation depending on the substances present in the ink system. Request the supplier's position in writing.
- Recycled resins. Recycled PP and PET carry variable surface contamination and inconsistent surface energy. Expect to specify adhesion promoters and to tighten incoming inspection.
Indicative Ink Cost
| Ink Type | Indicative Price per Litre |
|---|---|
| Standard UV ink | $30–80 |
| Plastic adhesion / specialty formulation | $60–150+ |
| Low-migration, food-grade certified | Higher - certification is a cost driver |
Substrate Qualification: A Repeatable Workflow
Most adhesion failures are process failures, not ink failures. This sequence prevents the expensive habit of changing ink first and diagnosing second.
- Confirm the resin. Get the exact grade and additive package from the material supplier - not "it's plastic."
- Measure surface energy. Use dyne pens or test solutions. Target ≥38 dynes/cm. A water-drop test (film = printable, bead = low energy) is a rough field substitute only.
- Check for contamination. Mold release, oils, dust, antistatic agents. Clean and re-measure.
- Select and apply treatment. Match method to substrate; treat inline where decay is a concern.
- Apply primer if required. Mandatory on most PP and PE work.
- Print and cure at specified dose. Verify with a radiometer rather than by eye.
- Test adhesion - then age, then test again. Initial adhesion proves nothing about week four.
Standard Adhesion Tests
Cross-hatch test (ASTM D3359). Cut a grid into the print, apply standardized tape, remove, and grade coating loss. 4B–5B indicates excellent adhesion; below 3B requires process improvement before production release.
Tape peel test. Faster shop-floor check - apply strong pressure-sensitive tape, press firmly, remove quickly, inspect for ink transfer.
Alcohol rub test. Common for packaging and consumer goods: 95% alcohol, 50–100 double rubs depending on the specification.
Aging protocol. Retest at 24–72 hours minimum, and add heat and humidity cycling for products that ship internationally or sit in warehouses. Delayed failure is the failure mode that damages customer relationships, because it appears after shipment.
Troubleshooting: Symptom to Root Cause
| Symptom | Most Likely Cause | Corrective Action |
|---|---|---|
| Ink peels immediately | Low surface energy or contamination | Clean, then add plasma/flame/corona treatment |
| Ink separates after several days | Under-cure - insufficient total dose | Raise lamp power, slow the pass, add curing stages |
| Surface tacky after curing | Insufficient peak irradiance or excessive ink thickness | Check LED output; reduce ink layers |
| Ink scratches easily | Wrong ink chemistry for the substrate | Switch to plastic-compatible formulation |
| Adhesion varies batch to batch | Inconsistent cleaning or decayed treatment | Standardize cleaning; treat inline; re-measure dynes |
| PP prints fail entirely | No primer or no activation | Polyolefin primer plus surface activation |
| Banding or missing nozzles | Partial nozzle blockage | Daily cleaning cycle, proper capping, controlled humidity |
| Colour drift between runs | RIP profile or ink batch variation | Re-profile; require batch consistency data from ink supplier |
Cost Structure and Return on Investment
Quoted machine price is the smallest part of a five-year cost picture. Build the model on total cost of ownership.
Cost Components
- Ink: roughly $0.01–$0.05 per square inch depending on coverage, density, and whether white underprint is required. White-heavy work on dark substrates sits at the top of that range.
- Depreciation: a $20,000 machine over five years is $4,000/year, about $333/month before utilization is considered.
- Consumables and maintenance: printheads, LED modules, dampers, filters, cleaning solution. Printhead replacement is the largest single line item and the one most often omitted from vendor quotes - ask for the replacement price and the expected service life in writing.
- Pretreatment: corona or plasma equipment, primer, and the labour of an added process step.
- Labour: loading, jigging, and QC. On small parts, handling frequently exceeds print time.
- Scrap: budget realistically during ramp-up, higher for difficult substrates.
A Worked Example
A contract decorator adds a $20,000 system for custom plastic panels:
- Average selling price: $25 per unit
- Fully loaded cost (ink, primer, labour, scrap allowance): $8 per unit
- Contribution margin: $17 per unit
- Fixed monthly cost (depreciation, maintenance reserve, facility share): $900
- Break-even volume: approximately 53 units per month
- At 200 units per month: roughly $2,500 net monthly contribution, capital recovered in about eight months
The variable that moves this model most is not price per unit - it is utilization. A machine running one shift at 30% capacity and one running two shifts at 80% have identical depreciation and wildly different economics. Model your realistic order book before sizing the equipment.
Where UV Printing Wins Against Alternatives
| Criterion | UV Digital | Screen Printing | Pad Printing |
|---|---|---|---|
| Setup cost per design | Near zero | High - screens per colour | Medium - plate per design |
| Economic batch size | 1 to mid-volume | High volume only | Medium volume |
| Design changeover | Instant | Slow | Slow |
| Resolution | Very high, full photographic | Medium | Medium |
| Variable data / serialization | Yes | No | No |
| Deeply recessed or compound curves | Limited | Limited | Excellent |
| Cost at 50,000 identical units | Higher per unit | Lowest per unit | Competitive |
The honest summary: UV printing does not beat screen printing on a long run of one identical design. It wins decisively wherever designs change - personalization, short runs, regional SKUs, seasonal packaging, serialized parts, and sampling. Pad printing remains superior on deeply contoured geometry that a flatbed or rotary axis cannot present flat to the printhead.
How to Evaluate a UV Plastic Printing Equipment Supplier
By this stage the technology question is settled and the risk shifts to the vendor. Use a structured evaluation rather than a price comparison.
Manufacturing and Engineering Capability
- Is the vendor an actual manufacturer or a trading company? Ask for factory footprint, headcount, and year established.
- Which printheads do they build around, and do they have depth with that platform specifically?
- Can they build custom tooling and jigs from your submitted samples?
- Do they support conical, tapered, and irregular geometries, or only standard cylinders?
Quality and Certification
- CE and SGS certification for the machine; documentation supplied with shipment
- Documented factory acceptance testing before dispatch
- Ink supplier certification confirming compatibility with the ink delivery system - mismatched ink chemistry degrades seals and tubing
- Written warranty terms, including what is and is not covered on the printhead
Sampling and Validation
- Will they print your actual substrate, not a demo sample?
- Do they return samples with adhesion test results and recommended cure settings?
- Can they specify the required pretreatment and primer for your material?
After-Sales and Serviceability
- Installation and operator training - on-site or remote?
- Spare parts availability and typical lead time to your region
- Technical support response window and language coverage
- Existing installed base in your market, and whether references can be contacted
Commercial Terms
- Incoterms, crating, and realistic delivery lead time
- Payment structure and what triggers final payment
- Consumable pricing locked or floating
A supplier that answers the sampling questions concretely - with a printed part and a test report - is demonstrating process knowledge that a specification sheet cannot convey.
Recommended Sequence Before You Buy
- Define the part. Resin, geometry, dimensions, annual volume, SKU count, required durability standard.
- Request substrate testing. Send real production parts, not offcuts, and specify the exposure conditions the print must survive.
- Review sample results. Cross-hatch grade, alcohol rub cycles, and aged retest - not just a photograph.
- Confirm configuration. Flatbed or rotary, bed size and clearance, ink channels including white and varnish, RIP capability, pretreatment integration.
- Build the TCO model. Machine, ink, consumables, pretreatment, labour, scrap, realistic utilization.
- Qualify the supplier. Certification, warranty, spare parts, training, references.
- Pilot before scaling. Run a controlled first production batch with full QC documentation.
Summary
Success in UV printing on plastic is decided in three places, and equipment is only one of them. The substrate must be correctly identified, cleaned, and activated to at least 38 dynes/cm. The ink system must match the mechanical and regulatory reality of the finished part. And the curing dose must be verified with an instrument rather than assumed from appearance. Get those three right and the technology delivers exactly what it promises: photographic-quality decoration on non-porous surfaces with no setup cost and no drying time.
Get any one of them wrong and the print will look perfect on the day it leaves the machine and fail somewhere between the warehouse and the customer. That is why substrate testing before purchase - not after - is the single highest-return step in the entire procurement process.
FAQ
Which plastics can be UV printed successfully?
Acrylic, rigid PVC, PET, PETG, polycarbonate, and ABS print reliably with proper cleaning and, in some cases, corona or plasma treatment. Polypropylene and polyethylene are the difficult cases because of low surface energy, and generally require surface activation combined with a polyolefin-specific adhesion primer.
How is UV printing different from solvent inkjet on plastic?
UV ink cures by photo-initiated polymerization under UV light; solvent ink dries by evaporation. UV gives instant handling, sharper detail on non-porous surfaces, and far lower VOC emissions. Solvent inks bite into certain plastics chemically, which can help adhesion but at the cost of dwell time and emissions management.
What surface energy do I need for reliable adhesion?
Target at least 38 dynes/cm as a minimum threshold, with above 44 dynes/cm giving the most reliable bonding. Verify with dyne pens or test solutions, and re-verify treated stock that has been stored, since corona treatment in particular decays over time.
How do I get UV ink to adhere to polypropylene?
Clean thoroughly to remove mold release, apply flame, plasma, or corona treatment, then apply a primer formulated for polyolefins before printing. Neither treatment nor primer alone is usually sufficient on PP. Validate with a cross-hatch test after 24–72 hours of aging, not immediately after curing.
What does a UV printer for plastic cost?
Entry-level desktop machines start around $3,000–$15,000 and suit prototyping and low-volume personalization. Production-grade systems for small manufacturers typically run $15,000–$30,000, and larger industrial configurations with multiple printheads extend well beyond $50,000. Budget separately for pretreatment equipment, primer, and printhead replacement.
How long do UV prints last on outdoor plastic signage?
Properly cured UV prints perform well outdoors, but service life depends on pigment UV stability, substrate preparation, cure completeness, and whether a protective clear coat is applied. For multi-year outdoor exposure, specify weather-stable resin systems and UV-resistant pigments rather than standard indoor ink.
Can UV ink be used on food packaging?
Only with low-migration UV ink formulated and documented for the purpose. Standard UV ink is not suitable for food-contact applications. Confirm applicable FDA requirements for the US market and EU 10/2011 for European distribution, and commission migration testing separately from adhesion testing.
Why does adhesion vary between production batches?
Almost always incoming material variation or inconsistent cleaning. Different resin lots carry different additive packages, and sprayed mold release varies between molding runs. Add dyne measurement to incoming inspection and standardize the cleaning procedure before adjusting anything on the printer.
What safety measures apply to UV ink handling?
Uncured UV ink can irritate skin and eyes. Operators should wear gloves during maintenance, avoid skin contact, work in a ventilated area, store ink per the supplier's guidance, and dispose of waste ink according to local environmental regulations. Fully cured ink presents a substantially lower hazard than the liquid form.
Should I choose a flatbed or a cylinder UV printer?
Part geometry decides. Flat and low-profile items - panels, signage, cards, cases - go to a flatbed. Bottles, tumblers, and tapered cups need a rotary axis synchronized to the carriage for full-wrap printing. Operations covering both usually run separate machines rather than compromising on a single one, since jigging and cure geometry differ significantly.