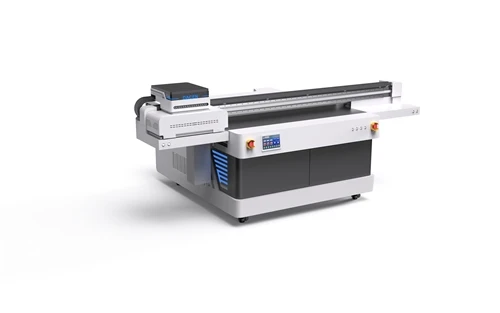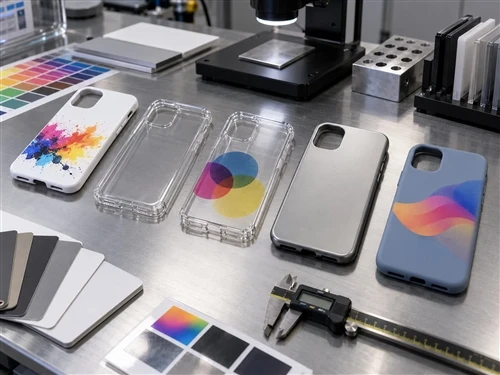
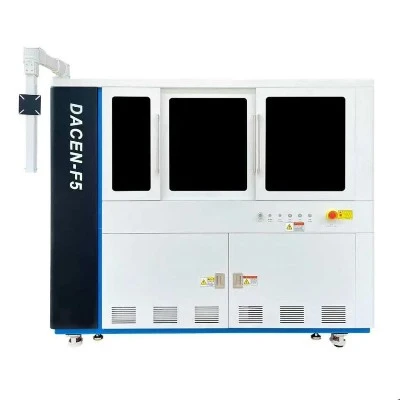


A cylindrical UV printer can create several decorative effects on transparent glass bottles, wine glasses, tumblers, candle holders, perfume bottles, and other round products.
By changing the relationship between white ink, CMYK, clear varnish, and the transparent product, a printer can produce a soft frosted appearance, transparent color, opaque full-color graphics, mixed transparent and opaque artwork, or selective gloss and texture.
These are printed surface effects. They can visually resemble etched, sandblasted, frosted, or stained glass, but they do not alter the glass itself in the way that acid etching, abrasive blasting, laser processing, or mechanical engraving does.
Quick answer: use controlled white ink for a frosted or etched-looking design, print CMYK without a white base where light should pass through, and use selective white where some areas need stronger opacity. The final process must also control glass cleaning, artwork registration, product rotation, curing, and durability testing.

What Are UV-Printed Etched and Stained-Glass Effects?
An etched or frosted effect uses a printed ink layer to imitate the diffuse, pale appearance associated with treated glass. A stained-glass effect uses transparent or semi-transparent color so that light can pass through the printed area.
Transparent color does not have one fixed appearance. The background, the color of any liquid inside the vessel, the glass wall thickness, and the direction of the light can all change what the viewer sees.
This article concentrates on decorative effects for round transparent products. For broader information about preparation, curing, and durability, review the guide to printing on glass and controlling adhesion.
Etched, Frosted, Transparent, and Opaque Effects Compared

| Effect | Typical Ink Approach | Light Behavior | Visual Character | Main Limitation |
|---|---|---|---|---|
| Frosted or etched-looking effect | Controlled white ink, often without a strong gloss layer | Diffuses or partially blocks light | Soft white, hazy, or matte-looking decoration | It remains a printed surface rather than physically etched glass |
| Transparent color | CMYK without a white underbase | Light passes through the color | Translucent graphics influenced by the background | Color is less predictable under different lighting and fill conditions |
| Opaque full color | White underbase plus CMYK | White limits the influence of the background | Stronger opacity and more predictable color | The printed area loses transparency |
| Mixed transparent and opaque design | Selective white beneath chosen CMYK areas | Some areas transmit light while others remain opaque | Layered contrast within one design | Requires accurate white-to-color registration |
| Selective varnish | Clear varnish over or beside selected areas | Changes reflection rather than opacity | Gloss contrast, texture, or raised detail | Too much gloss can weaken the intended frosted appearance |
The appearance also depends on the installed ink, RIP settings, glass tint, viewing distance, and product lighting. Dacen's guide to digital printing on glass provides additional context for selecting a process beyond the visual effect alone.
How White Ink, CMYK, and Varnish Control the Design

White Ink for a Frosted Appearance
A heavy, fully opaque white layer may look more like a solid white label than frosted glass. A softer result can be developed through controlled white coverage, halftone patterns, fine texture, gradual opacity changes, or small clear gaps within the artwork.
There is no universal white-ink percentage for this effect. Different inks, print modes, and glass products produce different opacity. Create a controlled sample set rather than copying a setting from an unrelated printer.
White-channel condition also affects uniformity. Operators should include circulation and nozzle checks in the process and follow the site's guidance for testing UV printer white ink.
CMYK Without White for Transparent Color
Printing CMYK directly on transparent glass allows more light to pass through the design. The color may appear lighter or less saturated than the same artwork printed over white.
Review the sample against a white background, a dark background, and transmitted light. When the vessel will contain a colored liquid, inspect it both empty and filled because the contents become part of the visual result.
Selective White for Mixed Transparency
Selective white allows one design to contain an opaque logo, transparent colored illustration, frosted white pattern, clear window, and full-color area with stronger opacity.
The white spot layer must align with the color artwork. If white extends beyond fine text or colored edges, the viewer may see a white halo. If the white area is too small, transparent edges may make the color appear inconsistent.
A controlled choke or spread can compensate for small registration differences, but the correct value depends on the artwork, resolution, rotary accuracy, and viewing distance. It should be approved on the actual product rather than treated as a fixed universal setting.
Varnish for Gloss and Texture
Varnish can create gloss contrast, tactile detail, or raised decoration. It can also increase the total film build and change the way light reflects from a transparent product.
Do not automatically place varnish over an area intended to look matte or frosted. Compare samples with and without varnish and use it only where it supports a defined visual or functional requirement. The spot UV varnish guide explains related design and production considerations.
Prepare the Artwork for Transparent Glass
The production file should separate color, white, and varnish information clearly. A practical file plan may contain:
- A CMYK artwork layer
- A white-ink spot layer
- A varnish spot layer when required
- A defined seam or no-print area
- Registration elements for sampling
- Versions for reflected-light and transmitted-light review
Before printing, decide which parts must remain transparent, which colors need a white base, where the frosted pattern begins and ends, and whether the finished vessel will be viewed empty, filled, front-lit, or backlit.
Do not approve transparent-glass artwork only on a monitor. A screen cannot reproduce the changing background, reflections, glass thickness, and liquid color of the finished object. Dacen's wider guide to digital glass printing options can help place these decorative effects within a broader application plan.
Plan the 360-Degree Seam Before Printing
A full-wrap design has a start and end point. The seam should be placed where it is least visible and least disruptive to the artwork.
Avoid placing the seam through small text, a face, a detailed logo, or a smooth transparent gradient when another location is available. Depending on the design, a narrow no-print gap may look cleaner than an uncontrolled overlap.
A visible seam can be caused by more than artwork width. Check:
- Product diameter and taper measurements
- Start-position repeatability
- Rotary calibration
- Fixture slip
- Artwork scaling
- White-to-color registration
- Planned gap or overlap
Inspect the seam under the same lighting used to evaluate the rest of the transparent design.
Prepare the Glass and Control Adhesion
Glass is smooth, non-porous, and sensitive to contamination. Fingerprints, oil, silicone, dust, moisture, cleaning residue, factory coatings, and incorrect pretreatment can create weak or uneven areas.
Document the cleaning material, wipe method, handling procedure, drying or reaction time, and permitted interval between preparation and printing. After cleaning, avoid touching the printable surface.
Compare a cleaned untreated control with a sample using an approved primer or other verified treatment when required. Primer is not a universal solution and should not be applied simply because the product is glass.
UV ink, primer, and cleaning chemicals should be managed according to their labels and safety data sheets. The OSHA Hazard Communication overview explains the role of labels, safety data sheets, and worker training where hazardous chemicals are used.
What the Cylindrical UV Printer Must Control
| Equipment Factor | Why It Matters | What to Confirm |
|---|---|---|
| Ink channels | Transparent, opaque, frosted, and gloss effects require different layer combinations | Supported CMYK, white, and varnish configuration |
| Rotary positioning | Rotation errors create gaps, overlaps, banding, and seam movement | Registration repeatability and product synchronization |
| Product fixture | Glass must rotate without slipping or being damaged | Diameter, length, weight, neck, base, and contact points |
| Taper compensation | Changing circumference can stretch or compress the design | Supported taper range, measurement method, software, and tooling |
| Curing configuration | The installed ink and full layer stack must cure consistently | Supported lamp, ink, speed, and transparent-product process |
| Changeover | Multiple bottle and glass shapes can reduce production efficiency | Fixture-change time, saved settings, calibration, and cleaning routine |
A digital cylinder printer buying guide can help compare these production factors before equipment selection. Operations focused on wine and spirit bottles should also review the guide to choosing a wine bottle printing machine.
Flatbed Rotary Attachment or Dedicated Cylindrical Printer?
| Selection Question | Flatbed Printer with Rotary Attachment | Dedicated Cylindrical Printer |
|---|---|---|
| Best use | Sampling, occasional round products, or a mixed flat-and-cylindrical workload | Repeated bottle, cup, and glass production |
| Loading | May require more manual setup and fixture adjustment | Designed around repeatable cylindrical loading |
| Full-wrap seam | Depends heavily on the attachment, calibration, and workflow | Normally evaluated as a core production requirement |
| Tapered products | Only where the attachment and software support the geometry | Available only on systems specifically designed for taper compensation |
| Changeover | May be suitable for flexible low-volume work | Can be more efficient for standardized product families |
Neither format is automatically correct for every business. Compare the actual product range, daily output, seam tolerance, taper, fixture requirements, and available operators. The bottle printer machine guide provides additional equipment-selection context.
A Six-Step Sampling Workflow
- Define the intended effect. Identify whether the target is frosted white, transparent color, opaque full color, mixed transparency, selective gloss, or raised texture.
- Record the glass product. Document the supplier, product code, color, diameter, printable length, taper, coating, intended contents, and washing or handling conditions.
- Prepare the surface. Use a documented cleaning and pretreatment method compatible with the glass, ink, and equipment.
- Build the artwork separations. Create the CMYK, white, varnish, seam, and no-print information required by the process.
- Secure and calibrate the product. Confirm the start position, fixture grip, rotation, printable length, taper setting, and seam alignment.
- Print, inspect, and test. Compare controlled layer combinations under realistic lighting, condition the samples as required, and evaluate appearance and durability.
Controlled Sample Matrix
The following matrix is a test-planning template, not reported production data.
| Sample | White Layer | CMYK | Varnish | Main Question |
|---|---|---|---|---|
| A | Controlled reduced-density white | No | No | Does the result look frosted, or does it resemble solid white paint? |
| B | No | Transparent color | No | Is the design visible under the expected background, fill, and lighting conditions? |
| C | Selective white | Color | No | Are opaque and transparent areas aligned without a visible white halo? |
| D | Selective white | Color | Selective varnish | Does the varnish improve the design without making frosted areas excessively glossy? |
| E | Final approved setup | Final artwork | As required | Does the complete process meet the documented appearance and durability criteria? |
Keep the glass batch, cleaning method, fixture, artwork size, print mode, curing configuration, conditioning period, and inspection conditions consistent. Relevant visual references can be found in Dacen's glass cup printing samples and bottle printing samples.

Test the Complete Printed Product
| Test Area | What to Reproduce | What to Record |
|---|---|---|
| Appearance | White, dark, and transmitted-light backgrounds; empty and filled viewing where relevant | Opacity, transparency, color shift, banding, seam, registration, gloss, and texture |
| Adhesion | A documented tape or cross-cut procedure appropriate to the coating system | Film lifting and the exact layer or interface that separated |
| Scratch and abrasion | Handling, stacking, cleaning, and packaging contact | Marring, gloss loss, color removal, and film damage |
| Water or wash exposure | The intended cleaning method and temperature | Softening, swelling, discoloration, cracking, or adhesion loss |
| Packaging | Actual dividers, cartons, and product-to-product contact | Local rubbing and wear on raised or exposed design areas |
| Rotation and seam | A complete print cycle using the production fixture and settings | Gap, overlap, density change, white halo, and start-position drift |
The ASTM D3359 tape-test methods describe procedures for rating coating adhesion by tape testing. The ISO 2409 cross-cut test can be used as a pass/fail or classification procedure and can help assess separation within multi-layer coating systems, but ISO notes that it is not a direct measurement of adhesion strength.
Follow a standard in full before describing a result as ASTM- or ISO-based. An informal tape pull can be used as an internal screening check, but it is not automatically a standards-compliant result.
Identify Where the Ink Stack Failed
| Failure Location | Typical Appearance | First Investigation |
|---|---|---|
| Glass or primer interface | The complete printed film separates and exposes the glass | Cleaning, contamination, surface coating, primer compatibility, and cure |
| Primer to white ink | Primer remains while the printed layers lift | Primer application, reaction time, white-ink compatibility, and film build |
| White ink to CMYK | Color separates while white remains on the glass | Layer sequence, interlayer cure, registration, and ink compatibility |
| CMYK to varnish | Clear material chips, peels, or separates from the color | Varnish compatibility, cure, thickness, and intended handling |
| Within the ink film | Ink remains on both sides of a crack or damaged area | Excessive film build, cure, mechanical stress, and product movement |
| Original glass coating | A factory-applied coating leaves the glass with the print | Product coating quality and its bond to the glass |
Common Problems and First Checks
| Problem | Likely Cause | First Check |
|---|---|---|
| Frosted effect looks like solid white paint | White is too opaque or too uniform | Compare reduced, textured, and halftone white samples |
| Transparent color is too weak | No white base, low color deposit, or unsuitable viewing conditions | Review the actual background, liquid, and lighting requirement |
| Color is too opaque | White was printed beneath an area intended to remain transparent | Inspect the white spot layer |
| White halo appears around fine artwork | White and CMYK are misregistered or the choke/spread is unsuitable | Review artwork trapping, rotary registration, and fixture repeatability |
| Varnish makes the design too glossy | Varnish covers an area intended to remain matte | Remove or localize the varnish layer |
| Ink peels from glass | Contamination, incompatible treatment, weak cure, or unsuitable ink | Repeat the documented preparation and compare treated and untreated controls |
| Seam is visible | Incorrect artwork width, start position, rotation, gap, or overlap | Recheck product measurement and rotary calibration |
| Artwork distorts on tapered glass | Incorrect taper compensation or unsupported geometry | Confirm upper and lower dimensions, software support, and fixture capability |
| Backlighting reveals banding | Inconsistent nozzle output, rotation, curing, or print mode | Inspect nozzles, motion, layer uniformity, and cure |
For examples of geometric variation, review Dacen's conical cup printing samples and broader cylinder printing samples.
Use a Release Decision Before Production
| Decision | Meaning | Required Action |
|---|---|---|
| Pass | The sample meets the documented appearance, adhesion, seam, handling, and end-use criteria | Approve only the recorded glass, artwork, ink stack, fixture, printer configuration, and process |
| Conditional pass | The sample is acceptable only under a limited lighting, handling, washing, product, or design condition | Record the limitation and prevent the result from being generalized to other products |
| Fail | There is unacceptable peeling, scratching, registration error, seam visibility, color shift, cracking, or functional damage | Identify the failure location and change one controlled variable before retesting |
Do not publish dishwasher-safe, wash-resistant, outdoor-life, chemical-resistance, or food-contact claims unless the complete finished product has been evaluated for the specific claim and jurisdiction.
UV-Printed Frosted Effect vs Physical Glass Etching
| Factor | UV-Printed Effect | Physical Etching or Sandblasting |
|---|---|---|
| Process | Adds a cured ink layer to the surface | Changes or removes part of the glass surface |
| Color | Can combine white, CMYK, and varnish | Usually requires an additional decoration process for full color |
| Variable data | Digital artwork can be changed between jobs | May require new masks, setup, or tooling |
| Texture | Created by printed ink and varnish layers | Created within the glass surface |
| Durability | Depends on adhesion, ink, pretreatment, cure, and use | Depends on the physical glass-treatment process |
A printed frosted design should be described as an etched-looking, frosted, or decorative UV-printed effect. It should not be marketed as physically etched glass unless a separate etching process is actually used.
FAQ
Q: Can a UV printer create real etched glass?
A: No. UV printing adds a cured decorative layer that can imitate an etched or frosted appearance. It does not remove or chemically alter the glass.
Q: Does transparent color require white ink?
A: Not always. Omitting white preserves more transparency. Selective white is useful where the design needs stronger opacity or more predictable color.
Q: Can varnish be used with a transparent color effect?
A: Yes, when supported by the installed ink system. Compare the sample with and without varnish because additional gloss may change the intended appearance.
Q: Does every glass bottle require primer?
A: No universal answer applies. The need for primer depends on the exact glass surface, coating, ink, cleaning process, and required durability.
Q: Why does the design change after the bottle is filled?
A: The liquid color, glass thickness, background, and lighting become part of the transparent image. Review the product in its actual use condition.
Q: Can tapered wine glasses be printed?
A: Only when the printer, software, fixture, and printable geometry support the taper. Measure and test the actual product before equipment approval.
Q: Is UV-printed glass dishwasher-safe?
A: It should not be described as dishwasher-safe without product-specific testing of the glass, preparation, ink stack, cure, and washing conditions.
Conclusion
Creating a convincing etched, frosted, or stained-glass effect requires more than switching the white channel on or off. The artwork must define transparent and opaque areas, the seam must be planned, the glass must be prepared consistently, and the printer must rotate and cure the product without registration drift.
Before selecting equipment or approving mass production, print the actual glass product with the final artwork. Compare several controlled ink-layer strategies, inspect the design empty and filled where relevant, identify the interface if a sample fails, and release only the documented process that meets the agreed requirements.
Businesses can submit glass products, artwork, dimensions, and durability requirements for evaluation before committing to a printer configuration or production process.