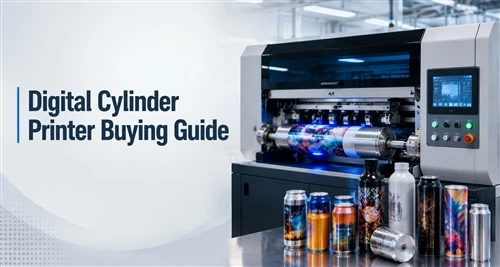
Quick answer: To print a tumbler successfully, first qualify its material, coating, shape, and end-use requirements. Clean and pretreat the surface when testing shows it is necessary, prepare the artwork for the measured circumference and taper, secure the tumbler in a calibrated rotary fixture, print a controlled sample, and approve production only after appearance and durability checks.
A rotary UV printer can place full-color graphics, white ink, and optional clear varnish directly around tumblers, bottles, cups, and other round products. The printing itself is only one part of the job. Most failures begin earlier, with an untested coating, an inaccurate artwork width, an unstable fixture, or an undefined durability requirement.
This guide explains how to build a repeatable tumbler-printing workflow rather than relying on a visually attractive first sample. Businesses comparing equipment can also review Dacen's cylindrical UV printer range before matching a machine to actual product samples and production requirements.

How Rotary UV Tumbler Printing Works
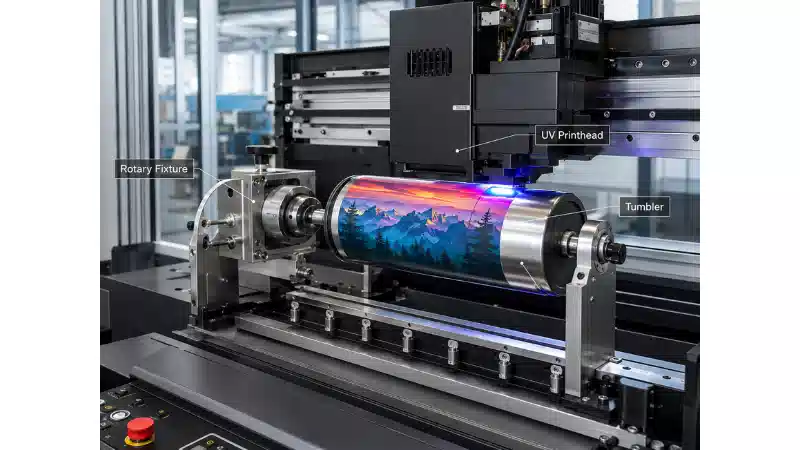
A rotary UV printer holds a tumbler on a powered fixture and turns it while the print carriage deposits ink across the surface. The rotational movement and print data must remain synchronized so the design wraps around the product at the correct scale.
Unlike a flat image, a full-wrap tumbler design must close at a seam. If the cup slips, runs out of round, or uses the wrong developed artwork width, the two ends of the design may leave a white gap, overlap into a dark band, or drift out of registration.
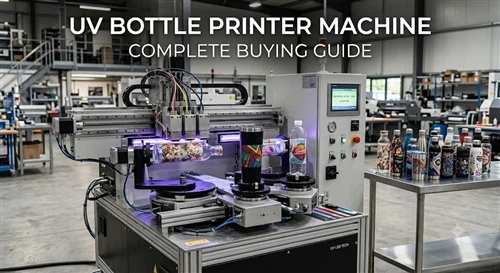
Current dedicated machines such as Dacen's rotary UV bottle printer are designed for direct printing on cylindrical and compatible conical objects. The exact diameter range, print length, taper capability, ink configuration, and fixture design vary by model, so a catalog description should be treated as a screening tool rather than production approval.
What to Confirm Before Printing a Tumbler
Material Is Only the Starting Point
Tumblers may be made from stainless steel, aluminium, glass, plastic, ceramic, or coated composites. The visible material name does not fully predict ink adhesion because the printer is usually depositing ink onto a coating rather than directly onto the base material.
A stainless steel tumbler, for example, may have a powder coating, paint layer, clear coat, polished surface, anti-fingerprint finish, or residue from manufacturing and packing. Two products that look identical can behave differently if they come from different coating lines.
UV-curable ink can be used on many non-absorbent materials, but ink and substrate properties vary, and some surfaces require primer or other treatment. Mimaki's official UV-curable ink information and adhesion troubleshooting guidance both reinforce the need to test the actual substrate rather than assume universal compatibility.
For material-specific preparation, Dacen's guides to UV printing and adhesion on glass and printing on plastic with UV ink provide additional context.

Shape Determines Whether the Artwork Can Close Correctly
Measure the real product rather than relying only on the supplier's nominal dimensions. Record the minimum and maximum diameter, printable height, total length, taper, runout, rim shape, shoulder, handle, ridges, raised logos, and any area that will touch rollers or supports.
A straight-wall tumbler has one circumference throughout the print area. A tapered tumbler does not. As the diameter changes, the surface distance travelled during one rotation also changes, which means a rectangular image may stretch, compress, or fail to close evenly unless the RIP software, artwork template, or rotary system compensates for the taper.
Examples of the types of shapes that require additional setup can be seen in Dacen's conical cup print samples.
Define the Required Durability Before Choosing a Process
A sample that looks good immediately after printing may still fail during packing, repeated handling, exposure to water, or cleaning. Before setup, define where and how the tumbler will be used.
- Is the product decorative or handled every day?
- Will printed surfaces rub against cartons or other cups?
- Will the product be hand-washed or subjected to a defined wash cycle?
- Will it contact alcohol, detergent, oils, or cleaning chemicals?
- Is outdoor exposure expected?
- Does the buyer require a documented adhesion or abrasion method?
Printed areas near a drinking rim or any food-contact zone require separate regulatory review. FDA guidance explains that substances applied to packaging or other food-contact surfaces may require authorization for their specific intended use. Refer to the FDA's food-contact substance information rather than assuming that a general-purpose UV ink is suitable for direct food or mouth contact.
Step-by-Step Tumbler UV Printing Process
Step 1: Define the Job Before Touching the Printer
Start with a short production brief. It should identify the tumbler supplier and SKU, material and coating, printable area, artwork version, full-wrap or partial-wrap requirement, white and varnish requirements, order quantity, expected output, seam location, no-print zones, and required durability checks.
This prevents a common production mistake: selecting settings for the artwork before confirming whether the physical product and its intended use are compatible with the proposed process.
Step 2: Inspect and Measure Several Tumblers
Measure more than one piece from the intended batch. Look for diameter variation, ovality, coating inconsistency, and changes in the way each tumbler sits in the fixture.
For a straight cylinder, begin with:
Circumference = measured diameter × π
Illustrative calculation: If the measured diameter is 90.0 mm, the theoretical circumference is approximately 282.7 mm. That figure is a starting artwork width, not a final approved width. Fixture pressure, coating thickness, software scaling, rotary calibration, and the planned seam may require a small adjustment after a controlled test print.
For a tapered example, assume the upper diameter in the print zone is 90 mm and the lower diameter is 80 mm. The two theoretical circumferences differ by approximately 31.4 mm. A rectangular file therefore cannot close evenly at both edges without taper compensation. This example is provided to explain the geometry only; the final template must be generated for the actual product and validated physically.
Step 3: Clean the Print Area Without Damaging the Coating
Dust, fingerprints, oil, release agents, silicone, moisture, and packaging residue can weaken adhesion. A controlled cleaning process should remove contamination, leave no film, allow complete drying, and prevent the cleaned area from being touched again.
The cleaner must be compatible with the coating. A solvent that works well on bare metal may soften paint, change gloss, or leave marks on a powder-coated tumbler. When in doubt, test the cleaning method on a non-critical area before preparing production samples.
Step 4: Use a Controlled Pretreatment Comparison
Not every tumbler requires primer, flame treatment, plasma treatment, or another adhesion promoter. The correct decision comes from a comparison in which one variable changes at a time.
| Sample | Surface Preparation | Purpose |
|---|---|---|
| A | Approved cleaning only | Establish the untreated baseline |
| B | Same cleaning plus the selected primer or treatment | Measure whether treatment improves adhesion |
| C | Same preparation with one adjusted curing or ink-layer variable | Separate surface effects from print-setting effects |
Keep the artwork, fixture, print mode, ink density, and inspection method unchanged during the comparison. Excess primer can also create uneven gloss, visible application marks, soft edges, or color inconsistency, so the objective is not to apply as much as possible. It is to establish the minimum controlled process that passes the required test.
Step 5: Prepare the Artwork for the Actual Circumference
Build the artwork around the measured printable area. Avoid placing faces, fine text, QR codes, or critical logo details directly on the closing seam.
A small controlled overlap may prevent an unprinted line. Too much overlap creates a darker vertical band, particularly in solid colors and white underbases. There is no responsible universal overlap value because the result depends on artwork density, printer calibration, fixture stability, and the product itself.
Use vector artwork for logos, fine text, and line graphics where possible. High-quality raster files are appropriate for photographs and gradients. Separate the file into clearly named channels or layers for CMYK, white, clear varnish, digitally applied primer if supported, and no-print areas.
The actual file workflow should follow the RIP software and artwork procedures supplied with the chosen machine.

Step 6: Compensate for Taper Before Fine-Tuning the Seam
For a tapered product, first confirm that the printer, fixture, and software support the shape. Taper compensation may be handled through a developed conical template, RIP distortion controls, variable rotary movement, or a combination of these methods.
A useful diagnostic sign is a design that looks correct near one end but progressively drifts or stretches toward the other. That usually indicates geometry or taper compensation rather than a simple whole-file scaling error.
Approve the compensated file on a physical sample. A screen preview cannot reveal tumbler runout, fixture slippage, coating variation, or the actual closing seam.
Step 7: Choose the Correct Ink-Layer Sequence
The layer order depends on the tumbler color, opacity, viewing direction, and desired finish.
- White or light opaque tumbler: CMYK may provide sufficient opacity without a white underbase.
- Dark or strongly colored tumbler: A white underbase usually helps preserve color brightness and brand consistency.
- Transparent tumbler: The file may require color backed by white, mirrored second-surface printing, selective transparency, or a white-color-white structure.
- Decorative clear layer: Varnish can add selective gloss, contrast, texture, or raised details when the equipment and ink system support the required build.
More ink is not automatically better. A thick white or varnish build can influence edge definition, curing, flexibility, and adhesion. Dacen's spot UV varnish guide explains the difference between decorative selective varnish and full-surface protection in more detail.
Step 8: Install and Calibrate the Rotary Fixture
The fixture should hold the tumbler firmly enough to prevent slip without deforming, marking, or damaging it. Before printing, rotate the product manually through a complete cycle and check that the rim, base, lid, handle, shoulder, and raised features cannot contact the printhead or lamp assembly.
Watch the product from the side while it turns. If the print surface moves toward and away from the printhead, the tumbler may be out of round, incorrectly seated, or unsupported. A general-purpose holder may work for regular products, but recurring irregular work often justifies a dedicated fixture.
The printhead gap must follow the machine manufacturer's procedure. Excessive distance can reduce detail and increase placement error; insufficient clearance creates a collision risk.
Step 9: Check the Printer Before Using a Production Blank
Run a nozzle check and confirm white ink circulation, ink levels, curing-system condition, rotary calibration, bidirectional alignment, printhead height, media profile, and product clearance. A missing nozzle should be corrected at the machine rather than hidden by increasing ink density or altering the artwork.
For a more complete maintenance routine, refer to Dacen's daily and weekly UV printer printhead maintenance guide.
Step 10: Produce a Diagnostic Test Print
The first test file should reveal several types of failure, not merely show an attractive image. Include fine text, solid colors, gradients, white areas, registration marks, a seam reference, and varnish or texture when required.
Inspect the sample for seam position, banding, white-to-color registration, text sharpness, color density, taper distortion, ink buildup, varnish uniformity, unprinted gaps, and marks caused by the fixture.
When a result is wrong, change one variable at a time. If cleaning, primer, lamp settings, fixture pressure, artwork width, and ink density are changed together, the next sample may look better without revealing which change solved the problem.
Step 11: Diagnose the Closing Seam in the Correct Order
A visible seam is often blamed on artwork width too early. Use the following sequence:
- Mark the tumbler and confirm it returns to the same rotational position after a complete cycle.
- Check whether the product slips or moves sideways in the fixture.
- Confirm that the measured diameter matches the actual print zone.
- Print a simple registration band to separate mechanical drift from image-content effects.
- Verify rotary-axis calibration and the correct machine profile.
- Only after the mechanical checks pass, adjust the developed artwork width or controlled overlap.
A white gap generally points toward insufficient developed width or under-rotation. A dark vertical band suggests excessive overlap, excess ink in the overlap zone, or repeated image placement. A seam that changes from top to bottom usually points toward taper, runout, or axial movement rather than a single width error.
Step 12: Test Adhesion and Durability
Allow the print to condition for the period specified by the ink and pretreatment suppliers before final testing. Possible screening methods include tape, scratch, dry rub, wet rub, water exposure, packaging abrasion, chemical resistance, and a defined hand-wash or wash-cycle protocol.
Record the conditioning time, number of samples, test method, acceptance criteria, and failure mode. Do not describe an informal tape pull as ASTM-compliant. The official ASTM D3359 tape-test standard contains defined procedures, substrate considerations, equipment, and reporting requirements.
A dishwasher-safe or chemical-resistant claim requires a documented protocol that matches the stated use. Visual inspection immediately after printing is not sufficient.
Step 13: Approve and Record the Production Recipe
Once the sample passes appearance and durability checks, record the setup so another operator can reproduce it.
| Production Record Field | What to Document |
|---|---|
| Product | Supplier, SKU, material, coating, dimensions, batch |
| Preparation | Cleaning method, primer or treatment, application method |
| Artwork | File version, developed width, seam position, taper compensation |
| Ink build | CMYK, white, varnish, density, layer sequence |
| Machine | Printer model, print mode, printhead gap, rotary calibration |
| Fixture | Fixture identification, supports, stops, loading position |
| Approval | Inspection criteria, test method, results, approved physical sample |
Dacen's cup printing sample page and broader cylindrical print samples can help buyers define the type of visual result they want to discuss during sample qualification.
Common Tumbler UV Printing Problems and What to Check
| Problem | Likely Causes | First Checks |
|---|---|---|
| Ink peels during handling | Contamination, incompatible coating, unsuitable ink, missing treatment, incomplete cure | Cleaning control, coating identity, pretreatment comparison, curing condition |
| White gap at the seam | Insufficient developed width, under-rotation, fixture movement | Measured circumference, calibration, product slip, file scaling |
| Dark vertical seam | Excessive overlap or excessive ink density in the closing area | Artwork width, overlap amount, white and color density |
| Seam changes from top to bottom | Uncompensated taper, runout, axial movement | Upper and lower diameter, seating, taper template, end stops |
| White ink is offset from color | Registration error, unstable rotation, incorrect layer setup | Rotary stability, channel alignment, file layers |
| Fine text looks blurred | Excessive printhead gap, unstable fixture, unsuitable file or print mode | Head distance, runout, vector quality, nozzle condition |
| Colors look weak on a dark tumbler | Missing or insufficient white underbase | White coverage, opacity, layer order, color profile |
| Varnish looks uneven | Contamination, excessive clear build, curing variation, nozzle defects | Surface cleaning, clear density, nozzle check, curing-system condition |
| Print shifts during the run | Tumbler slips or moves axially | Fixture pressure, supports, stops, product roundness |

Rotary Attachment or Dedicated Cylinder Printer?
| Decision Factor | Rotary Attachment on a General Printer | Dedicated Cylinder Printer |
|---|---|---|
| Best fit | Occasional round-object work and a limited product range | Recurring tumbler, bottle, cup, can, or jar production |
| Product geometry | Usually easiest on regular straight cylinders | More likely to offer specialized fixtures and taper support |
| Changeover | May require more manual setup and printer reconfiguration | Designed around repeatable cylindrical loading |
| Production planning | Shares machine time with flat work | Keeps cylindrical work on a dedicated production asset |
| Purchase decision | Suitable when round products are a secondary application | Suitable when cylindrical output, repeatability, or changeover speed is central |
Businesses assessing total production setup can continue with Dacen's digital cylinder printer buying guide and UV bottle printing machine guide.
How to Match the Machine to Production Volume
The right machine depends on more than maximum headline speed. Compare the supported diameter and length range, taper capability, fixture stability, white ink circulation, varnish configuration, software workflow, changeover time, maintenance access, operator training, spare-parts availability, and the measured output of your own artwork.
A compact unit such as the Dacen M1 desktop cylindrical printer may suit smaller-scale customization workflows. A model such as the Dacen F5 UV cylinder printer targets dedicated cylindrical and compatible shaped-object work. For production where loading and unloading become the bottleneck, compare a multi-station cylindrical UV printer.
These examples are starting points, not recommendations for an untested job. Request a sample using the intended tumbler, artwork, white and varnish layers, seam position, and durability requirements. Evaluate the actual loading cycle and approved quality mode rather than relying only on a catalog cycle time.
When Rotary UV Printing May Not Be the Best Choice
Another process may be more suitable when the order consists of a very large volume of one simple spot-color design, the product cannot rotate steadily, handles or deep shoulders obstruct the print path, the taper exceeds the available compensation, or the required durability cannot be achieved with the validated ink and preparation process.
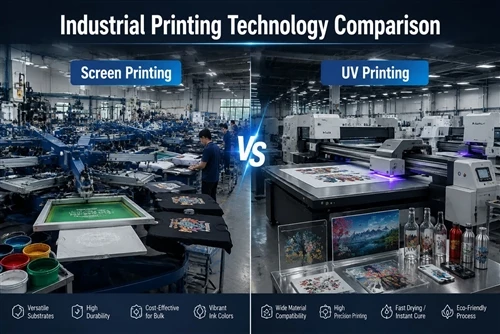
Screen printing may be economical for long repetitive runs after its setup is complete. Pad printing may suit a small logo on a restricted curved area. Transfers may be useful when the product cannot be safely or repeatably mounted in a rotary fixture. The correct comparison should include design changes, color count, setup waste, tooling, labor, durability, and the value of personalization.
FAQ
Q: Can A Rotary UV Printer Print Directly On Stainless Steel Tumblers?
A: It can print on many stainless steel and coated tumblers, but the result depends on the actual surface coating, contamination, ink system, preparation, curing, and required durability. Approve the production blank through sample testing rather than relying on the material name alone.
Q: Does Every Tumbler Need Primer?
A: No. Some cleaned surfaces may pass the required tests without primer, while others need a compatible adhesion promoter or treatment. Use a controlled comparison and follow the ink and primer suppliers' instructions.
Q: How Do I Calculate Artwork Width For A Straight Tumbler?
A: Begin with the measured diameter multiplied by π. Treat that theoretical circumference as a starting point, then verify the seam through a controlled test print because fixture grip, calibration, coating thickness, and software scaling can affect the final closure.
Q: Can A Rotary UV Printer Print Tapered Tumblers?
A: Some machines can print compatible tapered products when the fixture, rotary control, software, print range, and artwork compensation support the geometry. The actual taper should be included in the sample test before machine selection or production approval.
Q: How Do I Avoid A Visible 360-Degree Seam?
A: Confirm that the tumbler does not slip, verify rotary calibration, measure the actual print zone, place critical artwork away from the seam, and adjust the developed width only after the mechanical setup is stable.
Q: Is White Ink Always Required?
A: No. White ink is mainly used to restore opacity on dark, strongly colored, or transparent products. It may be unnecessary on a bright opaque tumbler.
Q: Does A UV-Printed Tumbler Need Varnish?
A: Not always. Varnish can create selective gloss, texture, raised details, or an additional decorative layer, but it changes the total ink build and must be included in curing and adhesion tests.
Q: Are UV-Printed Tumblers Dishwasher Safe?
A: Do not make that claim from appearance or a simple tape check. The finished product must pass a documented wash protocol that reflects the claimed use, including the actual tumbler, coating, ink, pretreatment, cure, and printed location.
Q: What Should I Send A Printer Supplier For Sample Testing?
A: Send several actual tumblers, dimensional drawings or measured dimensions, artwork files, the required print area, seam preference, desired white and varnish effects, target quantity, expected daily output, and the required durability tests.
Conclusion: Approve a Process, Not Just a Printed Sample
Reliable tumbler printing comes from controlling the complete system: product geometry, surface preparation, artwork development, ink layers, fixture stability, printer condition, curing, and verification. The most important production habit is to change one variable at a time and record the setup that produced the approved result.
Before purchasing equipment or releasing mass production, test the actual tumbler on the actual machine configuration. Review both appearance and durability, document the production recipe, and retain an approved physical sample.
To discuss a tumbler application, prepare the product samples, dimensions, artwork, required effects, order volume, and test expectations, then contact Dacen Printer for sample qualification and machine matching.