

UV printing can place full-color graphics, white ink, and selected varnish effects directly on plastic sheets, molded components, phone cases, bottles, cups, tubes, and other finished products. The printing itself is usually fast; achieving dependable adhesion is the more difficult part.
A reliable process starts by identifying the plastic and its surface condition. You then select the appropriate printer, ink, fixture, cleaning method, and pretreatment before approving the job through repeatable adhesion and use-condition tests.
There is no universal plastic-printing setting. Two products that look identical may contain different pigments, slip agents, recycled material, coatings, or mold-release residue. A setting that works on one batch may therefore fail on another.
This guide explains how to evaluate a plastic product, choose between a UV flatbed printer and a cylindrical system, select a pretreatment route, run a controlled proof, and decide whether the result is ready for production.

Can a UV Printer Print Directly on Plastic?
Yes. UV printers can print directly on many rigid and flexible plastic products. UV-curable ink is deposited onto the surface and exposed to UV radiation during printing, so the print normally leaves the machine already cured. Official UV-ink guidance from Mimaki also identifies plastic, glass, and metal as common non-absorbent substrates for UV printing.

However, cured ink does not automatically mean good adhesion. A print may look correct immediately after production and still peel during tape testing, crack when the product bends, or fail after contact with detergent, alcohol, heat, or repeated handling. Mimaki similarly notes that cured UV ink may not adhere to every surface and that substrate type and pretreatment affect the result. :contentReference[oaicite:4]{index=4}
The practical question is therefore not only whether the printer can deposit ink on the plastic. The important question is whether the complete ink, treatment, curing, and fixture process can meet the product's real durability requirement.
Why UV Ink Adhesion Varies Between Plastic Products?

The Polymer Name Is Only the Starting Point
"Plastic" includes chemically different materials such as acrylic, ABS, PVC, polycarbonate, PET, PETG, polypropylene, polyethylene, nylon, TPE, and silicone-type elastomers. These materials do not offer the same wettability, flexibility, chemical resistance, or response to cleaning agents.
The polymer name also does not describe the entire surface. A molded ABS housing may contain pigments and release agents. A polycarbonate panel may have a scratch-resistant coating. PVC may contain different levels of plasticizer, while recycled plastics may vary between production batches.
Contamination Can Be More Important Than the Resin
Oil, fingerprints, dust, silicone, mold-release agents, polishing compounds, protective coatings, and cleaner residue can prevent the ink from spreading evenly. Typical symptoms include:
- Ink beading or pulling away from the surface
- Small fisheyes or unprinted spots
- Uneven gloss
- Weak tape-test results
- Adhesion that changes between batches
When a previously successful material suddenly fails, check contamination and supplier changes before increasing lamp power or adding more primer.

Surface Energy Is Important, but It Is Not the Whole Answer
Polypropylene and polyethylene often have low surface energy, which can make them difficult for inks and coatings to wet. Flame, plasma, or corona treatment may improve wettability by modifying the surface.
A dyne pen can help monitor wetting tension, particularly on polyethylene and polypropylene films. However, it does not directly measure ink bond strength. ASTM D2578 is specifically intended for measuring the wetting tension of polyethylene and polypropylene film surfaces; it should not be treated as a universal adhesion standard for every rigid or three-dimensional plastic product. :contentReference[oaicite:5]{index=5}
Good adhesion also depends on surface chemistry, ink formulation, primer compatibility, curing, ink-film thickness, product flexibility, and the stresses the product experiences after printing.
What Do You Need to Print on Plastic?

1. A Printer Matched to the Product Geometry
Start with the product shape rather than the largest available print area.
| Product Type | Typical Printer Choice | Main Selection Factors |
|---|---|---|
| Flat sheets, panels, signs, nameplates | UV flatbed printer | Print area, media height, vacuum or fixture support, load capacity |
| Phone cases, housings, toy parts, molded components | Flatbed printer with a fixture | Part height, repeatability, multiple-part loading, printhead clearance |
| Bottles, cups, tubes, cans, thermos products | Cylindrical UV printer | Diameter, printable length, taper, rotational accuracy, seam alignment |
| Raised, stepped, or uneven parts | High-drop or specially configured flatbed system | Surface-height variation, jetting distance, overspray, collision risk |
| High-volume cylindrical orders | Multi-station cylindrical system | Loading time, number of stations, cycle time, artwork change frequency |
For small and medium fixture-held parts, the A1 UV Printer 9070 range provides a more compact format. Large panels and multi-part fixtures may be better evaluated on the DG-2513 UV printer range.
2. An Ink Set Suitable for the Plastic and Final Use
UV inks vary in hardness, flexibility, scratch resistance, chemical resistance, and supported substrates. A rigid ink may perform well on a hard panel but crack when printed on a part that bends. A flexible ink can tolerate movement better but may offer different surface-hardness characteristics.
Review the ink supplier's technical data before selecting an ink. Dacen's explanation of soft and hard UV ink can also be used as an introductory comparison, but final compatibility should be based on the actual ink technical data sheet and printed sample.
The required color configuration may include:
- CMYK for full-color graphics
- White ink beneath color on transparent or dark plastic
- Selected white areas rather than a full white layer
- Varnish for gloss, texture, or spot effects
- Printable primer where the equipment and ink system support it
3. Cleaning and Pretreatment Supplies
A production setup may require lint-free cloths, an approved cleaner, primer wipes, liquid primer, plasma treatment, corona treatment, flame treatment, or a dedicated treatment station.
Do not use one cleaner for every plastic. Aggressive solvents may haze acrylic, affect coatings, soften certain plastics, or contribute to stress cracking. The cleaner must remove contamination without damaging the substrate or leaving a residue that interferes with ink wetting.
4. A Repeatable Fixture
The fixture must hold the product without distortion and keep the printable surface in a consistent position. For flat parts, it should control height and orientation. For bottles and cups, the rotary system must hold the product concentrically and prevent slipping.
A fixture problem can look like a printing problem. Blurred edges, a visible bottle seam, stretched artwork, registration errors, and changing print positions may result from movement, runout, uneven clamping, or an incorrect product diameter rather than from the ink or printhead.
5. Samples and Inspection Tools
Prepare enough products to compare several controlled combinations. One sample is rarely sufficient because it does not allow you to distinguish the effect of cleaning, primer, curing, and treatment.
Useful inspection tools include:
- A defined pressure-sensitive tape
- A cross-cut tool appropriate for the coating thickness and substrate
- Dry and wet rubbing materials
- A controlled scratch tool
- Dyne solutions where appropriate
- The actual detergents, oils, alcohols, or cosmetics used around the final product
Which Plastics Are Easier or More Difficult to UV Print?
The following table is a screening guide. It does not replace an actual print test.
| Plastic | Relative Difficulty | Common Risks | Recommended Starting Approach |
|---|---|---|---|
| Acrylic or PMMA | Low to medium | Protective coating, surface scratches, damage from unsuitable cleaner | Confirm whether the surface is coated, clean carefully, and compare direct printing with a suitable primer only if needed |
| ABS | Low to medium | Mold-release residue, variable surface finish, additives | Clean the actual molded part and run a direct-print adhesion test before adding treatment |
| PVC | Medium | Plasticizer migration, different formulations, contamination | Confirm the PVC grade and ink compatibility; monitor changes over time rather than testing only immediately after printing |
| Polycarbonate | Medium | Hard coatings, cleaner sensitivity, surface-treatment variation | Identify any coating and verify cleaner compatibility before printing |
| PET or PETG | Medium | Grade variation, coatings, flexing, inconsistent treatment | Compare direct printing, primer, and treatment on the exact grade |
| Polypropylene | High | Low wettability, treatment decay, additives, weak tape adhesion | Evaluate an approved primer, plasma, corona, or controlled flame treatment |
| Polyethylene or HDPE | High | Low surface energy, inconsistent treatment, poor chemical bonding | Use a validated treatment and ink system; include batch-level verification |
| Nylon or PA | Medium to high | Moisture absorption, fillers, conditioning differences | Condition samples consistently and compare primer or plasma treatment |
| TPE and silicone-type products | Very high | High flexibility, chemical resistance, migration, ink cracking or peeling | Use a specialized ink and treatment process intended for the exact material |
Dacen also maintains a dedicated guide on improving UV ink adhesion on flat plastic products. Use it as a supporting overview rather than as a substitute for material-specific testing.
How to Choose a Plastic Pretreatment Method?
| Method | When to Evaluate It | Advantages | Main Limitations |
|---|---|---|---|
| Direct printing | Clean acrylic, ABS, coated products already approved for the ink | Lowest process complexity and no additional treatment step | May fail when the resin, coating, or supplier changes |
| Manual primer | Low-volume products, local treatment, difficult surfaces | Simple to introduce and useful for comparison testing | Application thickness and operator consistency may vary; primer may affect appearance |
| Printable primer | Systems that can jet primer only beneath printed areas | Controlled placement and reduced full-surface treatment | Requires a compatible printer, primer, ink, and curing sequence |
| Corona treatment | Films, sheets, and relatively regular surfaces | Suitable for continuous or controlled surface activation | Complex three-dimensional surfaces may be difficult to treat evenly |
| Atmospheric plasma | Localized areas and some three-dimensional parts | Controllable treatment without applying a liquid coating | Equipment, nozzle distance, speed, and treatment uniformity must be controlled |
| Flame treatment | Selected PP, PE, and molded products where the material tolerates heat | Can rapidly activate suitable surfaces | Thin walls, heat-sensitive parts, uneven geometry, and operator safety require careful control |
| Combined treatment and primer | Applications that fail with a single method | May provide a wider processing window | Adds cost and variables; incompatible layers can still fail |
Begin with the least complex process that meets the durability requirement. More treatment is not automatically better. Excessive heat, too much primer, nonuniform plasma exposure, or a long delay between treatment and printing may create new problems.
UV Flatbed, Cylindrical, or High-Drop Printer?
Flat and Fixture-Held Plastic Products
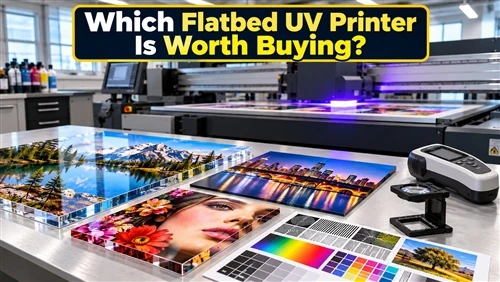
A flatbed UV printer is generally the correct starting point for sheets, panels, cases, housings, signs, toys, control panels, and parts held horizontally in a fixture.
Confirm:
- Maximum printable area
- Maximum media or fixture height
- Safe printhead clearance
- Table load capacity
- Vacuum zoning or fixture mounting options
- White ink and varnish configuration
- Number of parts that can be loaded per cycle
Bottles, Cups, Tubes, and Round Containers
A dedicated cylindrical UV printer rotates the product while the print carriage builds the image around its surface.
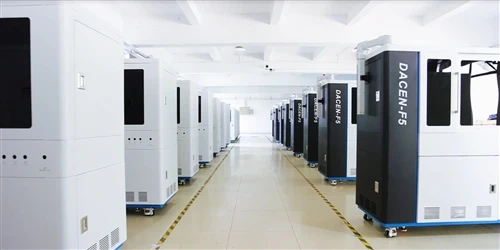
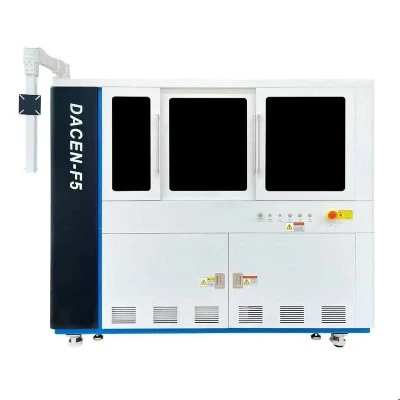
The Dacen F5 cylindrical UV printer, for example, is presented for bottles, cups, thermos products, cans, and other cylindrical or conical objects. Its published page lists CMYK, white, and varnish support, a diameter range of 45 to 125 millimeters, and a print length of 30 to 270 millimeters. Confirm the final product dimensions, taper, fixture, and configuration before ordering. :contentReference[oaicite:6]{index=6}
For larger production requirements, a multi-station cylindrical UV printer may reduce the effect of loading and unloading time. The real productivity gain depends on artwork, white and varnish layers, print quality mode, product handling, and operator workflow.
Raised and Irregular Products
Products with handles, deep curves, steps, or large height variation need more than a larger table. Excessive distance between the nozzle plate and lower areas can create overspray and reduced edge definition, while raised areas can create a collision risk.
Review Dacen's guidance on printing high-drop products with a UV flatbed printer when evaluating uneven components. The printable result still depends on the real surface profile, fixture, printhead technology, ink, and acceptable image sharpness.
How to UV Print on Plastic Step by Step?
Step 1: Define the Required Performance
Decide how the finished product will be used before selecting settings. A decorative panel used indoors requires a different approval process from a bottle exposed to washing, alcohol, cosmetics, abrasion, or outdoor weather.
Define:
- Expected handling and abrasion
- Whether the product bends or flexes
- Contact with water, detergent, oil, alcohol, or chemicals
- Indoor or outdoor exposure
- Required appearance and gloss
- Customer or industry acceptance criteria
Step 2: Identify the Material and Surface
Request the polymer name, supplier, part number, color, coating information, recycled content, manufacturing method, and any known use of mold-release agents.
When the material is unknown, do not describe the job as production-ready. Treat it as an application test and request enough samples for comparison.
Step 3: Clean Without Damaging the Plastic
Remove loose dust first. Use a substrate-compatible cleaning method and allow the surface to dry fully. Avoid touching the print area after cleaning.
If adhesion changes unexpectedly, repeat the test using newly cleaned samples and compare them with untreated controls. This helps determine whether the problem comes from contamination, treatment, ink, or curing.
Step 4: Build a Small Pretreatment Test Matrix
Do not change several variables on the same sample. A basic comparison may include:
- Cleaned surface with direct printing
- Cleaned surface with primer
- Cleaned surface with the selected physical treatment
- Physical treatment followed by primer, only when necessary
Record the cleaner, treatment method, treatment power or speed, primer amount, delay before printing, ink mode, and UV setting.
Step 5: Prepare Color, White, and Varnish Layers
Transparent and dark plastic often requires a white layer beneath the color image. White ink improves opacity, but excessive white-ink thickness can increase curing demands, slow production, reduce flexibility, and affect surface texture.
Possible print structures include:
- CMYK only
- White beneath CMYK
- Selected white beneath specific image areas
- White, CMYK, and selected varnish
- Multiple white passes where greater opacity is required and validated
Step 6: Control the Fixture and Print Gap
Confirm product orientation, the highest point, surface level, fixture clearance, sensor operation, and loading repeatability.
A large print gap may produce overspray or blurred detail. A gap that is too small increases the collision risk. For cylindrical printing, also confirm product diameter, circumference, clamping pressure, axial alignment, radial runout, rotation direction, and the planned seam position.
Step 7: Run a Controlled Proof
The proof image should include fine text, solid colors, gradients, white ink, registration marks, reverse text, and varnish where required. Evaluate sharpness, banding, color density, white opacity, ink spreading, surface finish, tackiness, and seam alignment.
Dacen's explanation of why proofing is necessary before production provides additional context on checking artwork and color before committing to a full run.
Step 8: Test, Approve, and Record the Process
Do not approve a sample only because it looks good. Allow the agreed conditioning time, then run the required adhesion, abrasion, flex, water, detergent, or chemical tests.
Record the approved production recipe:
- Plastic supplier and part number
- Material batch
- Cleaning process
- Pretreatment and primer
- Ink set and layer order
- Print mode and curing settings
- Fixture version
- Environmental conditions
- Test procedure and acceptance result
- Approval date and reference sample
How to Test UV Ink Adhesion on Plastic?
Use a Defined Tape or Cross-Cut Procedure
A tape or cross-cut test can compare untreated samples, primers, treatment methods, curing settings, and production batches. The test must use the same cutter, tape, pressure, waiting time, removal method, and visual rating each time.
ASTM D3359 describes tape-test methods for rating coating adhesion, including reported use on non-metallic substrates such as plastic. ISO 2409:2020 provides a cross-cut method for assessing resistance to coating separation. ISO specifically notes that the procedure should not be interpreted as an absolute measurement of adhesion. :contentReference[oaicite:7]{index=7}
These standards can guide an internal procedure, but the company must still define which rating is acceptable for the product and whether additional tests are required.
Do Not Use Dyne Level as a Pass-or-Fail Adhesion Result
A dyne reading can indicate whether a PE or PP surface has reached a target wetting-tension range. It cannot prove that the selected UV ink, primer, and curing process will survive abrasion, washing, flexing, or chemical contact.
When dyne testing is relevant, follow an approved method such as ASTM D2578 and use the result as one process-control input rather than the final product-acceptance test.
Add Tests That Match the Application
| Test | What It Helps Evaluate | Typical Failure Signs |
|---|---|---|
| Tape or cross-cut | Resistance to separation at cut edges and printed areas | Flaking, square removal, edge lifting |
| Dry and wet rub | Resistance to repeated handling and friction | Color transfer, gloss loss, worn image |
| Scratch test | Surface hardness and local film damage | Gouging, delamination, exposed substrate |
| Bend or flex test | Ink-film flexibility on movable products | Cracking, whitening, edge lifting |
| Water or detergent exposure | Performance during washing or wet use | Softening, peeling, staining, reduced gloss |
| Chemical exposure | Resistance to alcohol, oil, cosmetics, or cleaners | Smearing, discoloration, swelling, adhesion loss |
| Outdoor or accelerated exposure | Resistance to light, temperature, and weathering | Fading, chalking, cracking, adhesion change |
A Better Way to Diagnose UV Ink Peeling
When ink peels from plastic, changing lamp power first may hide the real cause. Use the following diagnostic order.
- Check contamination. Repeat cleaning on fresh samples and confirm that the cleaner does not leave residue.
- Check wetting and treatment. Compare untreated, primer-treated, and physically treated samples.
- Check ink and primer compatibility. Confirm technical data sheets and avoid mixing unapproved systems.
- Check curing. Review ink thickness, white layers, speed, lamp condition, and UV settings.
- Check mechanical stress. Determine whether bending, clamping, temperature change, or packaging is causing the film to crack or lift.
- Check batch changes. Compare the failed product with the approved reference sample and material batch.
For bottle and cup applications, Dacen provides separate guidance on improving adhesion on cylindrical UV printing.
Common UV Printing Problems on Plastic
| Problem | Likely Causes | Recommended Checks |
|---|---|---|
| Ink peels during tape testing | Contamination, low wettability, incompatible ink or primer, incomplete curing | Repeat cleaning, compare treatment methods, verify ink system and curing |
| Ink beads or pulls away | Poor wetting, silicone, oil, cleaner residue | Inspect cleaning process and surface treatment before changing print mode |
| Fisheyes or pinholes | Dust, oil, silicone, mold-release agents | Improve part handling, cleaning, storage, and fixture cleanliness |
| Color looks weak on clear plastic | No white underbase or insufficient white density | Add selected white, verify registration, and control total ink thickness |
| Ink cracks when the product bends | Ink too rigid, excessive ink film, excessive curing, high product movement | Evaluate a flexible ink system and reduce unnecessary layer thickness |
| Bottle image does not meet at the seam | Incorrect circumference, product slipping, rotational error, wrong artwork length | Recheck diameter, fixture pressure, rotation calibration, and seam allowance |
| Blurred edges or overspray | Print gap too large, excessive height variation, static electricity | Improve leveling, reduce the safe gap, review high-drop suitability and static control |
| Ink remains tacky | Insufficient curing, excessive ink thickness, incompatible settings | Check lamp condition, speed, layer order, ink limits, and actual ink specification |
| Adhesion changes between batches | New resin formulation, coating, pigment, release agent, or treatment level | Record incoming batches and repeat a defined verification test |
Production Speed and Cost Factors
The fastest printer is not always the lowest-cost production system. Total cost depends on:
- Ink consumption, especially white ink and varnish
- Number of print layers and passes
- Primer or surface-treatment cost
- Fixture design and number of products loaded per cycle
- Operator loading and unloading time
- Rejected parts and rework
- Artwork change frequency
- Cleaning and maintenance time
- Required test and inspection time
Flatbed printing may be efficient when many identical parts can be loaded into a multi-part fixture. A dedicated cylindrical printer is normally easier to evaluate for 360-degree bottle and cup decoration, while a multi-station system may provide more value when loading time is a major production constraint.
UV Printing vs. Pad Printing and Screen Printing
| Method | Best Suited To | Advantages | Main Limitations |
|---|---|---|---|
| UV digital printing | Full-color images, variable data, frequent artwork changes, flat or cylindrical products | Digital workflow, no plate for each design, white and varnish options | Requires substrate testing, suitable fixtures, and adhesion control |
| Pad printing | Small spot-color graphics, recessed areas, complex molded parts | Can reach curved and irregular surfaces | Requires pads, plates, ink preparation, and color-by-color setup |
| Screen printing | Bold graphics, larger ink deposits, repeat orders | Established process for strong spot-color coverage | Screens and setup are required for each design or color |
| Hot stamping or transfer | Foil effects and selected high-repeat applications | Distinct decorative effects and repeatability | Requires heat, pressure, compatible transfers, and tooling |
UV printing is usually worth evaluating when the project requires photographic graphics, multiple colors, short setup time, variable information, white ink, selected varnish, or frequent design changes. Pad or screen printing may remain more economical for highly repetitive, simple spot-color jobs.
An Illustrative Plastic-Cup Evaluation Workflow
Consider a transparent polypropylene cup that produces weak colors and fails the tape test. A controlled evaluation could follow this sequence:
- Confirm the resin and whether the supplier uses a release agent.
- Clean several samples using an approved method and retain an untreated control.
- Compare direct printing, primer, and one validated surface-treatment method.
- Add a controlled white underbase to improve color density on the transparent cup.
- Keep the artwork, fixture, print mode, and UV settings identical across the comparison.
- Condition the samples for the defined period and run the same tape, wet-rub, and detergent tests.
- Approve only the lowest-complexity process that meets the real use requirement.
Dacen's transparent plastic cup samples and bottle printing examples show relevant application formats. Sample photographs demonstrate visual capability, but production durability should still be confirmed through the test process described above.
Information to Prepare Before Requesting a Printer Recommendation
Organize the project information into six groups:
- Material: resin, supplier, part number, color, coating, recycled content, and manufacturing method
- Geometry: product dimensions, printable area, height variation, diameter, taper, handles, seams, and raised features
- Print requirements: artwork, colors, white ink, varnish, texture, print angle, and 360-degree coverage
- Durability: abrasion, washing, bending, chemicals, outdoor exposure, and required test standard
- Production: daily volume, order size, artwork change frequency, loading method, and target cycle time
- Samples: enough physical products for pretreatment, print, curing, and destructive adhesion tests
Frequently Asked Questions
Does UV ink stick to every type of plastic?
A: No. Adhesion depends on the resin, additives, coatings, contamination, ink, primer, treatment, curing, and final use. The actual product must be qualified as a complete process.
Does every plastic need primer before UV printing?
A: No. Some clean acrylic, ABS, PVC, PET, and coated products may meet the required standard without primer. PP, PE, silicone-type materials, and some coated surfaces are more likely to need additional treatment.
Can a UV printer print on polypropylene and polyethylene?
A: Yes, but these plastics are often difficult because of low wettability and formulation differences. Primer, plasma, corona, or controlled flame treatment may be required.
Can I print white ink on transparent plastic?
A: Yes. White ink can be printed beneath CMYK to improve color density, used as a standalone design element, or limited to selected areas.
Which UV printer is suitable for plastic bottles?
A: A cylindrical UV printer is generally the correct starting point for round bottles, cups, tubes, thermos products, and cans. Confirm diameter, printable length, taper, seam requirements, production volume, and ink configuration.
Why does UV ink peel off plastic?
A: The most common causes are contamination, poor wetting, incompatible ink or primer, insufficient or unsuitable treatment, incomplete curing, excessive ink thickness, or mechanical stress.
Is UV printing on plastic waterproof?
A: A cured UV print may resist ordinary water exposure, but "waterproof," "dishwasher-safe," and "chemical-resistant" are product-level claims. They require defined tests for water temperature, exposure time, detergent, abrasion, substrate, and intended use.
Should each material batch be tested?
A: A full qualification test may not be required for every production lot, but a defined incoming-material verification is advisable when the supplier, resin, color, coating, molding process, primer, ink, or treatment condition changes.
Final Recommendation
Successful UV printing on plastic depends on four connected decisions: identify the material, select the simplest treatment that meets the requirement, match the printer and fixture to the product geometry, and verify the result with repeatable tests.
For flat sheets, panels, cases, and fixture-held components, begin with a flatbed printer assessment. For bottles, cups, tubes, and other rotating products, evaluate a dedicated cylindrical system. Raised or irregular products may require high-drop technology or a customized fixture.
Before choosing a machine, provide the material information, product dimensions, artwork, required durability, production volume, and physical samples. You can contact Dacen for a plastic printing assessment so that the printer, ink configuration, fixture, pretreatment, and sample-test plan can be evaluated together.