Digital cylinder printing is a direct-to-object technology that prints full-color graphics straight onto round products such as stainless steel tumblers, glass bottles, candle jars, cosmetic tubes, and plastic containers, with no plates and no screens.
This guide covers how the process works, how it compares with screen printing and pad printing, how to match machines and inks to each substrate, how to prepare artwork for curved surfaces, what a digital cylinder printer actually costs to buy and to run year after year, and how to keep one producing reliably.
How Digital Cylinder Printing Works
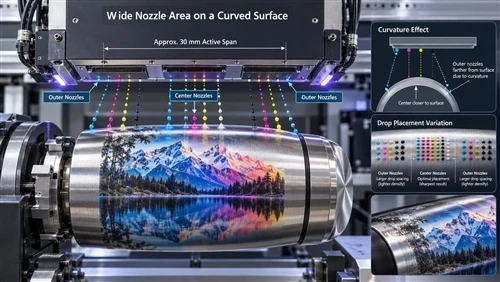
The product is mounted on a precision rotary attachment. As the item turns at a controlled speed, the print head travels across the surface and fires ink in synchronization with the rotation angle. That mechanical coordination is what keeps the image aligned all the way around the circumference without stretching, banding, or a visible seam where the artwork closes.

On a UV system, LED lamps cure the ink within milliseconds of it landing, so layers can be stacked immediately. A typical build order on a dark tumbler is primer, white underbase, CMYK, then varnish, all in a single pass sequence without removing the part from the fixture.
Because the image comes from a file rather than a plate, every single unit can carry a different design. That single fact drives most of the economics discussed later in this guide.
Digital Cylinder Printing vs Pad Printing vs Screen Printing
Pad printing handles simple one or two color logos on small runs cheaply, but each color needs a plate and photographic detail is out of reach. Screen printing lays down a thick, chemically resistant ink film and is extremely fast once running, but every color needs its own screen plus registration between layers. Digital removes tooling entirely.

| Factor | Digital Cylinder Printing | Screen Printing on Bottles |
|---|---|---|
| Image transfer | Direct inkjet onto rotating part | Ink pushed through a mesh screen |
| Setup | Load file, load part | Screen making, color mixing, registration |
| Design changes | Instant | New screens required |
| Economic volume | 1 to roughly 2,000 units | 2,000 units and above |
| Color capability | CMYK plus white and varnish, gradients, photos | Spot colors, limited by screen count |
| Variable data | Native | Impractical |
| Ink film thickness | Thin, relies on primer and varnish | Thick, inherently durable |
The honest summary: digital optimizes for flexibility, screen printing optimizes for repetition. Most US shops that serve corporate gifting, e-commerce personalization, or sampling end up digital. Beverage lines running one label design across a million bottles stay with screen or ceramic decoration.
Matching Machine and Ink to Your Substrate
Three variables decide the specification: material, volume, and required durability. Get any one of them wrong and the machine either underperforms or is oversized for the work.
UV-LED is the dominant technology for cylindrical work. It cures instantly, prints on almost anything with the right preparation, and supports white and varnish channels. Solvent systems still make sense for flexible plastics and outdoor exposure but need ventilation and drying time. Sublimation gives a smooth embedded look on polyester-coated blanks only, and cannot touch bare metal, glass, or ceramic.
| Substrate | Recommended Technology | Preparation Notes |
|---|---|---|
| Stainless steel tumbler | UV-LED | Degrease, then primer for dishwasher-grade adhesion |
| Glass bottle | UV-LED | Flame or primer treatment strongly improves bond |
| PET / PP / HDPE bottle | UV-LED | Low surface energy plastics need plasma or corona treatment |
| Silicone bottle | UV-LED plus surface treatment | Specialty primer, expect adhesion testing |
| Ceramic mug or jar | UV-LED or sublimation | Depends on coating and whether the piece is dishwasher rated |
| Powder-coated drinkware | UV-LED | Usually excellent adhesion with no primer |
Ink Safety and Food Contact
For drinkware and beverage packaging, compliance is judged on the finished product, not the ink alone. US manufacturers should verify whether the ink system is supported for the relevant FDA 21 CFR food-contact provisions, whether the cure is complete, and critically whether the printed area contacts the consumable at all. Most drinkware decoration sits on the exterior below the lip line, which changes the risk profile entirely. Ask suppliers for migration test data rather than a marketing claim, and consider low-VOC inks for workplace air quality.
Tapered and Irregular Shapes
A standard rotary axis assumes constant diameter. Wine glasses, tapered candle jars, and conical tumblers change circumference along the print area, so the surface speed under the head varies. Solving this requires a rotary system that adjusts rotation speed by diameter, tilting fixtures that keep the printed band perpendicular to the head, or software taper compensation. If tapered parts are more than a small share of your work, make them part of the sample test before purchase. A bottle UV cylinder printer with quick-change tooling and custom fixtures will pay for itself in changeover time alone.
Artwork Preparation and Production Workflow
Most print defects trace back to file preparation, not the machine. Curved surfaces distort artwork that was designed flat, and color drifts if nothing is managed.
Six Steps From File to First Good Part
- Measure the part. Record diameter, circumference, printable height, and the wrap start point. Circumference, not width, defines the canvas.
- Build the file to the developed circumference in Illustrator or Photoshop, leaving a bleed or a deliberate gap where the image closes.
- Apply taper or distortion compensation in the RIP software if the part is not a true cylinder.
- Assign spot colors. Pantone matching matters most on corporate logos that must look identical across thousands of units and multiple reorders.
- Calibrate the hardware. Check print head alignment, rotary speed, head height, and fixture grip before any production run.
- Run a test part and validate three things: color against the approved proof, image position and closure, and adhesion by tape and abrasion test. Only then release the run.
Fixtures and Semi-Automation
Custom fixtures are where real throughput is won. A shop running six tumbler sizes should invest in adjustable holders rather than machining six dedicated jigs. For most small and mid-sized US facilities, a semi-automated setup with manual loading plus automated rotary printing gives the best return. Full automation only earns its keep when a single design runs long enough that operators become the bottleneck. A multi-station cylindrical products inkjet printer is the usual middle path, letting one operator load one station while another prints.
Understanding Real Throughput
Quoted cycle times such as 15 seconds per bottle describe printing only. Real output includes loading, unloading, and occasional cleaning. A machine quoted at 15 seconds realistically yields 120 to 180 pieces per hour with one operator, and roughly double that on a multi-station frame. Build quotes on measured output, never on the spec sheet number.
How Much Does a Digital Cylinder Printer Cost to Own
Purchase Price
Entry-level desktop cylinder UV printers generally run $10,000 to $30,000, suitable for customization shops, Etsy-scale sellers, and startup drinkware brands. Mid-range commercial systems with white and varnish channels, servo-driven rotary axes, and larger diameter capacity land between $30,000 and $80,000. Industrial multi-station and automated lines exceed $100,000.
Annual Maintenance and Consumables
The purchase price is the smaller half of the story. Printheads, ink, cleaning chemistry, and wear parts define the operating budget.
| Component | Typical Cost (USD) | Replacement Interval | Notes |
|---|---|---|---|
| Printhead | $800 - $2,500 each | 12 - 36 months | Lifespan tracks cleaning discipline and ink quality more than machine hours |
| UV ink | $80 - $250 per liter | Ongoing | White ink consumption on dark parts is the usual budget surprise |
| Cleaning solution | $30 - $100 per bottle | Monthly | Required for flushing and nozzle recovery |
| Wiper blade | $20 - $150 | 3 - 12 months | Cheap part, prevents expensive nozzle damage |
| Damper and filter | $50 - $300 | 6 - 18 months | Keeps contamination away from the head |
| Waste ink tank | $50 - $200 | 6 - 24 months | Disposal fees vary by state and county |
| Rollers and mechanical parts | $100 - $800 | 1 - 3 years | Scales with production intensity |
Realistic annual budgets for a single machine: $2,000 to $5,000 for low volume, $5,000 to $10,000 for steady commercial production, and $10,000 or more for high-volume industrial use.
The Costs Buyers Forget
Downtime is usually the largest hidden expense. A shop generating $100 per production hour that loses 20 hours a year has already given up $2,000 before any parts are purchased. High-volume operations can lose that in a single morning.
Idle cleaning is the second. Every digital cylinder printer runs automatic flushing and circulation cycles to protect the head, and those cycles consume ink, solution, electricity, and waste tank capacity whether or not anything is sold. A machine left idle for several weeks can burn hundreds of dollars in ink producing nothing.
Cost Per Unit: Digital Cylinder Printing vs Screen Printing on Bottles
Which method is cheaper depends almost entirely on run length. These are indicative US market ranges for decorated bottles, excluding the blank.
| Order Quantity | Digital Cylinder Printing | Screen Printing on Bottles |
|---|
| 100 units | $2 - $8 per unit | $5 - $15 per unit |
| 1,000 units | $1 - $3 per unit | $0.50 - $2 per unit |
| 10,000 units | $0.80 - $2 per unit | $0.20 - $0.80 per unit |
Digital wins at 100 because there are no screens, no color separations, no setup waste, and no minimum. The crossover typically sits somewhere between 1,000 and 3,000 units for a simple design, and moves higher as the artwork gets more complex, because every added color costs screen printing another screen while costing digital nothing.
One example worth keeping in mind. A promotional supplier running 40 different corporate designs of 50 bottles each is doing 2,000 units of work. On screen printing that is 40 separate setups. On digital it is 40 file loads. The unit cost table does not capture that difference, but the P&L does.
When Digital Is the Wrong Answer
Buy screen printing capacity instead if you run a small number of designs at very high volume, if your customers demand a heavy tactile ink film, or if your parts are irregular enough that no rotary fixture holds them repeatably. Being clear about this before purchase prevents an expensive idle asset.
Print Quality: Curves, Color, and Adhesion
On curved surfaces, a well-calibrated rotary system holds constant head-to-surface distance, which is what produces sharp small text, clean logo edges, smooth gradients, and scannable QR codes all the way around. Screen printing can match this on straight-walled bottles, but tapered shapes introduce stretching and registration error.
Color is where digital separates itself. Photographic images, fine gradients, and personalized graphics are native to CMYK inkjet and awkward for screen. White underbase on dark bottles is a standard digital capability: a white layer goes down first, then color prints on top, giving vibrant graphics on black powder-coated steel. Screen printing can do the same but needs an additional screen and pass.
Durability depends on the whole system rather than the ink alone. UV-cured inks combined with the correct primer, flame or plasma treatment, and a protective varnish will pass repeated dishwasher cycles and abrasion testing. Specify how you will verify it, for example a defined ASTM abrasion method plus a set number of dishwasher cycles, and require the supplier to print samples on your actual blanks before you buy anything.
Maintenance, Troubleshooting, and Longevity
Daily and Weekly Routine
- Nozzle check print at the start of every shift
- Print head cleaning per the manufacturer schedule, not more and not less
- Ink circulation and level inspection
- Rotary attachment calibration check
- Surface cleaning of parts before printing
- Correct shutdown procedure, including capping
Three Problems That Cause Most Service Calls
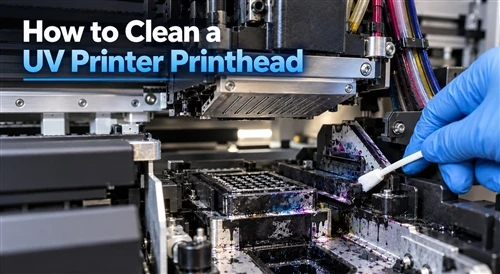
Nozzle clogging. Caused by skipped cleaning cycles, dried ink, poor ink storage, or long idle periods. Prevention is scheduling, not skill.
Image misalignment. Almost always rotary calibration, a fixture that shifts under load, or inconsistent part seating. Check the fixture before blaming the software.
Poor adhesion. Contaminated surfaces, skipped primer, incomplete cure, or an ink and substrate mismatch. Handle blanks with gloves and validate every new substrate before running it in production.
Five Ways to Reduce Maintenance Spend
- Train operators properly. Daily checks, approved cleaning only, error logging. Documented training typically cuts avoidable service calls by 20 to 40 percent.
- Choose preventive over reactive. Replacing a $60 wiper on schedule is cheaper than a $1,800 head.
- Evaluate extended warranty against reality. It pays when the machine uses expensive heads, production is continuous, or local service is thin. It rarely pays for a seasonal low-volume shop.
- Use OEM parts on critical components. Third-party consumables can be reasonable for wipers and cleaning fluid, but off-spec ink and dampers damage heads and electronics.
- Manage idle and environment. Avoid long dormant periods, keep the room temperature stable, and configure standby schedules so cleaning cycles are protective rather than wasteful.
Regarding used equipment: the head is the asset, and its remaining life is invisible from the outside. If you buy secondhand, insist on a current nozzle check print, the maintenance log, and an idea of total ink volume passed through the system.
Where Digital Cylinder Printing Is Heading
Three developments matter for buyers planning a five-year horizon. AI-assisted color management is starting to automate profile adjustment and compensate for batch variation in blanks, reducing the operator expertise needed for consistent output. Hybrid lines are integrating cylinder printers with automated loading, inspection, and packing rather than treating them as standalone islands. And ink chemistry keeps moving toward lower VOC and more sustainable formulations, driven by both EPA-aligned waste requirements and customer procurement policies. None of these changes the buying decision today, but they favor machines with open software and upgradeable stations.
Choosing the Right Setup for Your Business
There is no universal winner. Choose digital cylinder printing when you need customization, short runs, fast sampling, variable data, or photographic artwork. Choose screen printing when you produce thousands of identical bottles and unit cost is the only metric that matters. Many established decorators run both and route each job to the cheaper process.
Before committing capital, send real production samples to the supplier and have them printed on the actual machine you are considering. Test adhesion the way your customers will abuse the product. Ask for a maintenance cost estimate built on your projected volume, a recommended spare parts list, and a written training plan. A supplier who cannot produce those three documents is selling a box, not a production solution.
Frequently Asked Questions
What is digital cylinder printing?
It is a direct-to-object inkjet process that prints digital artwork onto round products while a rotary attachment turns them under the print head. No plates or screens are required, so full-color images and one-off personalized designs are produced at the same cost per unit.
Which printer and ink work best for stainless steel tumblers and glass bottles?
UV-LED cylinder printers with CMYK plus white and varnish channels are the versatile default. UV inks bond well to both substrates when combined with cleaning and the correct primer or flame treatment.
How do I prepare artwork so it does not distort on a curved surface?
Build the file to the developed circumference rather than the visible width, apply taper compensation in the RIP software for non-cylindrical parts, use Pantone spot colors for brand logos, and always validate with a test part before the run.
What does a digital cylinder printer cost?
Entry-level systems run roughly $10,000 to $30,000, mid-range commercial machines $30,000 to $80,000, and industrial automated lines above $100,000. Budget separately for annual running costs.
What are typical maintenance costs?
Most shops spend $200 to $800 per month on routine maintenance. Annual totals commonly land between $2,000 and $10,000 or more, before counting downtime and idle cleaning consumption.
How much do printheads cost and how long do they last?
Printheads typically cost $800 to $2,500 each and last one to three years. Cleaning discipline, ink quality, and avoiding long idle periods influence lifespan more than total print hours.
At what order quantity does screen printing become cheaper?
The crossover usually falls between 1,000 and 3,000 identical units for a simple design. Complex multi-color artwork and frequent design changes push the crossover point substantially higher in favor of digital.
Can these machines print tapered items like wine glasses?
Yes, with a rotary system that varies speed according to changing diameter, or with software taper compensation. Confirm this with sample prints on your own parts before purchasing.
Are the inks food safe under FDA rules?
Some ink systems are formulated for food-related applications, but compliance depends on the full system including cure completeness and whether the printed area contacts the consumable. Request migration test documentation for the specific ink and substrate.
Can a small shop handle maintenance in house?
Operators can and should handle daily cleaning, nozzle checks, and inspection. Printhead replacement, electrical repair, and precision calibration are best left to trained technicians.