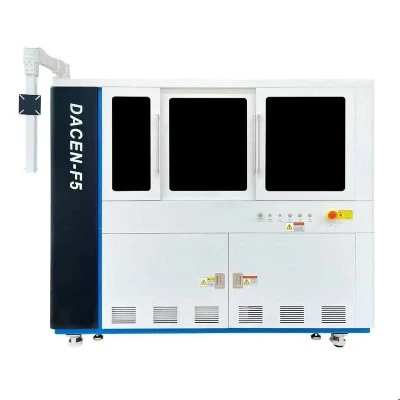


Digital printing on glass lets manufacturers put photographic images, gradients, logos and variable data straight onto a glass panel without screens or plates. This guide covers the whole production chain in one place: how UV inkjet and ceramic frit processes differ, which inks and primers actually bond to glass, how to clean and pretreat the surface, how to set up white ink and RIP files, what outdoor durability really looks like in numbers, how much it costs per square foot, and when screen printing is still the cheaper answer. It is written for glass processors, print shop owners, architects and procurement teams who need specifications rather than marketing claims.
What Is Digitally Printed Glass?
Digitally printed glass is glass decorated by an inkjet system that deposits ink droplets directly onto the substrate from a digital file. There are no screens, no color separations and no tooling. Two ink families dominate: UV-curable organic inks, which sit on the glass as a cured polymer film, and ceramic frit inks, which are fired into the glass surface during tempering and become part of the glass itself.
Typical end products include shower doors, kitchen backsplashes, office partitions, retail displays, furniture panels, elevator cladding, spandrel glass and curtain wall facades. The choice of process is driven by three questions: how many pieces, how long it must last outdoors, and how complex the artwork is.
Digital Glass Printing Methods: UV Flatbed vs Ceramic Frit vs Screen

1. Direct UV Flatbed Printing
A UV flatbed printer uses piezoelectric printheads to jet UV-curable ink onto the glass, with LED or mercury lamps curing each pass almost instantly. Because curing is immediate, ink does not spread on the non-porous surface and fine detail holds.
The production sequence is:
- Inspect the glass for scratches, edge chips and coating damage
- Clean and degrease the printing surface
- Apply primer or adhesion promoter if the ink system requires it
- Position the panel on the vacuum table and set origin
- Print white base, then CMYK, then optional varnish
- Cure layer by layer under UV
- Apply protective coating or laminate if the application demands it
Typical machine specifications:
| Parameter | Typical range |
|---|---|
| Print resolution | 600–1440 dpi |
| Minimum line width | 0.1–0.3 mm, ink and substrate dependent |
| Glass thickness | 2–25 mm |
| Entry-level bed size | 600 × 900 mm |
| Production bed size | 1.2 × 2.4 m to 2.5 × 1.3 m |
| Industrial bed size | 2 × 3 m and above |
| White ink layers | 1–5 passes depending on opacity target |
| Curing | UV LED, instant, layer by layer |
Strengths: no tooling cost, same-day setup, unlimited color and variable data, economical from a single piece. Limits: the cured film sits on the surface, so exposed exterior work needs primer plus a protective coating, and most UV inks cannot survive a tempering furnace.
2. Ceramic Frit Digital Printing
Ceramic inks carry inorganic pigments suspended in finely milled glass frit. The panel is printed flat, dried, then run through a tempering furnace at roughly 600–750°C. The frit melts, the pigment embeds into the softened glass surface, and the controlled cooling cycle produces safety-grade tempered glass in the same pass.
Strengths: the decoration becomes part of the glass, giving outstanding UV, chemical and abrasion resistance suitable for facades, curtain walls, spandrels and automotive glazing. Limits: higher capital cost, printing must happen before tempering, and the design cannot be altered after firing. Color gamut is narrower than UV inkjet, and small custom runs carry disproportionate furnace cost.
3. Screen Printing and Digital Transfer
Screen printing pushes ink through a prepared mesh, one screen per color. Screen preparation takes several hours to two days, but once running, output reaches 100–1,000+ pieces per hour with extremely dense ink deposits. It remains the right tool for high-volume, few-color work such as bottles, glassware, warning marks and safety signage. Digital transfer films occupy a middle ground for shaped or curved parts that a flatbed cannot reach.
Method Comparison at a Glance
| Criterion | UV inkjet | Ceramic frit | Screen printing |
|---|---|---|---|
| Setup time | 15–60 minutes | Moderate, furnace scheduled | 4–48 hours |
| Effective resolution | 600–1440 dpi | Good, gamut limited | ~100–300 dpi equivalent |
| Photos and gradients | Excellent | Good | Poor to moderate |
| Solid color density | Good | Very good | Excellent |
| Outdoor durability | Medium to high with coating | Very high | High with ceramic ink |
| Heat resistance | Limited | Excellent | Ink dependent |
| Economical run size | 1–500 pieces | Architectural batches | 500+ pieces |
| Best fit | Custom and interior work | Facades and exteriors | Mass production |
How to Choose a Glass Printer
Bed size is the obvious spec, but it is rarely the one that causes regret. When comparing a glass printing machine, evaluate:
- Maximum media thickness and table load - glass is heavy; the frame must not deflect under a 15 mm panel
- Vacuum zoning - segmented suction holds small panels without masking the whole bed
- Printhead technology and channel count - a dedicated white channel with circulation is non-negotiable for glass
- White ink circulation and stirring - titanium dioxide settles fast; static ink lines mean nozzle loss
- Anti-static and anti-collision systems - dry rooms attract dust to glass, and a head strike on glass is expensive
- Height adjustment and edge support for oversized or uneven panels
- RIP software, ICC profiling and linearization support
- Installation, operator training, spare parts lead time and local service coverage
For workshops starting out, a small format UV printer keeps the entry investment low and recovers cost quickly on samples and short runs, while production shops usually move to a 2513 UV flatbed printer class machine for architectural panel sizes. Cylindrical work such as bottles and drinkware needs a separate bottle and glass cylinder printer rather than a flatbed.
Inks and How They Actually Bond to Glass
Glass is chemically stable, perfectly smooth and non-porous - three properties that make adhesion difficult. Ink bonds through two mechanisms: mechanical keying into microscopic surface texture, and chemical bonding between the ink resin and a treated or primed surface.
UV-Curable Inks
Photopolymer monomers crosslink under UV light within milliseconds. Advantages are fast curing, high color density, low VOC emission and compatibility with varnish and 3D relief effects. A full UV set for glass normally includes CMYK, opaque white, clear varnish and a primer or adhesion promoter. These inks are the standard choice for interior decorative glass, partitions, shower doors and retail work.
Ceramic Frit Inks
Inorganic pigment plus glass powder. During firing the frit melts, the pigment sinks into the softened surface and the printed layer becomes structurally integrated. This is why ceramic decoration survives decades of facade exposure while an unprotected organic film may not.
Solvent and Hybrid Inks
Good adhesion and flexibility, but they demand stronger surface preparation, additional primer layers, and proper ventilation and VOC management.
White Ink Strategy for Transparent Glass
Because glass transmits light, CMYK alone looks washed out. White ink controls opacity, contrast and how the panel behaves when backlit.
Underbase white (front-viewed panels): Glass → white → CMYK → optional varnish. This maximizes brightness and contrast on clear glass.
Second surface printing (viewed through the glass): Glass → mirrored CMYK → white backing. The glass itself protects the ink film from cleaning chemicals and abrasion, which is why this layout dominates architectural and shower door work.
Backlit panels: multiple controlled white layers at reduced opacity produce even diffusion instead of hot spots.
Practical starting points:
| Setting | Starting value |
|---|---|
| White opacity | 80–100% depending on transmission target |
| White passes, light decorative | 1 layer |
| White passes, standard decorative | 2–3 layers |
| White passes, high-opacity architectural | 4–5 layers |
| White-to-color trapping overlap | 0.1–0.3 mm |
| Dot coverage adjustment | 70–100% |
White ink discipline matters more than white ink settings: keep circulation running, agitate before production, check nozzles at every shift start, and hold the ink at stable temperature.
Glass Surface Preparation: Step-by-Step
Most adhesion failures trace back to preparation, not to ink. A fingerprint, a trace of silicone from a nearby release agent, or residue from protective film is enough to cause peeling weeks later.

Step 1: Classify the Contamination
Light contamination - dust, fingerprints, water marks, handling residue. Heavy contamination - machine oil, silicone, release agents, adhesive or film residue.
Step 2: Wash and Degrease
For light contamination: wash with a neutral detergent at 1–5% concentration using a lint-free pad, rinse with deionized water (tap water leaves mineral deposits), then dry with filtered oil-free compressed air at roughly 0.2–0.5 MPa.
For heavy contamination, follow with a solvent wipe:
- Apply 90–99% isopropyl alcohol to the wipe, never flood the glass
- Wipe in one direction only - circular motion redistributes contaminants
- Repeat two to three times with a fresh wipe each pass
- Use citrus degreasers, petroleum ether or hexane-based cleaners only for stubborn silicone, under proper ventilation and PPE
- Always finish with a finishing IPA wipe to remove solvent residue
Where thermal drying is used in production, 50–100°C for 10–30 minutes is typical. Avoid uneven heating on thin or tempered glass.
Step 3: Activate the Surface
| Method | Typical parameters | Best for | Limitation |
|---|---|---|---|
| Mechanical abrasion | 400–800 grit, wet sanding, cross strokes | Decorative glass | Visible scratching risk |
| Chemical etching | HF or fluoride chemistry | Industrial adhesion | Severe safety burden |
| Plasma | ~50–300 W, 10–100 mm/s traverse | Repeatable production | Equipment investment |
| Corona | Target above ~40 dyn/cm surface energy | Large flat panels | Weak on complex shapes |
| Flame | Short passes, controlled distance | Industrial coating lines | Thermal stress risk |
Hydrofluoric acid deserves a specific warning: it causes deep chemical burns and systemic toxicity. Small workshops should not use it without licensed handling, ventilation, emergency protocols and compliant waste disposal.
Step 4: Apply Primer or Silane Adhesion Promoter
Silane coupling agents form a chemical bridge between the silica surface and the ink resin. Methacrylate-functional silanes generally pair with acrylic and UV-curable systems; amino-functional silanes suit epoxy and polyurethane chemistries.
- Concentration: 0.5–2% by volume in ethanol, IPA, or an alcohol/water mix
- Application: wipe, spray or dip in a thin uniform film
- Flash off: 10–30 minutes at room temperature
- Optional cure: 80–120°C for 5–15 minutes
Always follow the primer manufacturer's technical data sheet, and always run a compatibility test with your actual production ink. A primer that performs on soda-lime float glass can fail on a coated or low-iron panel because the surface chemistry differs.
File Setup, Color Management and RIP Settings
Recommended formats are PDF/X-4, TIFF, AI, EPS or layered PSD. Resolution should follow viewing distance rather than defaulting to maximum:
- Viewing distance under 1 m: 150–300 dpi
- Medium distance interior panels: 100–150 dpi
- Building facade graphics: 50–100 dpi
Build white as a dedicated spot channel, mask or vector path - never rely on "transparent means no white." Then set trapping, preview the separation in RIP, and proof before committing glass.
RIP starting parameters for glass:
- Total ink limit: 250–300%
- Pass mode: 8–16 passes for quality output
- Dot gain compensation: 5–15%
- Linearization: mandatory before any ICC profile is built
- Gray balance: verified through the profile, not by eye
The most common file errors are RGB artwork sent without conversion, missing white channels, low-resolution enlargement, and hairlines below the printer's minimum reproducible width.
Substrate Compatibility and the Tempering Question
| Glass type | Typical use | Printing consideration |
|---|---|---|
| Annealed float | Furniture, interior decor | Easiest substrate, print before further processing |
| Tempered | Doors, partitions, backsplashes | Ceramic ink before tempering; UV ink after |
| Laminated | Safety and security glazing | Print can be encapsulated between plies |
| Low-iron | Premium displays, showcases | Higher transmission demands tighter white control |
| Body-tinted or colored | Decorative projects | Requires heavier white underbase |
| Coated / low-E | Performance glazing | Coating compatibility test mandatory |
| Curved | Feature and automotive glass | Custom fixtures, avoid point loading |
Print Before or After Tempering?
Before tempering is required for ceramic frit work. The firing cycle is what bonds the ink, and the result is permanent chemical and weather resistance. The risk is that an incompatible ink or excessive deposit thickness can shift color or crack during the temperature curve.
After tempering is standard for UV printing on interior decorative glass. Customization is easy and the furnace never touches the ink, but the print relies on primer and coating for its durability rather than on fusion.
Either way, run adhesion and heat compatibility tests on sample panels before releasing a production order.
Curing, Firing and Common Defects
For UV systems, cure quality depends on lamp intensity, exposure time, ink film thickness and lamp age. Undercured ink looks finished but scratches easily and peels at the tape test. For ceramic systems, firing profile and airflow management control both color and stress.
| Defect | Likely cause | Corrective action |
|---|---|---|
| Ink peeling | Contamination, wrong primer, undercure | Rework cleaning, verify UV output, retest adhesion |
| Cracking after tempering | Excess ink thickness, wrong firing curve | Reduce deposit, adjust furnace profile |
| Color shift between batches | Wrong ICC profile, aging heads, drift | Relinearize and recalibrate, service heads |
| Banding | Nozzle dropout, feed error | Nozzle check and purge, verify pass mode |
| Edge lifting | Moisture ingress at the perimeter | Apply edge sealing, revise installation detail |
| Dust inclusions | Static, dry room air | Anti-static system, clean immediately before print |
Production Environment, Fixturing and Handling
Stable conditions for UV glass printing are 18–24°C and 30–50% relative humidity. High humidity causes condensation on cold glass and ink spread; dry air causes static and dust attraction. Let glass equalize to room temperature before printing rather than pulling panels straight from a cold warehouse.
For positioning, use vacuum fixtures, soft silicone supports and non-marking clamps, and keep contact away from the printing area. For repeat jobs, CNC-cut acrylic registration templates give repeatable placement without automation. Masking should use low-tack, UV-resistant film - cheap tape leaves silicone or acrylic residue that destroys adhesion. Operators handle panels with powder-free gloves and keep prepared glass covered until it goes on the bed.
How Long Does Printed Glass Last Outdoors?
Service life is judged by color retention, adhesion stability and surface integrity, not by years alone. Under controlled manufacturing, ceramic frit architectural glass commonly holds performance for 15–30 years. UV-cured systems, properly primed and protected, typically deliver 5–15 years outdoors depending on exposure and coating.
| US climate zone | Dominant stress | Ceramic frit | Protected UV print |
|---|---|---|---|
| Southwest (AZ, NV, NM) | Extreme UV, thermal swing | 20+ years | 5–10 years before visible fade |
| Pacific Northwest (WA, OR) | Moisture, humidity | 15–25 years | Depends on edge sealing |
| Northeast | Freeze-thaw cycling | 15–30 years | Adhesion-limited |
| Coastal | Salt spray, corrosion | High, with sealed edges | Requires corrosion-grade coating |
UV Fade Testing and What ΔE Numbers Mean
"UV resistant" means nothing without a test report. Standard methods are xenon arc exposure (ASTM G155), UV fluorescent lamp with condensation cycling (ASTM G154), and real outdoor exposure racks. Color change is reported as ΔE under CIELAB or CIEDE2000:
- ΔE below 1 - no visible difference
- ΔE 1–3 - minor change, generally acceptable architecturally
- ΔE 3–5 - noticeable difference
- ΔE above 5 - obvious fading
A credible claim reads like "ΔE below 3 after 2,000 hours xenon arc per ASTM G155." Ask for the standard, irradiance, chamber temperature and humidity, the initial and final measurements, and the accepted ΔE limit. Accelerated hours do not convert cleanly into outdoor years - climate, orientation and mounting height all shift the ratio.
Adhesion, Thermal Cycling and Protection
Delamination usually comes from poor cleaning, silicone contamination, incompatible coatings, undercured ink or moisture entering printed edges. Thermal expansion adds stress at the ink-glass interface with every day-night cycle. Verify with:
- Cross-hatch adhesion, ASTM D3359, rated 5B (excellent) to 0B (total failure)
- Taber abrasion, ASTM D4060
- Thermal cycling per ASTM C1241, plus freeze-thaw exposure
- Heat aging at 70°C for 24–72 hours
- Humidity and salt spray exposure for coastal work
Protection options, in ascending order of cost and effectiveness: clear hardened topcoat, sol-gel or silane inorganic coating (adds scratch and chemical resistance while keeping optical clarity), second surface printing, and full lamination between glass plies for maximum protection.
Cost, Lead Times and the Digital vs Screen Break-Even
Printing cost is driven by panel size, ink coverage, number of white layers, process choice and finishing.
| Application | Process | Indicative cost |
|---|---|---|
| Simple single-color decorative glass | UV inkjet | $10–30 / sq ft |
| Full-color graphics with white underbase | UV inkjet | $20–50 / sq ft |
| Architectural exterior panels | Ceramic frit | $30–80+ / sq ft |
Per-Piece Comparison
| Quantity | Digital printing | Screen printing |
|---|---|---|
| 12 pieces | $20–40 each | $80–150 each |
| 50 pieces | $15–30 each | $30–70 each |
| 200 pieces | $10–25 each | $15–30 each |
| 1,000 pieces | $8–18 each | $3–10 each |
Worked Break-Even Example
Assume screen preparation costs $300 and color separation $200, for $500 fixed tooling. Screen printing then runs $6 per piece, while digital flatbed printing runs $15 per piece with no tooling.
Break-even = $500 ÷ ($15 − $6) ≈ 56 pieces
In practice: below roughly 50 pieces digital wins outright; above 500–1,000 pieces screen printing wins decisively; and anywhere in between, artwork complexity decides. If the design contains photographs, gradients or per-piece variable data, digital can stay competitive well past the arithmetic break-even because screen printing simply cannot reproduce it.
Typical Lead Times
- Sample panels: 3–7 days
- Interior decorative production: 2–4 weeks
- Architectural ceramic projects including processing: 3–5 weeks
Two Project Examples
Kitchen Backsplash, Residential
Specification: 6 mm tempered low-iron glass, second surface UV print with three white layers, edge polished, silicone-mounted. Because the image sits behind the glass, cleaning chemicals never touch the ink. Sample approval in one week, production in two to four weeks. Cost lands in the $20–50 per square foot band because of the white build.
500 sq ft Office Partition, Commercial
Specification: 10 mm tempered glass with a company pattern in ceramic frit, printed before tempering so the decoration survives daily cleaning and cannot be scratched off. Fifteen identical panels plus two door leaves. Ceramic is the right call not because of weather but because of abrasion and cleaning-chemical exposure over a ten-year lease. Expect three to five weeks including glass processing and installation preparation.
Installation and Maintenance
Common mounting methods are structural silicone, mechanical brackets, glass clamps and laminated embedment. Custom cutting, drilling, curved shapes and oversized panels all add processing cost - specify holes and cutouts before printing, never after.
For maintenance, clean two to four times a year in normal environments and more often in coastal, industrial or high-dust locations. Use soft microfiber cloths, neutral pH cleaner and clean water. Avoid strong alkaline cleaners, ammonia on sensitive coatings, abrasive pads, steel wool and unapproved solvents. On exterior installations, inspect edges and sealant annually; edge failure precedes visible print failure by years.
Safety and Compliance
Solvents, primers and UV inks require adequate ventilation, chemical-resistant gloves, eye protection and trained handling. US operations should follow applicable OSHA requirements for chemical exposure, ventilation and hazardous waste, and keep an accessible SDS file. California and similar jurisdictions increasingly favor low-VOC ink and coating systems, which is worth confirming at the specification stage rather than at delivery.
Supplier Evaluation Checklist
Before approving a glass printing supplier or a machine purchase, request:
- UV weathering report with standard, hours and ΔE limit
- Cross-hatch adhesion results on your exact glass type
- Thermal cycling and, for coastal work, salt spray data
- Abrasion and graffiti-removal test procedure and results
- Written cleaning instructions and maintenance schedule
- Warranty terms with exclusions stated in full
- Printed sample panels on your substrate, not on a demo sheet
When requesting a quotation, supply glass size and thickness, glass type, quantity, indoor or outdoor exposure, project location and orientation, expected service life, and production-ready artwork. A capable supplier can normally return a process recommendation and initial pricing within 48 hours.
Summary
Choose UV flatbed glass printing for interior, custom, photographic and short-run work where flexibility and turnaround matter. Choose ceramic frit for exterior architecture and anywhere the decoration must outlive the ink. Choose screen printing when thousands of identical, few-color pieces are the whole job. Whichever route you take, the two variables that most often decide success are surface preparation and verified adhesion testing - not the printer on the spec sheet.
FAQ
What are the main methods for printing directly on glass?
UV inkjet printing, ceramic frit printing and screen printing. UV inkjet gives the widest color range and fastest customization, ceramic frit fuses the image into the glass during tempering for maximum durability, and screen printing delivers the lowest unit cost on large identical runs.
How durable is digitally printed glass outdoors?
Ceramic frit printing commonly holds up for 20–30 years. UV-cured printing typically achieves 5–15 years outdoors and needs primer plus a protective coating, second surface printing or lamination in high-UV regions such as the US Southwest.
Can UV printed glass be tempered after printing?
Generally no. Most UV inks cannot survive furnace temperatures without color shift or adhesion loss, so UV printing is done after tempering. Ceramic frit inks are the opposite: they are printed before tempering and the firing cycle is what bonds them.
Why do I need white ink on glass?
Glass transmits light, so CMYK alone appears weak and washed out. A white underbase provides opacity and contrast; for backlit panels, several controlled white layers give even diffusion instead of hot spots.
How many white layers should I print?
One layer for light decorative effects, two to three for standard decorative glass, and four to five for high-opacity architectural work. Set trapping overlap between white and color at 0.1–0.3 mm.
How should I clean glass before printing?
Remove dust with filtered air, wash with a 1–5% neutral detergent if contamination is light, rinse with deionized water, wipe with 90–99% IPA in one direction using fresh lint-free wipes, use stronger degreasers only for oil or silicone, and always finish with IPA before drying completely.
When should I use plasma or corona treatment instead of abrasion?
Use plasma or corona when you need clean, repeatable adhesion improvement without altering appearance - the right choice for production lines and optical-quality panels. Mechanical abrasion suits decorative glass where slight texture is acceptable. Chemical etching is an industrial-only option with serious safety requirements.
Which primer works with UV-curable inks on glass?
Methacrylate-functional silanes at 0.5–2% in alcohol are the usual pairing for acrylic and UV-curable chemistries. Because results vary by ink formulation and glass coating, run a sample compatibility test with your production ink before committing.
What RIP settings and DPI should I start with?
Set resolution by viewing distance: 150–300 dpi for close viewing, 50–100 dpi for facades. Start at 250–300% ink limit, 8–16 passes, 5–15% dot gain compensation, and always linearize before building an ICC profile.
What is the cost per square foot?
Roughly $10–30 for simple UV decorative work, $20–50 for full-color UV printing with a white underbase, and $30–80+ for architectural ceramic printing. Size, coverage, white layers and finishing move the number more than the process name does.
At what quantity does screen printing become cheaper?
Typically around 50–60 pieces at the arithmetic break-even, with a decisive advantage past 500–1,000 pieces. Complex artwork, gradients or variable data can keep digital printing competitive well beyond that point.
How do I test adhesion before mass production?
Run a cross-hatch test to ASTM D3359 aiming for 5B, back it with a tape pull check on the shop floor, then add heat aging at 70°C, thermal cycling, UV chamber exposure, and dishwasher cycles for printed glassware.
Request a Glass Print Sample or Equipment Recommendation
Whether you are specifying printed panels for a project or evaluating a UV printer for in-house production, the fastest way to reduce risk is a sample print on your actual glass with your actual ink and curing conditions. Send your artwork, glass specification, quantity and exposure environment to receive a process recommendation, an adhesion test plan and a cost comparison between digital and screen printing for your run size.