For short runs, variable designs and full-color decoration, a dedicated cylindrical UV printer is usually the most practical wine bottle printing machine. It rotates the bottle while laying down color, white ink and optional clear varnish directly onto the glass.
The right machine, though, is rarely the one with the highest advertised resolution or the fastest quoted print time. It is the one that matches your bottle shape, printable area, glass surface, adhesion target, artwork, output and workflow. Glass in particular is unforgiving: some bottles print well after cleaning alone, while others need a compatible primer or another surface treatment. Because coatings and dimensions vary batch to batch, any purchase decision should rest on tests using your actual bottle, your ink and your pretreatment - not a lookalike sample.
This guide covers how wine bottle UV printing works, how it compares with other decoration methods, which configuration suits which production scenario, what it really costs, and how to test a machine before you commit.

What Is the Best Machine for Printing on Wine Bottles?
A dedicated cylindrical UV printer is generally the strongest option when you need full-color graphics printed directly around straight or tapered bottles, with short setup and frequent design changes. It fits limited editions, private-label products, corporate and event gifts, personalized bottles, packaging prototypes, and small batches carrying variable names, numbers or graphics.
Other methods still have their place. A UV flatbed printer with a rotary attachment can be enough for prototypes, occasional bottle jobs, or a shop that also prints many flat products - provided you confirm the supported diameter, weight, taper and printable length, because rotary attachments vary widely. Screen printing remains competitive for long, stable runs with few solid colors, where its rigid setup is offset by repeatability at volume. Pressure-sensitive labels suit conventional packaging, regulatory copy and frequent label swaps, where ink never touches the glass at all.
In short, the best wine bottle printing machine is the one that fits your order mix - not the one with the longest feature list.
Which Wine Bottle Printer Configuration Fits Your Production?
Before comparing brands, match the machine class to how you actually produce. The table below is a starting point, not a rulebook - a strongly tapered bottle or a demanding adhesion target can push you up a tier.

| Your production pattern | Sensible machine class | Configuration you'll need | Worth adding |
|---|---|---|---|
| A few dozen samples a month, mixed products | Flatbed with rotary attachment | CMYK plus white | Varnish channel |
| Steady short runs, one or two bottle formats | Dedicated cylindrical UV printer | White ink circulation, a stable dedicated fixture | Primer channel or external primer step |
| Tapered or conical bottles | Cylindrical printer with taper compensation | Conical fixture, software taper mapping | Automatic start-position sensing |
| Higher-volume, repetitive output | Automated or multi-station cylindrical system | Auto load/unload, inline curing | Vision positioning, inspection |
If your work sits on a boundary - say, mostly straight bottles but the occasional conical run - size the machine for the harder job. Under-buying on fixtures and taper support is the most common reason a shop outgrows a printer within a year.
How Does a Cylindrical UV Wine Bottle Printer Work?

Rotary Motion Meets UV Inkjet
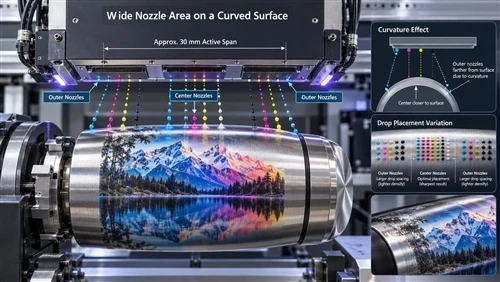
The bottle is held in a rotary fixture, and during printing the controller synchronizes the bottle's rotation with the movement and firing of the printheads. UV-curable ink is deposited and then cured by UV-LED energy as the job runs, so the piece leaves the machine already touch-dry - though real durability still depends on the substrate, pretreatment, ink, cure settings and how you test. Well-built rotary systems handle straight cylinders and, where the hardware and software allow, tapered shapes; many now use helical or spiral strategies to wrap graphics smoothly around bottles, cans and jars.
White Ink, Color and Clear Varnish
CMYK on its own often looks weak on transparent, green or brown glass, because light passes through the image and the bottle's own color bleeds into it. A white ink underbase solves this - as a full underlayer, a selective layer beneath logos and text, a standalone white design, or part of a layered effect.
Clear varnish adds gloss, matte contrast or raised texture, but it is a finishing tool, not an adhesion fix: a glossy print can still delaminate if the ink never bonded to the glass. Primer is the separate functional layer that improves that bond, applied either through a dedicated channel or as a controlled external process.
What "360-Degree Seamless" Actually Requires

A full-wrap design meets itself at a seam, and a good result keeps that meeting point controlled and clean. Software is only part of it. The seam is also shaped by the measured circumference, diameter variation, bottle ovality, fixture concentricity, motor accuracy, artwork scaling, start-position control, white-to-color registration and taper compensation.
Here is where real bottles bite back: a batch with a nominal diameter can still carry small dimensional swings, and embossed marks, mold seams and shoulders interfere with rotation and printhead clearance. One bottle may wrap perfectly while the next shows a visible seam simply because it is slightly out of round. That is why you should always ask for a full-wrap sample on your production bottle - a neat front logo proves nothing about registration around the whole circumference.
Nine Factors to Check Before You Buy
1. Bottle Diameter, Length and Printable Area
Start from the bottle, not the brochure. Document the minimum and maximum diameter, overall length, required print length, the base-to-print and shoulder-to-print distances, neck diameter, weight, any raised logos or mold marks, and the maximum variation across the batch. Note that maximum bottle length and maximum printable length are not the same - the fixture needs room to hold and turn the bottle, and the printhead needs clearance from shoulders and raised areas. Ask the supplier to mark the usable print zone on a drawing or a photographed sample.
2. Straight, Tapered and Irregular Shapes
A straight cylinder is easy to map. On a tapered bottle the surface speed changes along the print, so the machine needs a matching fixture and software compensation or the image stretches and compresses. Skip the vague "standard wine bottle" description and send side-view photos, a dimensioned drawing, the taper angle if you have it, physical samples, and details of any embossing or recesses. Bottles with handles, severe shoulders or large surface-height changes may need a custom fixture, a restricted print area, or a different method entirely.
3. Glass Surface and Ink Adhesion

Never sign off on adhesion by eye. Glass can carry dust, oil, fingerprints, moisture, release agents, and cold-end or hot-end coatings from bottle production, all of which change how ink wets and bonds. A controlled evaluation compares at least two states - a cleaned bottle printed without primer, and the same bottle printed with the proposed primer or pretreatment - holding artwork, ink density, cure and timing constant. The goal is the minimum treatment that passes your durability test, not the most primer you can apply. For a deeper look at the mechanics, see how to improve adhesion on cylindrical glass products.
4. White Ink, Varnish and Primer Setup
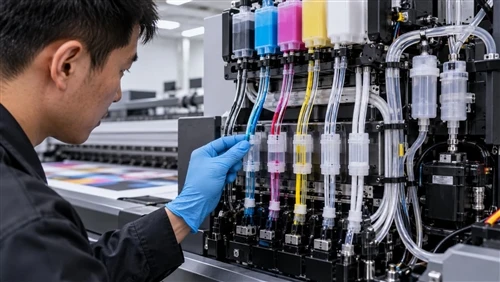
Do not compare machines by the color count in a brochure. Ask for a diagram showing every printhead, which channels carry CMYK, white and varnish, whether primer is installed, whether each specialty fluid has its own supply path, and whether layers print in one pass or several. White pigment is dense and settles, so ask specifically whether the system circulates ink only in the main tank or through the tubing, secondary reservoir, damper and printhead as well - tank agitation alone does not prove the whole white path stays stable during idle periods and long runs. It helps to see the supplier's own white ink test method before you commit.
5. Rotary Accuracy and Seam Registration
Ask for a test file that makes problems obvious: a thin line crossing the seam, small text near it, a geometric grid, a full white underbase with color-to-white registration marks, a large solid fill, a gradient, and a full-circumference pattern. Inspect more than one bottle - a single clean sample says nothing about repeatability. Have the supplier explain how the machine finds its start position and whether every cycle needs manual alignment.
6. Printheads and Ink Delivery
Printhead brand matters, but it is one part of a system. The print also depends on the exact head model, ink compatibility, drive waveform, operating temperature, negative-pressure control, filtration, print gap, pass count, head alignment and curing capacity. A smaller advertised droplet does not automatically mean a better bottle print: fine text may benefit from small controlled droplets, while white underbases and raised varnish want more ink. Two practical asks - see your own artwork printed in a real production mode rather than a slow demo mode, and understand how the printhead configuration was chosen for your job.
7. UV Curing and Durability
"Durable" means different things for different projects. A bottle used once at an indoor event faces nothing like one that endures carton contact, conveyor handling, refrigeration, condensation, repeated handling, cleaning chemicals, outdoor display and transport abrasion. Define those conditions first. The lamp setting has to cure the ink fully without adding avoidable heat, since over-curing can embrittle a film or hurt inter-layer adhesion just as under-curing leaves it soft - more UV is not automatically better. Agree on the test method, waiting time and pass criteria before you approve anything.
8. Real Production Output

Advertised speed usually counts only the time ink is being laid down. Real output has to absorb loading and alignment, clamping, cleaning, primer where required, RIP processing, white and color and varnish passes, curing, unloading, fixture changeover, nozzle checks and rejects. Artwork changes the math too: a small front logo, a full white underbase and a 360-degree textured wrap have very different cycle times. Request a timed trial on your bottle, your artwork and your intended mode, and record both the pure printing time and the full operator-to-operator cycle.
9. Fixtures, Software, Training and Support
The fixture is a production component, not an accessory. It should hold the bottle firmly without marking the glass, allowing axial drift, or creating wobble, and it should not slow changeover. For multiple formats, ask how long a fixture swap and recalibration takes. Evaluate the RIP and control software for circumference setup, taper compensation, white generation, varnish layers, color profiles, variable data and repeat-job storage. Finally, pin down who provides installation, operator training, color calibration, maintenance guidance, spare parts and remote troubleshooting - support is what keeps the machine earning after month one.
How Much Does a Wine Bottle Printing Machine Cost?
There is no single honest price, because the machine is only one line in the total. Anyone who quotes a figure without seeing your bottle and output is guessing. What you can do is understand the levers.
The purchase price is driven mainly by the printhead type and count, whether white and primer channels are installed, the fixture design, the level of automation, and the software. Beyond the machine, budget for rotary fixtures, inks, primer and cleaning fluids, labor, maintenance and consumables, rejected bottles during setup, training, and shipping and installation. For how these interact, see what determines a cylindrical printer's price.

Running cost per bottle deserves its own look. A full white underbase and a heavy varnish layer consume far more ink than a two-color logo, primer adds both material and a labor step, and changeover time is dead time you pay for. If several designs or small batches would otherwise force repeated screen setup, digital UV often wins on total cost even at a higher sticker price. Suppliers can help you model cost per bottle from your real artwork.
Manual, Semi-Automatic or Automatic?
A manual desktop cylindrical printer is cheapest and fine for samples and low volume, but every bottle is loaded, aligned and unloaded by hand. A semi-automatic machine keeps a person in the loop while speeding clamping and positioning. An automated multi-station system adds auto load/unload, inline curing and often vision positioning - a real capital step that only pays back at sustained volume. Choose by daily quantity and labor cost, not by ambition: an automatic line running a few dozen bottles a day is expensive idle metal.
Wine Bottle Printing Methods Compared

| Method | Best suited to | Main strengths | Main limitations |
|---|---|---|---|
| Dedicated cylindrical UV printer | Short and medium runs, full-color 360° graphics, frequent design changes | Direct-to-bottle, white and varnish options, variable data, minimal setup | Needs fixture compatibility, adhesion validation and ink-system upkeep |
| UV flatbed with rotary attachment | Prototypes, occasional bottles, mixed flat and cylindrical work | One machine serves several product types | Rotary size, taper support and full-wrap accuracy may be limited |
| Screen printing | Long runs of stable, low-color designs | Mature process, strong repeatability once set up | Screens and color stations; poor for frequent artwork changes |
| Pressure-sensitive labels | Conventional packaging, regulatory copy, fast label swaps | Familiar workflow, wide converter availability | Visible label edges, separate label inventory and application |
| UV DTF transfer | Irregular surfaces and low quantities hard to load directly | Flexible application, no direct-print fixture needed | Adds transfer-film and manual steps; edge visibility and durability vary |
How to Test a Wine Bottle Printer Before Buying
Testing is where a purchase is really decided. Keep it disciplined and it will tell you far more than any spec sheet.
Send bottles from the same supplier and production route you'll use after installation - glass composition, coatings, dimensions and surface condition can differ even between two bottles that look identical. Then specify the target clearly: print dimensions, full or partial wrap, viewing side, opacity, white coverage, gloss or matte zones, raised texture, seam location, a color reference, variable data and required output. Include the hard stuff - small text, gradients, fine lines and solid fills.
Have the supplier document the pretreatment exactly: cleaner or solvent, primer type and application method, flash time, ink series and cure settings. Run treated-versus-untreated comparisons where it makes sense, and print a test file that genuinely challenges detail, white opacity, registration and full-wrap alignment. Inspect the result under the lighting the finished bottle will actually live in, checking for banding, missing nozzles, white-edge misregistration, seam gaps or overlap, and distortion on tapered areas.
Adhesion and Handling Tests
Match the test to how the bottle will be handled, and hold the timing constant across samples - a piece checked minutes after printing cannot be compared fairly with one checked after a proper cure. A basic evaluation combines controlled tape, scratch, rub, moisture and handling tests after a defined conditioning period. Where you want a repeatable, referenceable method rather than an ad-hoc rub, the industry standards are ASTM D3359 (the tape / cross-hatch test, rated 0–5) and its close counterpart ISO 2409 (the cross-cut test for coatings and varnishes). Agree on which method and which pass grade count as acceptable before the trial, and note that these are field-and-shop screening tests - demanding projects may call for customer-specific lab methods.
What a Sample Acceptance Record Should Contain
An approved sample is only worth something if the process behind it can be reproduced. Insist on a written record. The example below shows the level of detail to require - the values are illustrative, not a guaranteed specification:
Bottle: 750 ml green glass, straight body, nominal Ø 78 mm, batch tolerance ±0.4 mm. Fixture: chuck plus tailstock. Heads: CMYK + white, single pass color over selective white. Pretreatment: solvent clean, primer applied and flashed. Print mode: production. Adhesion: cross-hatch tape test after full cure, grade recorded and photographed. Cycle: 62 s pure print, 95 s operator-to-operator. Result: 5 bottles run, 5 accepted, seam within tolerance, no nozzle dropout.
Then run a timed production trial of several bottles in sequence with normal loading, cleaning and nozzle checks, and record total cycle time, operator time, setup time, accepted versus reprinted counts, nozzle condition before and after, and how often the fixture needed adjustment. That gives a far more honest capacity estimate than a headline seconds-per-bottle number. When you're ready, ask to see printed bottle samples and request one on your own glass.
Common Wine Bottle UV Printing Mistakes
A handful of errors account for most disappointing purchases.
Assuming all glass prints without primer - some bottles pass after cleaning, others fail fast; always test the actual bottle.
Choosing by maximum DPI - resolution says nothing about speed, droplet placement, rotary stability, white performance or adhesion.
Giving only the nominal diameter - the supplier also needs taper, length, weight, ovality, raised areas and tolerance.
Testing only a front logo - it never proves full-wrap seam accuracy; use a demanding 360-degree file.
Ignoring white ink upkeep - ask how the whole path is circulated and maintained, not just the tank.
Reading print time as output - loading, cleaning, pretreatment and changeover reshape daily capacity.And
approving one pretty sample - repeat the design across several bottles, because consistency beats a single showpiece.
What Digital Wine Bottle Printing Is Good For
A cylindrical UV printer earns its keep on work with frequent design changes and short-to-medium runs: limited-edition collections, personalized wedding and anniversary bottles, corporate gifts, hotel and restaurant branding, winery merchandise, private-label projects, seasonal packaging and serialized or variable designs. The common thread is variety - graphics that would be slow and costly to prepare repeatedly through screens.
What to Send Before Requesting a Quote
To get a recommendation worth acting on, give the supplier the bottle material and any surface treatment, clear photos from several angles, physical samples, the minimum and maximum diameter, overall and printable length, taper or contour details, weight, your artwork files, the required print position, your CMYK / white / varnish / primer needs, the durability tests you require, expected output, the number of bottle formats, any variable-data or automation requirements, and the destination voltage and operating environment. The more of this you provide up front, the less guesswork ends up in the quote.
Frequently Asked Questions
Q: Can a UV printer print directly on glass wine bottles?
A: Yes. The surface must be cleaned and tested first, and some glass needs primer or another pretreatment to reach the required adhesion.
Q: Does wine bottle UV printing always need primer?
A: No - it depends on the glass, any coating, the ink, cure settings and durability target. Decide it with a treated-versus-untreated comparison on your own bottle.
Q: Can transparent and dark bottles be printed?
A: Yes. A white underbase improves opacity and reduces the influence of the glass color; confirm the required white density with a printed proof.
Q: What determines the machine's price?
A: Mainly the printhead type and count, whether white and primer channels are fitted, the fixture, the automation level and the software. Fixtures, inks, training, installation and maintenance sit on top of the base price.
Q: Can it print filled bottles?
A: Sometimes, but weight and balance affect fixture choice and rotation stability, and cure conditions may differ. Test with filled bottles if that is how you'll actually run them, rather than assuming an empty-bottle result carries over.
Q: What is the maximum printable circumference?
A: It depends on the fixture, the rotary travel and the software, and it is not the same as the maximum bottle you can load. Ask for the usable print zone marked on your specific bottle.
Q: How often does white ink need maintenance?
A: White pigment settles, so it needs regular agitation or circulation and periodic checks; frequency depends on the system design and how continuously you print. Ask the supplier for their recommended routine.
Q: How long does a bottle changeover take?
A: That varies with fixture design and how many formats you switch between. Time an actual changeover during your trial rather than trusting a stated figure.
Q: What warranty and spare parts are included?
A: This varies by supplier - confirm the warranty term, which parts are covered, spare-part lead times, and how remote and on-site support are handled before you buy.
The Bottom Line
For customized, full-color or frequently changing wine bottle work, a dedicated cylindrical UV printer is usually the most flexible choice - but the decision should rest on your application, not the spec sheet. Confirm bottle geometry, glass adhesion, white opacity, 360-degree registration, real output and operator workflow before you compare price.
The most reliable next step is concrete: gather your bottles, representative artwork and a written acceptance standard, then ask for a documented sample test and a timed production trial. A machine that produces a repeatable, testable result on your bottle is worth more than one boasting the highest unsupported number. When you're ready to run that test, send your bottles and artwork along with a wine bottle glass UV printer specialist so the bottle, fixture, ink and pretreatment are evaluated as one application rather than picked from a diameter alone.