

Digital printing on cans lets brands decorate aluminum cans directly from a digital file - no plates, no cylinders, no five-figure setup bill. This guide covers how the technology actually works, what it costs at 100, 1,000 and 10,000 cans, how UV inkjet compares with offset lithography and water-based ink, and - the part most buyers underestimate - how to get ink to stay stuck to aluminum through filling, pasteurization, shipping and a customer's cooler. If you are evaluating a supplier or buying a can printing machine, everything below is written to be checked against a real quotation.
What Is Digital Can Printing?
Digital can printing is a plate-free decoration process in which computer-controlled inkjet heads deposit ink directly onto the curved surface of an aluminum can, which is then cured or dried in line. Because the image comes from a file rather than a physical plate, every can in a run can carry different artwork.
The dominant method is direct-to-can UV inkjet. UV-curable ink is jetted onto a pretreated can body and polymerized within milliseconds by UV or LED lamps. The result is a solid, cross-linked film bonded to the metal rather than a wet layer that needs hours to dry.
Industrial systems typically run at 600 × 600 to 1200 × 1200 DPI. Higher resolution matters for 6 pt legal text, fine gradients and photographic imagery; a bold logo and a solid background will look identical at 600 DPI and cost less ink.
Digital vs Offset vs Shrink Sleeve - Which Belongs on Your Can?
| Method | Setup cost | Economical from | Best for | Main drawback |
|---|---|---|---|---|
| Direct digital (UV inkjet) | Near zero | 50 cans | Limited editions, multi-SKU, personalization | Higher unit cost at scale |
| Offset lithography | $3,000–$10,000+ | ~50,000 cans | Mass-market core SKUs | Artwork changes are expensive |
| Shrink sleeve | Low–medium | 5,000 cans | Fast graphics changes, full coverage |
Plastic sleeve complicates recycling
|
UV Inkjet vs Water-Based Ink on Aluminum Cans
Aluminum is a difficult substrate: non-porous, reflective, low surface energy, and usually already carrying a protective lacquer. The ink system has to solve all four problems at once.
UV Inkjet
- Cures by photopolymerization - instant, no drying tunnel
- Forms a cross-linked film with strong scratch and chemical resistance
- High pigment loading gives dense color and good opacity on metal
- Very low VOC, since nothing evaporates
- Requires UV lamp maintenance and correct wavelength selection

Water-Based Ink
- Cures by evaporation - needs heat, airflow and humidity control
- On non-porous aluminum, adhesion depends heavily on binder chemistry and pretreatment
- Almost always needs a protective overcoat to reach comparable abrasion resistance
- Attractive on running cost at very high, stable volumes
- Longer drying zones mean more floor space and more energy per can
Practical verdict: for short and medium runs on aluminum, UV inkjet wins on adhesion, durability and changeover speed. Water-based systems make sense in high-volume, single-SKU lines where drying infrastructure already exists.
Digital Can Printing Cost, MOQ and Break-Even
Digital printing follows a variable-cost model - you pay per can, and there is almost nothing to amortize. Offset follows a fixed-cost-plus-volume model, which is why its unit price collapses at scale.
| Order quantity | Digital, est. cost/can | Offset, est. cost/can | Typical use |
|---|---|---|---|
| 100 | $2.00–$5.00 | Not viable | Prototypes, events, samples |
| 1,000 | $0.80–$1.50 | $2.00–$5.00+ | Small brand launch |
| 5,000 | $0.45–$0.90 | $0.80–$1.50 | Seasonal release |
| 20,000 | $0.25–$0.50 | $0.25–$0.45 | Crossover zone |
| 100,000 | $0.15–$0.30 | $0.08–$0.18 | Core SKU |
Indicative ranges only - real pricing moves with can size, coverage, coatings, region and freight.
How to Calculate Your Break-Even Point
The formula is simple:
Break-even quantity = Offset setup cost ÷ (Digital unit cost − Offset unit cost)
With a $6,000 offset setup, $0.45/can digital and $0.15/can offset:
$6,000 ÷ ($0.45 − $0.15) = 20,000 cans
Below roughly 20,000 cans, digital is cheaper. In practice the crossover for 12oz/355ml and 16oz/473ml cans lands somewhere between 15,000 and 50,000 units, depending on plate count and press time.
Where the Money Actually Goes
| Cost item | Share of a 1,000-can order |
|---|---|
| Empty aluminum can | 30–40% |
| Digital printing | 35–45% |
| Coating and finishing | 10–15% |
| Labor and inspection | 5–10% |
| Packaging and handling | 5–10% |
Minimum Order Quantities
- Prototype / sample: 50–100 cans
- Commercial short run: 500–1,000 cans
- Standing production: 5,000+ cans
Most suppliers charge a sampling fee covering artwork prep, test printing, sample cans and shipping. Ask whether it is credited back against a confirmed bulk order - many will say yes if you ask before you pay.
The Costs That Do Not Appear on the Quotation
Digital printing's real advantage is often off the invoice: no dead inventory of obsolete packaging, no 100,000-can minimum commitment for a flavor that might not sell, no six-week approval cycle before a seasonal window closes. For a product launch, those savings routinely exceed the higher per-can printing cost.
Surface Preparation: Why Most Adhesion Failures Start Here
Ink does not fail on aluminum because the ink is bad. It fails because the surface was never ready to accept it. Three variables control the outcome: cleanliness, surface energy, and surface microstructure.
Incoming cans carry rolling oils, fingerprints, dust and sometimes silicone residues. Cleaning is done by alkaline wash, solvent wipe or plasma-assisted cleaning - the goal is removing organics without attacking the existing lacquer.
Surface Energy Targets
- Untreated aluminum: ~30–35 mN/m
- Minimum for reliable printing: above 40–45 mN/m
- High-performance coating adhesion: 45–50+ mN/m
Verify with dyne pens on the line, or contact-angle measurement in the lab. The dyne test takes seconds: if the test fluid beads up instead of holding a continuous film for two seconds, the surface is not ready.
Corona vs Plasma Treatment
| Corona | Plasma | |
|---|---|---|
| Mechanism | High-voltage electrical discharge | Ionized gas, controlled chemistry |
| Equipment cost | Lower | Higher |
| Uniformity | Good | Excellent |
| On coated aluminum | Adequate | Better |
| Typical setting | 1–3 kW·min/m², 10–30 kHz | Recipe-dependent |
| Best for | High-speed continuous lines | Premium packaging, precision digital |
Flame and ozone treatment are also used where higher-energy activation is needed. Whichever you choose, treated surfaces decay - print within the validated time window, not the next shift.
Ink, Primer and Topcoat: Getting the Chemistry Stack Right
The standard build is:
Aluminum substrate → Pretreatment → Primer → Digital ink → Protective topcoat
Most adhesion failures happen not because one layer is weak, but because two perfectly good layers were never validated together. Test the stack, not the components.
Ink Systems
- UV radical-curing ink - acrylic oligomers, reactive monomers, photoinitiators and pigment. Fast, productive, scratch-resistant. Usually needs an aluminum-compatible primer.
- UV hybrid systems - UV cure plus secondary chemical crosslinking. More flexible, better chemical resistance after aging.
- Resin-based systems - modified polyester, polyurethane or epoxy. Strong impact and chemical resistance, but compatibility with the can's existing coating must be proven first.
Adhesion Promoters
Silane coupling agents bridge the inorganic metal surface and the organic polymer film, improving bond strength and - critically - moisture resistance after aging. Modified acrylic, polyurethane and epoxy-functional promoters serve similar roles on lacquered cans.
Coating Weights
| Layer | Typical dry film weight |
|---|---|
| Primer | 1–3 g/m² |
| UV ink | 3–8 g/m² |
| Protective topcoat | 2–5 g/m² |
Resist the temptation to over-apply. Excess coating thickness hurts flexibility, adds cost, and can complicate aluminum recovery at end of life.
UV Curing Parameters: Dose, Line Speed and Lamp Choice
Curing is where good ink goes wrong. Under-cured film leaves residual monomer - soft surface, poor chemical resistance, ink transferring onto the next can. Over-cured film goes brittle and cracks at the shoulder.
UV-LED vs Mercury Lamps
| UV-LED | Mercury | |
|---|---|---|
| Output | Narrowband: 365/385/395/405 nm | Broad spectrum |
| Heat | Low | High |
| Energy use | Low | High |
| Lamp life | Long | Shorter, needs scheduled replacement |
| Ink compatibility | Requires LED-matched photoinitiators | Works with most conventional UV inks |
Typical UV dose sits in the 100–1000 mJ/cm² range depending on ink chemistry and film thickness. White ink and heavy coverage need more, because pigment scatters and absorbs the very light meant to cure the layer beneath.
Dose and Speed Are the Same Variable
UV dose = lamp intensity × exposure time
Speed the line up and you must raise intensity, or dose falls and cure quality follows. A workable adjustment loop:
- Measure actual UV intensity with a radiometer - not the lamp's rated output
- Record conveyor speed
- Check can surface temperature
- Run a cure test (MEK rub is fastest)
- Adjust lamp power or line speed, then re-measure
Lamp aging is the silent killer here. Intensity drops gradually, cure quality drops with it, and nobody notices until a customer complaint arrives. Log radiometer readings weekly.
Quality Testing: Numbers, Not Opinions
"It looks fine" is not an acceptance criterion. Insist on these four, with numeric pass limits written into the purchase agreement.
Cross-Hatch Adhesion - ASTM D3359
Cut a grid into the printed film, apply standardized tape, remove at a controlled angle and speed, then rate coating removal. Acceptance: 4B–5B for premium packaging.
Taber Abrasion - ASTM D4060
Rotating abrasive wheels (typically CS-10) under standard load. Acceptance: defined maximum weight loss at 500–1,000 cycles, with no color breakthrough.
MEK Double Rub
A saturated cloth rubbed back and forth until the film fails. Target: 100–200+ double rubs for durable industrial coatings. Fast, cheap, ideal as a line-side cure check - but it says nothing about long-term UV exposure.
Application-Specific Tests
- Pasteurization or retort exposure, at actual process temperature
- Refrigeration and condensation cycling
- Salt spray, for outdoor promotional cans
- Accelerated UV aging, for color stability
- Forming simulation - checks cracking in deformation zones
Color Management on a Reflective Curved Surface
Aluminum is a mirror. A red printed straight onto bare metal reads darker and more metallic than the same red on white. That is not a printer defect - it is physics, and the fix is process, not complaint.
The White Ink Base Layer
- Lay down white ink as an opaque undercoat
- Print CMYK over the white
- Add clear protective coating if required
For deliberate metallic effects, mask selectively: leave chosen areas bare and print transparent colors over them for a chrome look. Uniform white coverage is hardest to hold near seams, shoulders and the neck - plan artwork accordingly.
Delta E Tolerances
- ΔE < 2 - excellent match
- ΔE 2–3 - generally acceptable for commercial packaging
- ΔE > 5 - visibly off; reject
Get the tolerance written down before production, along with the measurement geometry and light source. "Pantone match" without a ΔE number is not a specification.
Proofing Sequence
- Digital proof - layout, copy, legal text, barcode placement
- Physical sample can - color, metallic effect, finish, feel
- Production sample - small quantity at real line settings
Approving artwork on a flat on-screen mockup is the single most common and most expensive mistake in can decoration. A design that looks balanced flat will distort once wrapped - check it on a real can, in real light. Reviewing printed cylinder samples before committing is worth the week it costs.
Artwork Checklist for Digital Can Printing
File Requirements
- AI, PDF or EPS; vector logos strongly preferred
- Raster images at minimum 300 DPI at final size
- CMYK color mode, with Pantone references supplied separately
- Fonts outlined or packaged
Design Requirements
- Include bleed; maintain safe zones at top and bottom rims
- Compensate for circumferential stretch and seam distortion
- Mark white ink areas on a separate layer
- Identify intentional bare-aluminum areas
- Keep fine detail away from seams and deformation zones
- Keep critical graphics off high-abrasion contact points
Layer convention: Layer 1 white mask → Layer 2 CMYK artwork → Layer 3 protective coating.
The Six-Step Production Workflow
- Surface preparation - clean, activate, measure surface energy with a dyne pen
- Primer application - control coating weight, uniformity and drying
- Digital printing - monitor ink viscosity, droplet consistency, head alignment
- UV curing - verify dose, surface temperature and cure level
- Protective coating - apply where extra abrasion or chemical resistance is needed
- Inspection and packing - adhesion spot checks, color measurement, carton pack
Realistic Lead Times
| Stage | Duration |
|---|---|
| Artwork review | 1–3 days |
| Digital proofing | 2–5 days |
| Sample production | 3–7 days |
| Bulk printing | 5–15 days |
| Quality inspection | 1–3 days |
| Shipping | Destination-dependent |
Digital lines change over in minutes to hours because there are no plates to make. That is what makes ten flavors in one production week possible.
Troubleshooting: Symptom, Cause, Fix
| Symptom | Likely cause | Corrective action |
|---|---|---|
| Ink peeling in tape test | Insufficient surface energy | Improve cleaning and corona/plasma treatment |
| Scratching in handling | Under-cure | Raise UV dose or slow the line |
| Sticky or oily surface | Incomplete polymerization, photoinitiator imbalance | Check lamp intensity; review ink/lamp wavelength match |
| Whitening or haze | Moisture, cure stress, ink incompatibility | Control ambient humidity; re-validate stack |
| Cracking at shoulder | Film too brittle or too thick | Reduce coating weight; use more flexible formulation |
| Color fading | Pigment UV instability | Move to higher-lightfastness pigment system |
| Banding or missing lines | Nozzle clogging, viscosity drift |
Purge and align heads; check ink temperature control
|
Food Contact Compliance and Recyclability
For beverage cans in the US market, request and file the following before you commit to production:
- Ink and coating safety data sheets (SDS)
- FDA food-contact statements and applicable 21 CFR references
- Migration testing reports
- Third-party laboratory test data
- Heavy metal limit documentation
Photoinitiators and residual monomers deserve particular scrutiny - they are the components most likely to trigger a migration question during a retail customer's audit.
On recycling: aluminum remains highly recyclable, and directly printed cans generally create fewer problems than shrink sleeves, since the decoration stays inside the aluminum recovery stream. The variables to control are coating thickness and coating chemistry. Ask suppliers for a recycling compatibility statement rather than assuming one exists.
Two Scenarios, Two Right Answers
Case 1 - Craft Brewery, Summer Series
Requirement: 5,000 cans, four artwork versions, delivery in 2–3 weeks.
Solution: Digital. No plates, four designs in one production window, minimal inventory risk.
Indicative cost: $0.50–$0.90 per can. Offset would carry setup charges larger than the entire print budget.
Case 2 - National Soda Brand, Core SKU
Requirement: 500,000+ identical cans, strict Pantone control, lowest possible unit cost.
Solution: Offset lithography.
Indicative cost: $0.08–$0.15 per can. Setup amortizes to almost nothing at this volume.
Many brands eventually run both: offset for the core line, digital for everything seasonal, regional or experimental.
Choosing Equipment or a Supplier
If you are outsourcing, ask for: adhesion and abrasion test reports with numeric results, physical printed samples on your can, documented ΔE tolerances, food-contact compliance files, daily capacity and backup capability, and reference customers in your category.
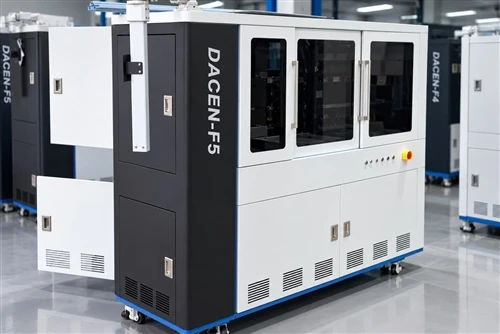
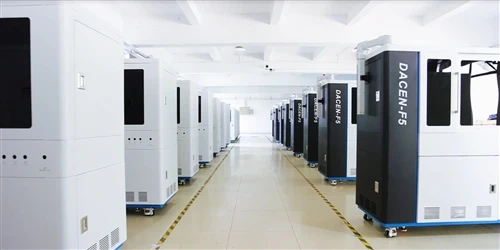
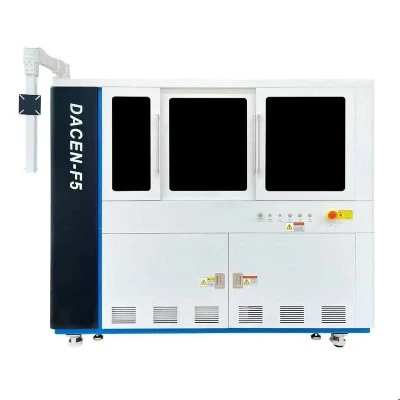
If you are bringing production in house, the questions shift to equipment. Throughput per hour, curing configuration, printhead type and changeover time drive your real cost per can far more than the sticker price of the machine. A cylinder UV printer built specifically for round bodies handles registration and curvature compensation that a converted flatbed cannot. For higher output, a multi-station cylindrical printer loads and prints in parallel rather than in series. For mixed jobs across cans, bottles and cups, look at the Dacen F5 UV cylinder printer class of machine, which handles varying diameters and drop heights on one fixture set. Full specifications for the UV printer range are worth comparing side by side before you shortlist.
One more piece of homework: adhesion behavior varies by substrate and coating, and it is the number one reason a machine that demoed beautifully disappoints in production. This walkthrough on improving adhesion on UV cylinder printers covers the practical adjustments. Always send your own cans for a trial print before purchase.
Summary
- Technology: UV inkjet direct-to-can is the default for aluminum - instant cure, strong film, plate-free
- Cost: digital wins below roughly 15,000–50,000 cans; offset wins above it. Run the break-even formula with your own numbers
- Adhesion: starts with surface energy above 40–45 mN/m, not with ink selection
- Curing: dose = intensity × time; measure it with a radiometer, and log lamp decay
- Quality: specify 4B–5B on ASTM D3359, 100–200+ MEK double rubs, and ΔE < 2–3 in writing
- Color: white ink base layer, then CMYK - and always approve on a real can, never a flat mockup
- Compliance: collect FDA food-contact documentation and migration data before, not after, production
Request a Sample Evaluation
Whether you are sourcing printed cans or evaluating a can printing machine for in-house production, the fastest way to a decision is a trial print on your own substrate with documented adhesion and abrasion results. Send your can specification, annual volume, artwork complexity and durability requirements, and contact our technical team for a printed sample and a production assessment.
FAQ
What is digital printing on cans?
It is a plate-free process in which inkjet heads deposit ink directly onto an aluminum can body from a digital file, followed by instant UV curing. Because no plates are involved, every can in a run can carry different artwork, and setup cost is close to zero.
How much does digital can printing cost per unit?
Roughly $2.00–$5.00 per can at 100 units, $0.80–$1.50 at 1,000 units, and $0.25–$0.50 at 20,000 units. Coverage, white ink usage, coatings and can size all move the figure.
What is the break-even point between digital and offset can printing?
Commonly between 15,000 and 50,000 cans. Divide the offset setup cost by the per-can price difference to find your own crossover - a $6,000 setup with a $0.30 per-can gap breaks even at 20,000 cans.
What minimum order quantity should I expect?
50–100 cans for prototypes, 500–1,000 for commercial short runs, 5,000+ for standing production. Offset typically starts at 50,000–100,000 cans.
Why do printed cans need a white ink base layer?
Bare aluminum is reflective, which shifts perceived color - reds read darker and more metallic. An opaque white undercoat neutralizes the substrate so CMYK reproduces brand colors accurately. Selective white masking is also how deliberate metallic effects are created.
Which adhesion and abrasion tests should I require, and what are the pass criteria?
ASTM D3359 cross-hatch adhesion with a 4B–5B rating, ASTM D4060 Taber abrasion with a defined weight loss limit at 500–1,000 cycles, and 100–200+ MEK double rubs. Add pasteurization or retort testing if your process requires it.
How do I determine the correct UV dose and line speed?
Measure actual intensity with a UV radiometer rather than relying on the lamp's rated output, then set line speed so total dose lands in the 100–1000 mJ/cm² range specified for your ink. Faster lines need proportionally higher intensity, and white or heavy-coverage layers need more dose than transparent ones.
Are UV inks safe for beverage cans, and do they affect recycling?
Properly formulated UV inks are used in food packaging when supported by compliance documentation - request food-contact statements, migration testing and supplier regulatory declarations. On recycling, directly printed cans generally integrate into the aluminum recovery stream more cleanly than shrink-sleeved cans, provided coating thickness stays controlled.
Can digital printing produce metallic effects and protective finishes?
Yes. Metallic effects come from leaving aluminum exposed and overprinting with transparent inks. Matte, gloss and scratch-resistant varnishes can be applied over the printed layer to improve durability through filling, packing and transport.