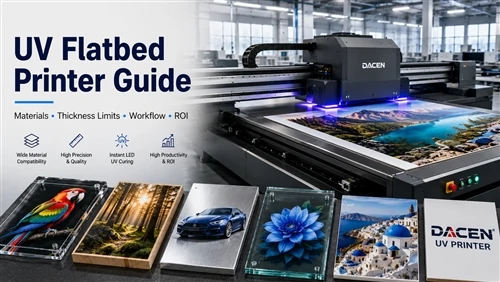
A UV flatbed printer deposits UV-curable ink directly onto a stationary substrate and cures it instantly with LED or mercury UV lamps - no drying time, no transfer step, no plates. This guide covers everything a buyer or production engineer needs before committing: which materials print well and which need pretreatment, the real thickness and curvature limits, how to fixture irregular parts, when a rotary axis becomes necessary, how flatbed compares with roll-to-roll for rigid work, and what the machine actually costs to run.
The question most first-time buyers ask is whether a flatbed can only print flat sheets. The more useful question is how far past flat you can go while keeping quality, throughput and reliability intact - and that has numeric answers, which is what this guide provides.
How UV Flatbed Printing Works

Conventional inks dry by absorption or evaporation, which limits them to porous or coated media. UV ink polymerises the instant it passes under the lamp, so it sits on top of glass, metal or stone rather than soaking in. That single difference is why one machine can decorate plywood, tempered glass and anodised aluminium in the same shift.
LED UV curing has become the default because it runs cool, draws less power, switches on and off instantly and lasts 10,000–20,000 hours. Mercury lamps still deliver higher raw curing intensity, but the heat output makes them a poor match for thin plastics, expanded PVC and laminated panels.
What Materials Can a UV Flatbed Printer Print On?
Rather than memorising material names, group substrates by the physical properties that actually predict printability - porosity, surface energy, transparency, texture and heat tolerance.

Porous rigid materials
Birch plywood, MDF, hardwood panel, bamboo, cork and engineered wood absorb primer and give excellent mechanical adhesion. Used for furniture panels, cabinet doors, interior décor, retail displays and personalised gifts. Open grain softens image detail, so a sanding sealer noticeably improves sharpness and colour density.
Non-porous smooth materials
Cast and extruded acrylic, float and tempered glass, mirror, stainless steel, anodised aluminium, ACM, ceramic tile and porcelain rely entirely on chemical adhesion. These carry architectural signage, museum graphics, storefront signs, awards and decorative wall panels - and they are the materials most likely to need an adhesion promoter.
Plastic sign materials
PVC sheet, expanded PVC (Sintra), polycarbonate, PETG, ABS and HIPS are engineered for print and remain the workhorses of North American sign production because they combine reliable printability with low cost.
Lightweight display boards
Coroplast, honeycomb board, foam board and composite sandwich panels serve real estate signs, event signage and trade show graphics. All of them flex, so vacuum hold-down must be even across the full sheet.
Transparent materials
Clear acrylic, glass, polycarbonate and PET sheet drive backlit signs, light boxes, window graphics and partitions. The white ink strategy depends entirely on which side the finished piece will be viewed from.
| Property | Examples | Printing consideration |
|---|---|---|
| High surface energy | Glass, ceramic, anodised aluminium | Excellent wetting, still often needs a promoter |
| Low surface energy | PE, PP | Plasma, corona or specialist primer required |
| Porous | Wood, MDF | Seal before printing |
| Textured | Stone, reclaimed wood | Multiple passes improve coverage |
| Transparent | Acrylic, glass | White ink required for opacity |
| Heat-sensitive | Expanded PVC, thin plastics | Reduce lamp power, add cooling passes |
Material choice also changes the finished look. Glass gives the highest gloss and colour vibrancy. Wood keeps its grain visible under transparent inks for a premium natural finish. Matte PVC reads clearly with almost no glare. Brushed aluminium produces metallic effects when white is deliberately omitted from parts of the artwork.
Surface Preparation and Adhesion
Excellent image quality means nothing if the ink lifts after installation. Preparation is the single biggest factor in long-term durability.
Wood and porous stock: sand with 220–320 grit, blow off dust, apply sanding sealer or wood primer, sand lightly again, and print only once fully dry.
Metals: degrease with isopropyl alcohol, use acetone where heavy oils are present, and never touch a cleaned surface with bare hands. Difficult metals benefit from epoxy or polyurethane adhesion primers. Anodised aluminium generally outperforms polished stainless because its surface offers mechanical anchoring.
Glass and acrylic: clean with isopropyl alcohol or an ammonia-free glass cleaner, and avoid anything containing silicone - it destroys adhesion. Glass, acrylic and silane-based primers all work; some industrial applications add light chemical etching or micro-abrasion.
Low surface energy plastics: PE and PP are the hardest common substrates. Corona, plasma or flame treatment is mandatory. Without it, adhesion fails regardless of curing settings.
Before releasing any new material to production, run a dry wipe, an alcohol rub, a cross-hatch test to ASTM D3359 and a tape peel. These take minutes and catch failures that would otherwise appear after the sign is installed.
Machine Limits: Bed Size, Thickness and Curvature
The limiting factor is rarely the overall shape of a part. It is the distance between the printhead and the specific surface being printed, and how much that distance varies across the image.
Print area
| Printer class | Maximum print area | Typical use |
|---|---|---|
| Desktop / A3 | 600 × 900 mm | Phone cases, awards, sample work |
| Mid-size | 1300 × 2500 mm | Standard 4 × 8 ft sheet stock |
| Industrial | 2000 × 3000 mm | Architectural panels, glass, stone |
| Large format | Up to 2500 × 4000 mm | Continuous panel production |
North American sign shops overwhelmingly buy 4 × 8 ft machines because that matches the sheet sizes acrylic, PVC, MDF and ACM already ship in. Gift decorators and prototype shops usually start with an A3 UV printer and add capacity once volume justifies it.
Thickness and Z-axis clearance
Entry and mid-range machines generally accept 50–100 mm of material with 100–120 mm of platen clearance. Machines built specifically for thick media - such as a high-clearance A1 flatbed UV printer - extend well beyond that, with some models handling 300 mm or more. Always check the Z-axis stroke on the specific model rather than the category, and measure from the bed to the highest point of the workpiece, not to the printable surface. Positioning accuracy typically falls between ±0.05 mm and ±0.10 mm.
Curvature and head gap
Gentle curves print directly. As the radius tightens, droplets stop landing perpendicular to the surface and both sharpness and colour density fall away.
| Parameter | Working range |
|---|---|
| Recommended head gap | 1.5–3.0 mm (start at 2.0 mm) |
| Absolute minimum gap | ≥1.0 mm |
| Practical height variation | ±2–5 mm |
| Minimum curvature radius, direct print | 150 mm and above (100 mm with tuning) |
| Maximum printable slope | 10–15° |
Below roughly a 20 mm radius, direct flatbed printing stops being viable and a rotary axis becomes the correct answer. Running under a 1 mm gap sharply increases head-strike risk, particularly on warped stock.
Fixturing Irregular Parts and Printing Cylinders
Experienced shops spend more time designing fixtures than adjusting print settings, because repeatable positioning improves yield far more than any driver tweak.
Vacuum tables suit acrylic sheet, aluminium panel, PVC board and composites. Use roughly 60–80 kPa for standard rigid stock, lower for fragile glass, higher for heavy plate - and confirm holding force is even across the whole area, not just near the ports.
Mechanical fixtures handle injection moulded parts, automotive components, electronic housings and irregular industrial parts. Dowel pins, reference edges, soft jaws, spring-loaded clamps and silicone contact pads all work; the goal is to stop movement without deforming the part. For repeat orders, keep fixture tolerance inside ±0.1 mm and use hardened locating pins.
Many manufacturers now model fixtures in CAD and produce them by CNC machining or 3D printing. Replaceable inserts, height adjustment, quick-lock clamps, integrated vacuum channels and modular locating pins turn a one-off jig into a reusable asset that cuts setup time on every reorder.
When you need a rotary axis
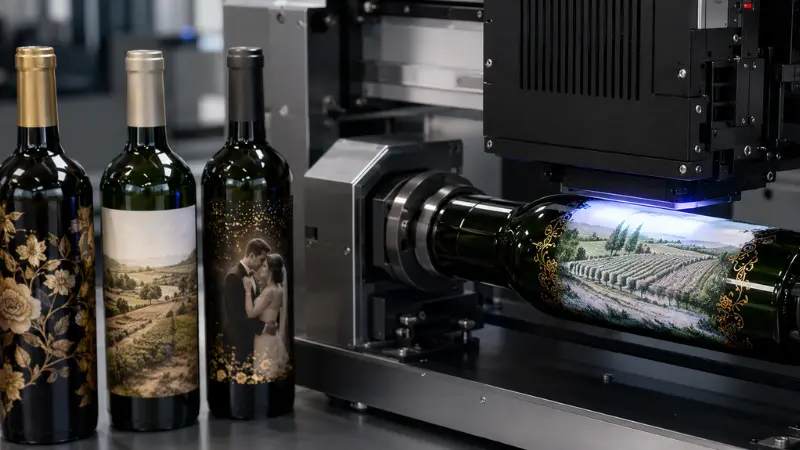
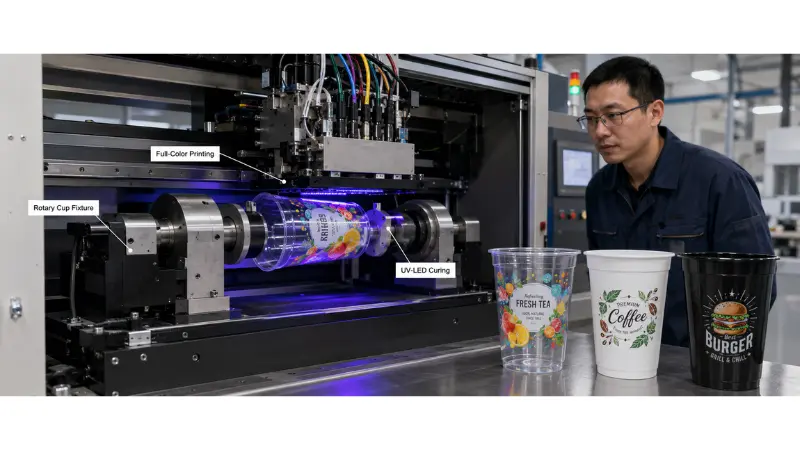
Bottles, tumblers, candles, pipes and cups require rotation synchronised to carriage travel rather than linear bed movement. A dedicated rotary UV bottle printer covers drinkware and cosmetic containers, while an external rotary axis suits large cylinders and industrial rollers. Keep runout at or below 0.10 mm - slight eccentricity shows up as visible distortion - and calibrate so every degree of rotation maps exactly to the image data, or a seam appears where the artwork closes.
A useful middle path: a promotional products manufacturer printing logos on one face of aluminium water bottles skips rotation entirely, using a V-block fixture, registration pins and a 2 mm gap. The printed area is narrow, distortion stays negligible and cycle time stays short. Only full wraps get moved onto the cylindrical bottle printer.
White Ink, Varnish and Raised Effects
Modern machines print far more than CMYK. White ink provides an opaque base on dark materials, lifts saturation, and makes accurate colour possible on clear substrates. Common sequences are white → CMYK, CMYK → white, and white → CMYK → white for double-sided viewing. Two properly configured white layers typically exceed 90% opacity.
Set white up as a dedicated spot channel in the artwork so the RIP generates the correct sequence. Keep automatic circulation running, stir daily and print white test patterns regularly - white pigment settles faster than any other channel and is the leading cause of nozzle dropout.
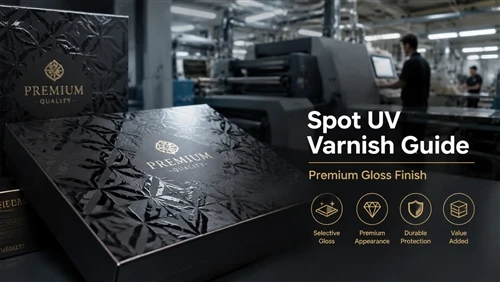
Clear varnish adds spot gloss, matte/gloss contrast, scratch protection and texture. Stacking varnish passes builds tactile height:
| Varnish layers | Approximate height | Typical use |
|---|---|---|
| 5 | 80–120 µm | Subtle spot texture |
| 10 | 150–250 µm | Premium packaging, business cards |
| 20 | 300–500 µm | Braille, decorative relief |
On uneven or contoured parts, watch for UV shadowing - recessed areas that the lamp cannot reach leave ink tacky, poorly bonded and prone to smearing. Fix it by lowering carriage speed, adding curing passes, raising lamp power, repositioning the object, or splitting the artwork into separate jobs with different orientations.
Standard Production Workflow
- Clean and, if required, prime the substrate; allow full drying.
- Mount the fixture on the vacuum table and insert locating pins.
- Seat the workpiece against the reference edge and apply vacuum.
- Measure the highest point of the part and set head gap.
- Run a nozzle check and a positioning test print.
- Print white, cure, print CMYK, cure.
- Apply varnish if required, then final cure.
- Test adhesion with a cross-hatch and alcohol rub before releasing the batch.
- Allow the part to cool before packing.
-
Setting Starting point Resolution 600 × 900 dpi High-quality mode 720 × 1200 dpi Head gap 2.0 mm UV lamp power 70–90% White ink Two layers on dark or transparent substrates
Treat these as baselines and tune with adhesion tests rather than trusting presets. Note also that no single ICC profile works across every substrate - build substrate-specific profiles, use grey balance targets, verify with a spectrophotometer, and keep viewing conditions consistent.
Troubleshooting
| Problem | Likely cause | Fix |
|---|---|---|
| Ink peeling | Poor adhesion | Re-clean, add primer, increase cure energy |
| Ink pooling | Excess laydown on a slope | Reduce ink density |
| Banding | Carriage misalignment | Nozzle clean, recalibrate |
| Uneven gloss | Inconsistent curing | Increase UV exposure |
| Bubbles under ink | Rushed cure sequence | Add intermediate cure passes |
| Head strike | Part too tall or warped |
Raise gap, redesign fixture
|
Flatbed vs Roll-to-Roll for Rigid Work
Both technologies use UV ink, but they are built for opposite environments. A flatbed prints directly onto stationary rigid material. A roll-to-roll machine transports flexible media past the heads and needs a conveyor, transfer table or hybrid table before it can process sheet stock at all.
| Factor | UV flatbed | Roll-to-roll UV |
|---|---|---|
| Designed for | Rigid substrates | Flexible media |
| Material thickness | 50–100 mm typical | Under 2 mm without hybrid table |
| White ink registration | Excellent | Harder on rigid sheet |
| Print resolution | 600–1800 dpi | 600–1440 dpi |
| Production speed | 20–120 m²/h | 50–250 m²/h |
| Single rigid board | 2–8 minutes | Longer, setup dominated |
Roll-fed machines win on raw hourly area, but that figure misleads on rigid work: a flatbed finishes a board faster in wall-clock terms because it eliminates mounting, repositioning and re-registration entirely. Choose roll-to-roll or hybrid when banners exceed roughly 70% of output, vinyl dominates the workflow, or you need long continuous runs. Shops that regularly switch between rigid boards and roll media usually end up running both, using the flatbed printing machine for thick substrates and reserving roll-fed capacity for films and banners.
Throughput, Cost and ROI
Output depends entirely on print mode: roughly 20–60 m²/h in draft, 10–25 m²/h in standard production, and 5–10 m²/h in high quality. For small promotional items, well-designed multi-up fixtures move the figure from tens of pieces per hour into the hundreds.
Purchase price is only a fraction of lifetime cost. A realistic model includes ink, white ink, varnish, primer, electricity, maintenance, replacement printheads, operator labour, downtime and facility overhead.
On a $180,000 investment producing 10,000 signs a year at $30 gross profit each, annual contribution is around $300,000 and payback typically lands between 7 and 14 months depending on utilisation and production mix. Ink alone generally runs $0.10–0.60 per square foot at light to moderate coverage, before white and varnish.
Fixtures pay back faster than machines. One manufacturer printing circular aluminium nameplates cut setup from 15 minutes to 5 with a dedicated fixture, reduced scrap from about 8% to under 2%, and raised daily output by nearly 40% - a payback of under three months on tooling alone.
Maintenance, Durability and Safety
| Task | Interval |
|---|---|
| Nozzle check and printhead cleaning | Daily |
| White ink circulation and stirring | Daily |
| Wiper, capping station, ink line inspection | Weekly |
| Vacuum system, lamp output, encoder cleaning | Monthly |
| Ink filters | 3–6 months |
| Pump tubing | 12–24 months |
| LED UV lamps | 10,000–20,000 hours |
For outdoor rigid graphics, use exterior-rated inks, apply protective varnish or clear coating, follow the recommended primer system for each substrate, and avoid under-curing - it quietly destroys both adhesion and weather resistance. Manufacturers substantiate durability with accelerated weathering such as QUV or ASTM G154 alongside adhesion and scratch testing; with the right ink, primer and coating, printed signs achieve several years of service life.
On safety: provide ventilation adequate for ozone and process emissions, supply gloves and eye protection, store solvents and inks per their Safety Data Sheets, verify fixture locking before each run, keep hands clear of carriage travel, and test emergency stops regularly in line with applicable OSHA guidance.
When Another Technology Is the Better Choice
| Technology | Best fit |
|---|---|
| UV flatbed | Short runs, customisation, rigid and mixed materials, thick stock |
| Pad printing | Small curved parts, simple graphics, very high volume |
| Screen printing | High volume with a limited colour count |
| Dye sublimation | Polyester textiles and specially coated aluminium |
Twenty custom acrylic awards is a flatbed job. Two hundred thousand identical plastic caps is a pad printing job. Thousands of polyester jerseys belong on sublimation. The deciding factors are substrate, quantity, image complexity and production economics - not print quality alone.
Summary
A UV flatbed printer is a flat-bed machine, not a flat-only machine. It handles thick blocks, gently domed panels, textured wood and irregular housings with the right fixture, and wraps full cylinders once a rotary axis is added. The practical boundaries are Z-axis clearance, a curvature radius above roughly 150 mm, a slope under 15°, and a head gap held near 2 mm. Everything beyond that is a fixturing problem - and fixturing is solvable.
Before committing to equipment or a new material, budget one to three days for sample qualification: print on your actual substrate, run a cross-hatch adhesion test, verify white opacity and scratch resistance, and record ink consumption and cycle time. It costs far less than reprinting a batch, and it turns an estimated ROI into a measured one. Compare bed sizes, print heights and configurations across the full UV printing equipment range against your own sheet stock and part geometry.
FAQ
What materials can a UV flatbed printer print on?
Wood, MDF, plywood, acrylic, glass, ceramic, stone, aluminium, stainless steel, PVC, Sintra, ACM, polycarbonate, Coroplast, honeycomb board, foam board, leather and cardboard. Flexible films can be printed on carrier boards. Glass, stainless steel and glazed ceramic normally need an adhesion promoter.
How thick can the substrate be?
Typically 50–100 mm on standard machines and up to 300 mm on high-clearance models. Measure from the bed to the highest point of the part and compare against the printer's Z-axis stroke rather than its headline thickness figure.
Can it print on curved or irregular objects?
Yes, if the curvature radius stays above roughly 150 mm, the slope stays under 15°, and total height variation across the image stays within a few millimetres. Tighter curves and full 360° wraps need a rotary attachment or a dedicated cylinder printer.
What head gap should I start with?
2.0 mm. Most industrial machines operate well between 1.5 and 3.0 mm; going below 1.0 mm sharply increases head-strike risk on warped or domed stock.
How do I get reliable white ink opacity?
Use two white layers on dark or transparent substrates, slow the carriage, and increase curing energy between passes. Set white up as a dedicated spot channel in the file so the RIP generates the correct sequence.
Is a UV flatbed better than roll-to-roll for rigid materials?
For rigid work, yes. The flatbed prints thick material directly, registers white ink accurately and eliminates the mounting step. Roll-to-roll earns its place on flexible media and long continuous runs; shops doing both regularly benefit from a hybrid workflow.
What does it cost to run, and how long is payback?
Ink runs roughly $0.10–0.60 per square foot at light to moderate coverage before white and varnish, with total cost per rigid sign around $4.00 including labour and maintenance. Payback on a mid-range industrial machine commonly falls between 7 and 14 months, driven far more by utilisation than by purchase price.
What tests should I request before approving production?
Cross-hatch adhesion to ASTM D3359, accelerated weathering to ASTM G154 for outdoor applications, an alcohol rub test for cure completeness, and a scratch resistance evaluation - all performed on your actual substrate, not a generic sample panel.