

UV ink adhesion failure on wine bottles is rarely caused by the UV printer alone. In most cases, the real problem is a mismatch between the bottle surface, contamination or factory-applied coating, ink chemistry, pretreatment method, and UV curing conditions.
This is especially important in direct-to-glass bottle decoration. Two wine bottles that look identical may behave very differently during printing because they came from different glass factories, coating processes, filling lines, or storage environments.

Before changing ink or increasing UV lamp power, manufacturers should first answer a more basic question:
What is actually on the surface of the bottle?
For businesses using a cylindrical UV printer, controlling the bottle surface before printing is one of the most effective ways to improve repeatability and reduce rejected products.
Surface Contamination: Why Wine Bottles Repel UV Ink
Clean soda-lime glass is normally a polar, relatively high-energy surface. Therefore, saying that "glass is naturally too low in surface energy for UV ink" is an oversimplification.
The bigger problem is that commercial wine bottles are rarely chemically clean glass by the time they reach the printing station.
Glass containers are commonly given protective coatings during manufacturing to reduce scratching and friction during conveying and transportation. Plasmatreat notes that these polymer coatings can affect subsequent printing and may require surface activation before ink can form a reliable bond.
Common contaminants include:
| Contamination | Typical Source | Effect on UV Printing | First Action |
|---|---|---|---|
| Finger oils and sweat | Manual handling | Creates local low-wetting areas | IPA cleaning |
| Label adhesive | Removed labels or reworked bottles | Prevents uniform wetting | Adhesive removal followed by final cleaning |
| Silicone residue | Lubricants, release agents, handling processes | Severe adhesion failure | Dedicated cleaning or plasma treatment |
| Cold-end bottle coating | Glass manufacturing process | Creates a barrier between ink and glass | Test pretreatment |
| Dust | Storage and transport | Causes pinholes and weak local adhesion | Filtered-air cleaning |
| Detergent residue | Bottle washing | Interferes with ink chemistry | DI-water rinse and complete drying |
A useful starting procedure is a two-cloth cleaning method. One cloth wets and lifts contamination; the second clean lint-free cloth removes the dissolved contamination before the solvent evaporates.
For relatively light organic contamination, 70% IPA can be used as an initial screening clean. 3M, for example, recommends 70% isopropyl alcohol when preparing coated or contaminated glass surfaces for adhesion applications. It also recommends checking for water beading as an indication that an invisible surface coating may remain.
However, IPA should not be treated as a universal solution.Silicones, heavy label adhesive, wax-like coatings, or persistent cold-end treatments may require a supplier-approved detergent, specialized cleaner, or physical surface activation. After stronger cleaning chemistry, perform a DI-water rinse and a final controlled wipe when appropriate.
How to verify the surface
Do not rely only on visual inspection.
Useful production checks include:
a water-break or water-beading test;
dyne/test inks for rapid comparative screening;
contact-angle measurement for more precise process development;
comparison of treated versus untreated control bottles.
Surface-energy test inks can provide a quick indication of wettability, although contact-angle measurement is more precise when developing a controlled production process.
The most important rule is simple: do not touch the printable area after cleaning.
Ink Formulation Compatibility: Chemistry That Sticks to Glass
Cleaning alone cannot solve every adhesion problem.
A perfectly cleaned bottle can still fail if the UV ink chemistry is not designed for glass or if the ink is expected to bond to an unknown polymer coating rather than bare glass.
UV-curable inks normally contain oligomers or resins, reactive monomers, pigments, additives, and photoinitiators. When exposed to the correct UV wavelength, the photoinitiators trigger polymerization and create a crosslinked ink film.
For bottle printing, the formulation must balance several properties:
Adhesion determines whether the film bonds to the substrate.
Flexibility helps the printed layer withstand handling, impact, and thermal changes without cracking.
Crosslink density improves chemical and scratch resistance but can make the film more brittle if pushed too far.
Cure speed must match printing speed and UV intensity.
Glass-oriented formulations may incorporate modified acrylates, adhesion-promoting resin chemistry, or silane-related bonding mechanisms to improve the interface between the cured film and the glass surface.
Commercial container inks illustrate why ink selection matters. Nazdar's 2300 Series, for example, is specifically formulated for container printing on substrates including glass and ceramics and supports both 395 nm UV-LED and conventional mercury curing.
When evaluating an ink, ask the supplier for:
approved substrate list;
recommended pretreatment;
compatible UV wavelength;
viscosity range at operating temperature;
recommended film thickness;
chemical-resistance data;
dishwasher or wash-resistance data where required;
adhesion-test method;
migration or food-packaging documentation when applicable.
Do not randomly add adhesion promoter or silane directly into UV ink unless the ink manufacturer has approved the formulation. Changing additive concentration can affect viscosity, jetting stability, polymerization, storage life, and printhead compatibility.
For inkjet systems, viscosity is particularly critical. The printer manufacturer and ink supplier should define the working range for the actual printhead rather than using a generic "glass ink viscosity."
Surface Treatments and Adhesion Promoters: Which Method Should You Use?
If controlled cleaning does not produce acceptable adhesion, pretreatment is usually the next step.
There is no single best treatment for every wine bottle.
| Treatment | Main Mechanism | Cost Profile | Production Suitability | Best Use |
|---|---|---|---|---|
| Primer / adhesion promoter | Creates chemical bonding interface | Low CAPEX, recurring consumable | Manual to automated | Small batches and difficult substrates |
| Atmospheric plasma | Cleans and activates surface | Higher CAPEX, low consumable use | Excellent inline potential | Repetitive industrial production |
| Flame treatment | Oxidizes/activates surface | Medium | High-speed lines | Selected bottle/coating systems |
| Corona treatment | Electrical surface activation | Medium | Better on suitable geometries | Films and selected containers |
| Chemical etching | Alters glass surface chemically | High process/safety burden | Specialized | Rarely first choice |
| Mechanical roughening | Increases mechanical anchoring | Low-medium | Slower and less cosmetic | Specialized applications |
Atmospheric plasma is particularly useful when bottles have polymer-type surface coatings or difficult organic contamination. Plasma can remove fine contaminants while increasing surface energy and wettability, which improves the conditions needed for durable printing.
For a small customization shop printing hundreds rather than tens of thousands of bottles, a controlled primer process may be more economical than installing an inline plasma system.
For a high-volume factory, the calculation changes.
A practical ROI equation is:
Annual pretreatment value = reduced scrap + reduced rework + increased production uptime − annual treatment cost
For example, if inconsistent adhesion produces a 5% rejection rate, calculate the actual annual cost of those rejected bottles, wasted ink, labor, machine time, and reprinting. Compare that figure with the annualized cost of pretreatment equipment.
This is more meaningful than comparing equipment prices alone.
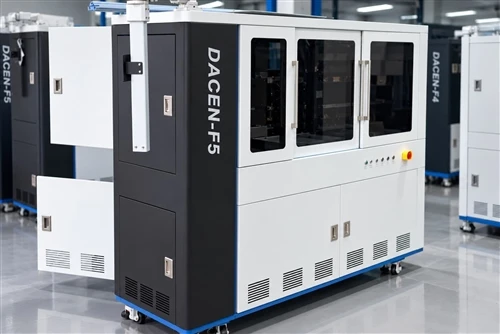
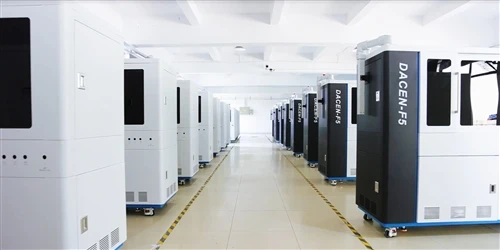
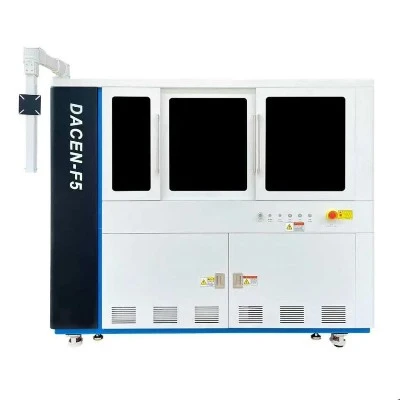
For companies evaluating automated bottle production, Dacen's F5 UV cylinder printer is designed for cylindrical and conical products including wine bottles and uses LED UV curing.
Important food-packaging consideration
There is no universal category called an "FDA-safe primer" that automatically makes every bottle-decoration process compliant.
FDA evaluates food-contact substances according to their composition, intended use, and potential migration. Substances reasonably expected to migrate into food need an appropriate regulatory basis for that intended use.
FDA research has also specifically examined photoinitiators in UV-cured inks used on exterior food packaging because migration can occur in some packaging configurations.
For wine bottles, keep decorative printing away from the bottle interior, drinking/contact surfaces, closure-contact areas, and other sensitive locations unless the complete ink/primer system has been evaluated for the intended use.
UV Curing, Machine Settings, and Process Controls
Excellent surface preparation can still fail if the ink is under-cured or incorrectly cured.
Important variables include:
LED versus mercury UV source;
wavelength;
irradiance;
accumulated UV dose;
distance between lamp and printed surface;
printing speed;
bottle rotation speed;
ink-film thickness;
white-ink thickness;
varnish thickness;
environmental temperature;
humidity.
Many modern LED-curable container inks operate around 395 nm, while some glass-decoration inks specify a broader 385–395 nm LED range.
However, there is no reliable universal answer such as "use 500 mJ/cm² for every wine bottle."
The correct UV dose depends on the ink formulation, color, ink thickness, lamp spectrum, bottle geometry, and production speed.
Instead, establish a curing window.
Practical curing setup procedure
Obtain the ink manufacturer's recommended wavelength and curing requirements.
Measure UV energy at the actual bottle position with a suitable radiometer.
Record irradiance and accumulated dose.
Print identical test bottles.
Change only one parameter at a time.
Perform adhesion and abrasion testing.
Record the successful range as the production standard.

If adhesion gradually worsens over several months while all other parameters remain unchanged, check lamp output before changing ink chemistry.
Lamp contamination, LED cooling problems, optical-window contamination, or aging components can reduce effective energy reaching the printed surface.
Ink thickness also matters. Dense white layers and raised varnish effects can require a different curing strategy from thin CMYK decoration.
Dacen's F5 specifications list a recommended working environment of approximately 20–30°C and 30–60% relative humidity, illustrating why environmental control should also be part of a repeatable printing process.
For smaller custom jobs, a compact desktop cylindrical inkjet printer may use the same basic workflow: verify the bottle, clean it, pretreat if required, print a sample, cure it, and test adhesion before starting the batch.
Adhesion Testing, SOPs, and Long-Term Durability
A bottle should not be approved simply because the print "feels dry."
Dry-to-touch and fully cured are different conditions.
A practical quality-control plan should combine adhesion and durability tests.
1. Cross-hatch or cross-cut testing
Cut a controlled grid through the ink film, apply specified tape, remove it consistently, and inspect coating loss.
ASTM D3359-23 is commonly referenced for tape testing, but there is an important limitation: the ASTM method was developed for metallic substrates. ASTM itself notes this limitation. ISO 2409 provides a cross-cut framework applicable to a broader range of coating/substrate systems.
For glass bottles, therefore, define the exact test procedure in the buyer-supplier quality agreement instead of casually claiming that every bottle has "passed ASTM D3359."
2. Abrasion testing
Repeated rubbing can expose failures that are not visible in an initial tape test.
ASTM D4060 is a recognized method for evaluating abrasion resistance of organic coatings on rigid planar samples, although curved bottles may require a modified internal QC method or representative test panel.
3. Wet and environmental testing
Depending on the bottle's real use, test:
water immersion;
chilled condensation;
alcohol splash;
repeated hand rubbing;
dishwasher cycles where relevant;
temperature cycling;
warehouse aging.
A decorative wine bottle that passes a tape test immediately after printing may still fail after refrigeration, condensation, transportation, or repeated handling.
Recommended production SOP
A simple production SOP can follow this sequence:
Bottle lot identification → contamination inspection → cleaning → surface verification → pretreatment → printing → UV curing → first-piece adhesion test → abrasion test → batch approval → retained sample
For each batch, record at least:
| Control Point | Record |
|---|---|
| Bottle supplier / lot | Traceability number |
| Bottle surface | Bare / coated / unknown |
| Cleaner | Product and concentration |
| Pretreatment | Method and settings |
| Ink | Batch number |
| Printer settings | Print mode / passes |
| UV system | Wavelength / measured energy |
| Environment | Temperature / RH |
| Adhesion result | Pass / fail / rating |
| Abrasion result | Pass / fail |
| Operator | Name / date |
Do not release a production batch based on one perfect bottle.
Take samples from the beginning, middle, and end of the run. If adhesion deteriorates during production, you can then determine whether the problem came from a bottle-lot change, contamination, UV output, ink condition, or process drift.
If a finished bottle fails, light rework may sometimes be possible by removing or abrading the defective decoration, re-cleaning, retreating, and reprinting. Bottles with uncontrolled contamination, damaged surfaces, or repeated coating failure should normally be rejected rather than repeatedly reprocessed.
For additional decoration ideas on transparent bottles, see UV printing effects on glass bottles.
The Best Troubleshooting Order
When UV ink will not stick to a wine bottle, do not immediately increase UV lamp power or replace the ink.
Troubleshoot in this order:
Bottle surface → contamination/coating → cleaning → pretreatment → ink compatibility → ink thickness → UV curing → durability testing
This sequence prevents one of the most common mistakes in UV printing: spending hours adjusting the printer when the real problem arrived on the bottle before it ever reached the machine.
If you are unsure whether a specific wine bottle can be printed reliably, send the bottle material, diameter, printable length, photos, and required durability standard to Dacen. A sample-printing test can reproduce the complete process-cleaning → pretreatment → printing → curing → adhesion testing-before machine or production parameters are finalized.
FAQ
Why does UV ink often fail to adhere to wine bottles even after cleaning?
The bottle may still contain silicone, polymer cold-end coating, adhesive residue, or another invisible treatment that normal IPA cleaning does not completely remove. The UV ink itself may also be incompatible with the surface, or the curing conditions may be insufficient.
How do silicone residues and cold-end coatings affect UV ink adhesion?
They create an interface between the UV ink and the underlying glass. Even though the glass itself may have good wettability, the coating or contamination can reduce wetting and prevent the ink from creating a durable bond.
Which treatment is best: corona, plasma, flame, or primer?
For low-volume work, primer is often the simplest starting point. Atmospheric plasma becomes attractive when repeatability, automation, and higher production volume justify the equipment. Flame and corona can also work, but suitability depends on bottle geometry, coating chemistry, line design, and safety requirements.
What UV curing settings should I use?
Start with the ink manufacturer's technical data. Verify that the LED wavelength matches the photoinitiator system-395 nm and 385–395 nm systems are common-but measure actual irradiance and dose at the bottle rather than relying only on lamp wattage.
How should adhesion be tested?
Use a documented cross-cut/tape procedure plus abrasion and environmental testing. For glass, do not automatically claim ASTM D3359 compliance because that standard was originally developed for metallic substrates. ISO 2409 or an agreed internal/buyer specification may be more appropriate.
Are there FDA-safe primers for beverage containers?
"FDA-safe" should not be treated as a universal product designation. Regulatory suitability depends on the exact material, intended use, migration potential, and applicable authorization. Obtain compliance documentation from the ink or primer manufacturer and evaluate the final package under its actual conditions of use.
What should a small-batch bottle printing SOP include?
At minimum: bottle identification, contamination inspection, cleaning method, surface treatment, ink batch, printer settings, UV curing conditions, first-piece inspection, adhesion testing, and retained samples.