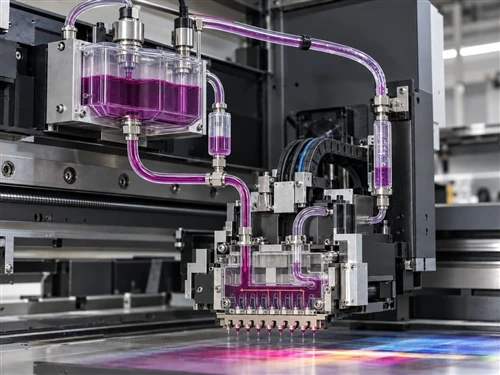
Negative pressure holds a stable ink meniscus at the printhead. Too little can cause leaking. Too much can restrict ink flow. The correct setting belongs to the complete printer and ink-delivery system, not to the printhead name alone.
Negative pressure is one of the most misunderstood settings in an industrial inkjet printer. Its purpose is simple: maintain a stable ink meniscus at the nozzle openings without letting ink leak out or pulling the supply away from the printhead.
Ricoh describes negative pressure as necessary for stable ink ejection. Modern industrial systems may combine pumps, sub-tanks, regulators, circulation loops, and pressure sensors to maintain that condition while the printer is working.
| Too little negative pressure | Too much negative pressure |
| Ink leaks or drips from the nozzle plate. | Ink supply becomes restricted and nozzles begin to drop out. |
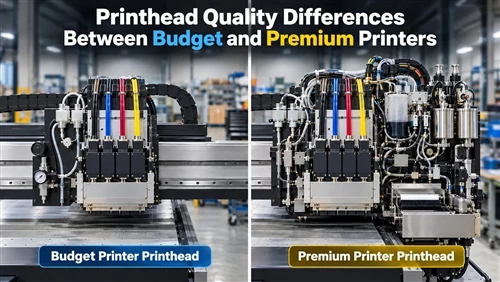
There is no single correct value for every Epson, Ricoh, Kyocera, or Konica head. The correct value belongs to the complete ink-delivery system. Dacen's guide to choosing a UV printer printhead makes the same point: ink, waveform, filters, dampers, temperature, negative pressure, and maintenance design must work as one validated system.
Find out how the printer controls pressure
Industrial printers generally use one of four control methods:
1.A physical regulator with a digital or analog gauge
2.An electronic pressure controller on the printer
3.A service or engineering menu in the machine-control software
4.An automatically regulated ink-supply system that operators should not normally adjust
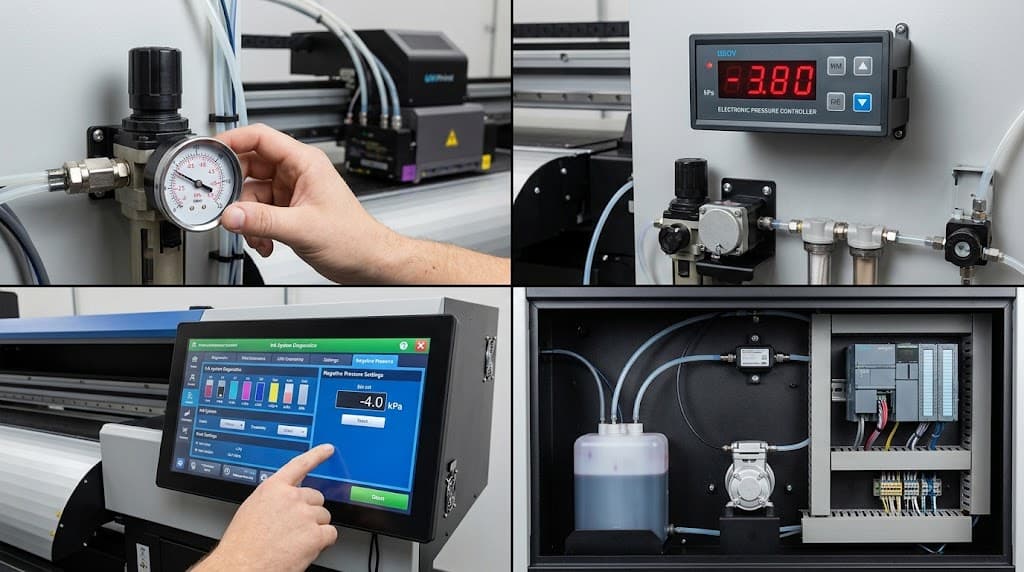
Large UV flatbed and roll-to-roll printers often have separate pressure systems for process colors and white ink. These channels may differ in viscosity, pigment loading, circulation, and operating conditions. Some Kyocera-equipped UV printers, for example, control white and color pressure independently.
Dacen's overview of UV flatbed printer ink systems identifies white ink circulation, negative-pressure supply, printheads, filters, tubing, and curing components as connected parts of the machine.
Where to look
On the printer control panel, look for labels such as:
- Negative Pressure
- Ink Pressure
- Vacuum Pressure
- Meniscus Pressure
- Ink Supply or Ink System
- White Pressure or Color Pressure
Some machines accept pressure values through proprietary control software rather than the RIP. ONYX, Caldera, and similar RIP software normally process images and color data; they do not control the physical meniscus pressure at the printhead.
Older or simpler machines may use a rotary regulator, vacuum cylinder, mechanical valve, or electronic regulator inside the cabinet. One Ricoh Gen5 UV flatbed manual, for example, shows separate color and white pressure gauges in the front control area.
Do not open a hidden engineering menu without the correct documentation. An incorrect setting can flood the printhead or draw air into the ink path. A password or value copied from another machine is not a safe substitute for the manual.
A printer using Ricoh Gen6 heads, UV ink, and recirculation may need a different condition from another Ricoh Gen6 machine with a different ink, sub-tank height, and pump system.
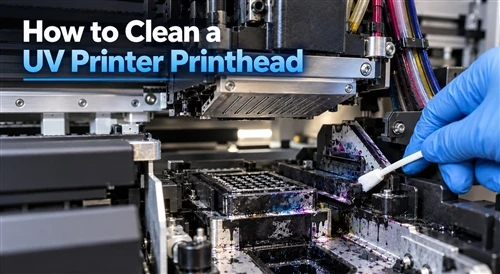
Before entering a service menu, obtain the user manual, service manual, ink-system diagram, approved pressure range, and calibration procedure. If tubing, regulators, pumps, or printheads must be disconnected, put the machine into the manufacturer's maintenance state first. That may require closing valves, stopping circulation, disabling a pump, or powering down part of the system.
Wear chemical-resistant gloves and follow the Safety Data Sheet for the ink and cleaning fluid.
Adjust negative pressure step by step
Do not begin by randomly turning the regulator. Establish a baseline first.
Record the existing condition
Write down color pressure, white pressure, ink and printhead temperature, room temperature, ink level, printer model, head model, ink brand and batch, and the current nozzle-test result. Photograph the controller screen if needed.
This record gives you a recovery point if the adjustment makes the printer worse.
Confirm the measurement point
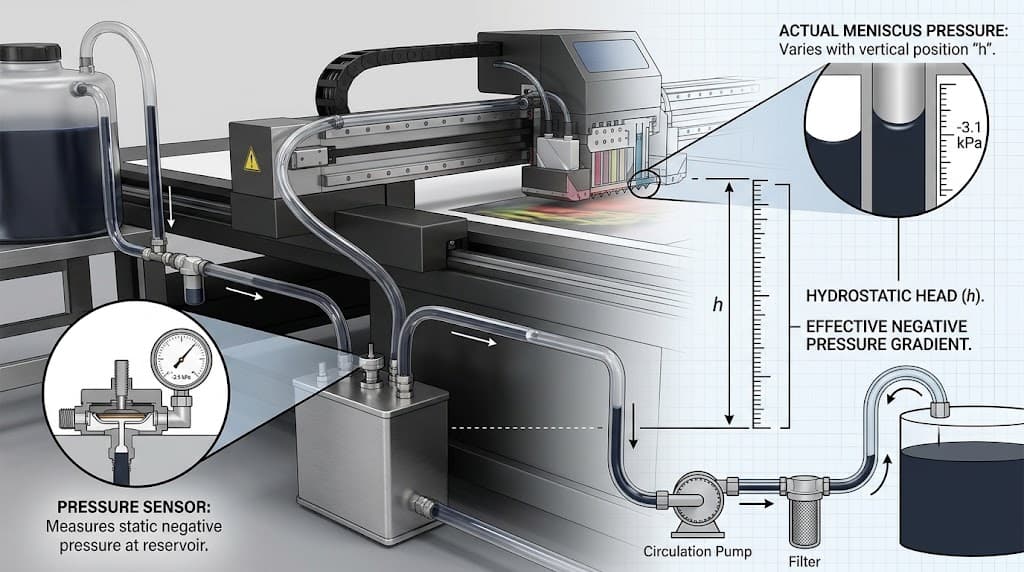
A pressure number is meaningful only when you know where the sensor measures it. A sensor on an air reservoir may show a different value from the liquid pressure at the nozzle.
In a circulating system, supply pressure, return pressure, ink-column height, and nozzle back pressure may all differ. One published circulation design used approximately -30 and -33 mbar at two reservoirs while the resulting nozzle back pressure was about -1.5 mbar because hydrostatic head also affected the system.
Two printers can therefore display different numbers while producing a similar meniscus at the nozzle.
Use a suitable measuring instrument
Useful tools may include a calibrated digital differential manometer, a low-pressure vacuum gauge, the manufacturer's calibration tool, clear ink-resistant tubing, approved priming syringes, clamps or shut-off valves, and lint-free wipes.
If the manufacturer permits it, compare an electronic sensor with an external calibrated manometer. A general high-pressure gauge may not have enough accuracy for small negative-pressure values.
Confirm the unit
Printer manufacturers may display kPa, mbar, mmH2O, or inH2O. These units are not interchangeable without conversion.
| Pressure | mbar | mmH2O | inH2O |
|---|---|---|---|
| -0.5 kPa | -5 | about -51 | about -2.0 |
| -1.0 kPa | -10 | about -102 | about -4.0 |
| -2.0 kPa | -20 | about -204 | about -8.0 |
| -3.0 kPa | -30 | about -306 | about -12.0 |
| -3.5 kPa | -35 | about -357 | about -14.1 |
| -4.0 kPa | -40 | about -408 | about -16.1 |
| -5.0 kPa | -50 | about -510 | about -20.1 |
-10 mmH2O is not the same as -10 mbar or -10 kPa. A value of -10 mmH2O is only about -0.098 kPa. Confirm the unit before copying any value.
Start with the printer manufacturer's value
Published examples show how widely configurations vary. Kyocera KJ4B evaluation systems have operated at approximately -4.0 kPa under defined laboratory conditions that included a specific ink, head temperature, waveform, and droplet volume.
One HandTop Kyocera printer procedure returns the system to approximately -3.5 kPa before priming and testing the nozzles. These figures indicate the engineering scale; they are not universal Kyocera settings.
Ricoh states that conventional MH5422 and MH5442 heads operate with slight negative pressure but does not publish one universal machine value on the general specification page.
Epson PrecisionCore and i3200 installations depend heavily on the damper, sub-tank, and ink-delivery design. Some compact systems rely mainly on dampers or hydrostatic balance instead of an adjustable industrial vacuum controller.
Adjust in small increments
If ink drips slowly from the nozzle plate and the valves, tank level, and pumps appear normal, increase the magnitude of negative pressure slightly.
Example: -3.2 kPa to -3.3 kPa, not -3.2 kPa to -4.5 kPa
If nozzles begin disappearing during continuous printing and the ink system is otherwise healthy, reduce the magnitude slightly.
Example: -3.8 kPa to -3.7 kPa
Wait for the reading to stabilize after every adjustment.
Print and compare a nozzle test
Clean or wipe according to the approved procedure, allow the pressure to stabilize, print a test, compare it with the baseline, and inspect the underside of the head for accumulated ink.
Do not judge the result from the gauge alone. Dacen's UV printer nozzle-check guide explains how missing, changing, or deflected lines point toward different diagnostic branches.
Run a continuous ink-load test
A setting can pass a stationary nozzle test and fail in production. Print a high-coverage CMYK test and, where relevant, a heavy white-ink pattern for at least several minutes.
If the pattern begins perfectly and gradually loses nozzles during heavy printing, the system may have an ink-supply restriction rather than a permanently clogged nozzle.
Save a descriptive preset
If the controller supports presets, include the printer, ink, head, temperature, pressure, and date in the name.
Match the symptom to the pressure problem
Pressure faults are easier to diagnose when they are separated into pressure that is too weak, too strong, or unstable.
| Symptom | Likely direction | First checks |
|---|---|---|
| Ink dripping from the nozzle plate | Negative pressure too weak | Pressure reading, tank height, regulator |
| Ink pooling under the carriage | Pressure too weak or a system leak | Valves, tank level, pressure |
| Good nozzle test, then missing nozzles during heavy printing | Excessive negative pressure or ink starvation | Filters, dampers, pumps, pressure |
| Random nozzles disappear and return | Pressure instability or bubbles | Air leaks, tubing, sub-tank |
| Bubbles in the ink line | Leak or incorrect pressure | Connections, degassing, seals |
| White ink is less stable than CMYK | Pressure, circulation, or viscosity problem | White circulation, temperature, pressure |
| Pressure reading changes constantly | Regulator, sensor, pump, or leak | External manometer comparison |
One Ricoh Gen5 printer manual identifies dripping as a possible result of insufficient negative pressure. It directs the operator to increase the value gradually until the dripping stops and then print another nozzle pattern.
Dacen's page on common UV printer problems and solutions also identifies negative pressure, tubing leaks, and nozzle condition as checks when ink leaks from the printhead.
Case 1: Ink drips while the printer is idle
If a previously stable printer develops droplets under the head, do not increase the pressure immediately. Check whether the sub-tank level changed, the secondary tank is overfilled, a valve is stuck open, a pressure tube is disconnected, or the regulator is unstable.
If these checks are normal, increase the pressure magnitude gradually using the service procedure.
Case 2: Nozzles disappear during high-coverage printing
A perfect startup test followed by fading color and missing lines after several square meters can point to excessive negative pressure, a blocked filter, a restricted damper, a weak pump, air entering a connector, inadequate sub-tank refill, or ink that is too viscous.
Reducing pressure may improve the symptom temporarily, but it must not be used to hide a restricted filter or failing pump.
Case 3: White ink is unstable while CMYK is normal
White UV ink has a high pigment load and is often circulated to limit settling. Many industrial printers control white and color ink independently, so the channels should not automatically receive the same value.
White ink temperature > circulation > agitation > filter > pressure > nozzle test
Dacen's UV printer printhead maintenance guide covers white circulation, pressure instability, filters, and the surrounding ink system as related causes of nozzle problems.
Do not overlook measurement errors
A displayed value may be misleading because of pressure trapped in long tubing, a partly blocked air filter, sensor zero drift, temperature changes, changing ink level, leaking pneumatic fittings, or different sub-tank heights.
Hydrostatic pressure matters. Moving an ink reservoir relative to the printhead can change the effective nozzle pressure even when the electronic regulator value remains unchanged.
Verify the setting over time
Test the stable value during startup, long continuous printing, overnight idle, heavy white-ink coverage, and different room temperatures. Record pressure and nozzle condition daily on production equipment.
If the printer progressively requires stronger pressure to work correctly, investigate the ink path. Continuing to increase the setpoint can mask a developing restriction or component fault.
Pressure instability can also contribute to misting and irregular jetting. Dacen's UV printer ink misting and flying ink guide explains how to separate pressure and ink-delivery faults from print gap, static electricity, airflow, and waveform problems.
Firmware, presets, and sensor calibration
Many industrial printers regulate pressure electronically. A controller reads a pressure sensor and changes pump operation through a feedback loop. Mechanically adjusting the regulator on this type of system can interfere with automatic control.
Use firmware or machine-control software when the manufacturer defines pressure as an electronic setpoint. Use a mechanical regulator only when the machine design calls for manual adjustment.
RIP settings are not pressure settings
Negative pressure normally belongs to the printer firmware, machine controller, or ink-delivery controller.
The RIP controls resolution, screening, passes, ink limits, color management, and ICC profiles. It generally does not control the physical ink meniscus. A material preset in the RIP and an ink-pressure preset in the machine software are different things.
Calibrate the pressure sensor
1.Stop printing.
2.Allow the ink system to stabilize.
3.Connect an approved calibrated manometer.
4.Compare the external measurement with the machine sensor.
5.Perform zero or offset calibration according to the service manual.
6.Document the result.
Do not perform a factory reset simply to solve an unexplained pressure problem. A reset may erase machine-specific calibration values.
Do not perform a factory reset simply to solve an unexplained pressure problem. A reset may erase machine-specific calibration values.
Chemical safety and maintenance schedule
UV, solvent, eco-solvent, cleaning, and flushing fluids require appropriate handling. Use suitable gloves, eye protection where splashing is possible, adequate ventilation, approved cleaning fluids, and sealed waste containers.
Do not discharge waste ink or cleaning solvent into a drain.
In the United States, waste ink may fall under RCRA hazardous-waste requirements depending on its chemical composition. The EPA notes that printing waste can become hazardous because of ignitable solvents or regulated constituents. Classification should follow the waste stream and SDS rather than the general label "printer ink."
| Frequency | Check |
|---|---|
| Daily | Pressure reading, nozzle test, leaks, and ink level |
| Daily or each shift | White ink circulation and agitation |
| Weekly | Tubing, fittings, dampers, filters, and pressure stability |
| Monthly | Compare the current pressure trend with the baseline |
| After an ink change | Recheck pressure and jetting behavior |
| After head replacement | Recalibrate with the manufacturer's procedure |
| After pump or regulator replacement | Verify with a calibrated pressure instrument |
The pressure number is only part of the record. The useful measure is pressure stability over time and under changing ink demand.
Information to collect before requesting support
Do not troubleshoot by copying a number from another printer. For a machine-specific pressure review, collect:
- Printer model
- Exact printhead model
- Ink type and batch where relevant
- White and color configuration
- Current pressure value and unit
- Pressure sensor or gauge location
- Nozzle-test photograph
- Photo of the pressure display
- Description of the fault and when it appears
A technician can compare the pressure reading, nozzle pattern, ink path, and production symptoms before unnecessary parts are replaced.
Frequently Asked Questions
Q: What are typical values for Epson, Ricoh, and Kyocera printheads?
A: No reliable universal setting is determined by printhead brand alone. Kyocera KJ4 evaluation systems have been documented around -4.0 kPa under specific laboratory conditions, while one commercial Kyocera procedure uses approximately -3.5 kPa during calibration. Ricoh describes conventional industrial heads as operating with slight negative pressure, but the machine setpoint depends on the ink-delivery system. For Epson PrecisionCore and i3200 systems, follow the printer integrator's specification because the damper, tank height, pump design, and ink system vary.
Q: How do I measure negative pressure accurately?
A: Use a calibrated low-pressure differential manometer or the manufacturer's approved gauge. Measure at the location specified for the machine and confirm whether the displayed number represents tank vacuum, air pressure, liquid pressure, or the nozzle meniscus condition. Record temperature and ink-tank height too.
Q: What should I test after changing the setting?
A: Use this sequence: pressure stabilization, nozzle test, visual leak inspection, high-coverage print, second nozzle test, and extended production test. A setting that passes only a stationary nozzle test is not fully validated.
Q: How does incorrect negative pressure affect print quality?
A: Pressure that is too weak can cause dripping, nozzle-plate flooding, contamination, and random ink marks. Excessive pressure can restrict ink delivery, introduce air, and cause progressive missing nozzles or density loss during heavy printing. Unstable pressure can create intermittent nozzle failures that move between tests.
Q: Can negative pressure be adjusted through firmware or RIP software?
A: It may be adjustable through printer firmware, proprietary machine-control software, or a physical regulator. It is normally not a RIP color-management setting. Use the control method specified by the printer manufacturer.
Q: How do I choose between FSW, vacuum brazing and embedded tube construction?
A: The choice depends on channel complexity, material, pressure requirements, coolant compatibility, production volume and cost. FSW is commonly used for machined aluminum channels. Vacuum brazing supports more complex internal structures. Embedded tube designs work well for defined tube routes.
Q: What safety precautions should I follow?
A: Wear suitable gloves and eye protection, stop pumps or close valves when the maintenance procedure requires it, avoid unnecessary contact with the nozzle plate and printhead electronics, and use only approved cleaning fluids. Collect waste ink and solvent in suitable containers, then determine whether the waste is regulated under applicable federal, state, and local requirements.