
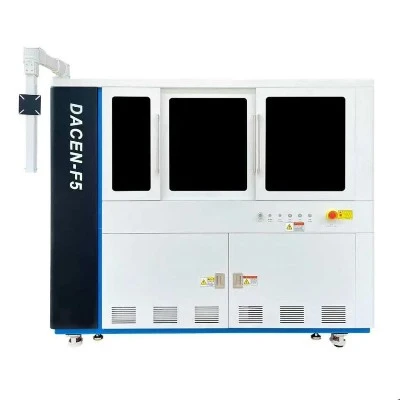


A phone case UV printer applies ink directly to a compatible case surface and cures it with ultraviolet light. The operator prepares the artwork, arranges the print layout, secures the cases and sets the printing height before starting the job.
The process involves more than loading an image and pressing print. Material compatibility, positioning and ink adhesion all need attention. Use the following workflow as a general guide, with the operating manual for your specific printer providing the exact settings.

How does the mobile phone case UV printer operate?Mobile phone shells such as iPhone,Samsung,Huawei,Xiaomi,etc.,notebook shells,notebook shells,tablet computer shells,etc.may use UV printers for processing and customization.This article will talk about how to do it.
How does the mobile phone case UV printer operate?
1:Select the original image file of the pattern you want to print,and add spot color to the picture(for embossing effect,select spot color for the picture)
2:Import the picture into the RIP software,arrange the version,and set the number of one-time mobile phone case printers to print.
3:Make a positioning frame once on the UV printer platform.
4:Put the phone shell into the positioning frame(if there is a fixed fixture,you can put the shell directly into the corresponding fixture).
5:Set the printing height of the phone case printer and start printing.
6:Spray and dry,and the picture can be taken off and shipped after printing.
Check the case material before printing
Confirm the case material and any surface coating before choosing the ink and preparation method. Compatibility should be checked on the actual case you intend to use.
Some materials require a primer or top coating. Mimaki's application guidance recommends testing materials before production or purchasing a printer for a particular application. Print a sample first, then assess whether the result meets your requirements.
Prepare the artwork and any special ink layers
Set the artwork to its intended print size. Check that the design fits the printable area, including the space around camera openings and other features.
If you want a raised or textured finish, confirm that the printer and ink configuration support it. A spot color identifies an area for a special printing operation; selecting one alone does not create an embossed effect. Supported systems can build texture through layers of gloss ink, with the artwork and RIP settings controlling where those layers appear. Follow the workflow specified for your equipment.
Arrange the layout in the RIP software
Import the artwork into the printer's RIP software, arrange the copies and set the quantity for the job.
Match the digital layout to the positions of the cases on the print bed. Check the artwork scale and orientation before sending the file to print. When using a jig, its physical positions must correspond to the layout.
A positioning guide may suit a single flat case. For multiple cases or objects that can move, a suitable jig helps hold them securely and maintain consistent positioning.
Clean and secure the cases
Clean the printing surface using a method suitable for the case material and any coating. Apply primer only when required by the tested material and ink combination.
Place each case in its designated position. Check that it sits securely and that the jig cannot shift during printing. Surface preparation deserves the same attention as alignment: a correctly positioned image can still fail if the ink does not bond adequately to the surface.
Set the printing height and run a trial
With the cases and jig installed, follow the printer's procedure for setting object height and printhead clearance. Account for raised case edges and other uneven features.
Use the settings specified for your machine. Height adjustment methods and acceptable surface variations depend on the equipment. Start with a trial print so you can inspect the setup before committing the batch.
Inspect the print before production or packing
Check the sample for alignment, image detail, color consistency and visible defects. Confirm that curing meets the ink supplier's instructions, and evaluate adhesion using a method suitable for the material.
UV curing and adhesion are separate considerations. Roland DGA notes that UV ink can crack or peel and describes adhesion testing to help assess bonding. Complete the required checks before releasing finished cases for packing.
Dacen,a manufacturer of UV flatbed printers
The printing effect of Dacen UV printer can reach photo-level accuracy,which makes it possible to print products that are viewed at close range.The high-resolution printing of mobile phone cases is also favored by more and more consumers.If there are UV printers,mobile phone case printers,For mobile phone case UV printer needs,welcome to inquire Dacen.